> ## Documentation Index
> Fetch the complete documentation index at: https://moengage-partner-guide.mintlify.site/llms.txt
> Use this file to discover all available pages before exploring further.
# Xeno
# Introduction
[Xeno](https://www.getxeno.com/) is a customer loyalty and engagement platform that helps businesses build and manage loyalty programs, rewards, and promotions. It provides tools for creating personalized customer experiences, tracking customer behavior and engagement, and measuring the effectiveness of loyalty campaigns.
# MoEngage × Xeno
With the MoEngage and Xeno integration, you can display your customer loyalty data dynamically using Content APIs inside MoEngage campaigns across various channels like emails and push.
# Integration
**Prerequisites**
* You would need an authentication token to interact with Xeno APIs.
## Display your customers' loyalty points
### Step 1: Set up a MoEngage Content API
We will use Xeno's REST API to insert personalized content into your campaigns. This can be done by adding Xeno's Rest API endpoints in MoEngage Content APIs.
1. Navigate to **Settings** -> **Advanced settings** -> **Content API**. Click **+ Add content API** at the top right corner of the Content API screen. 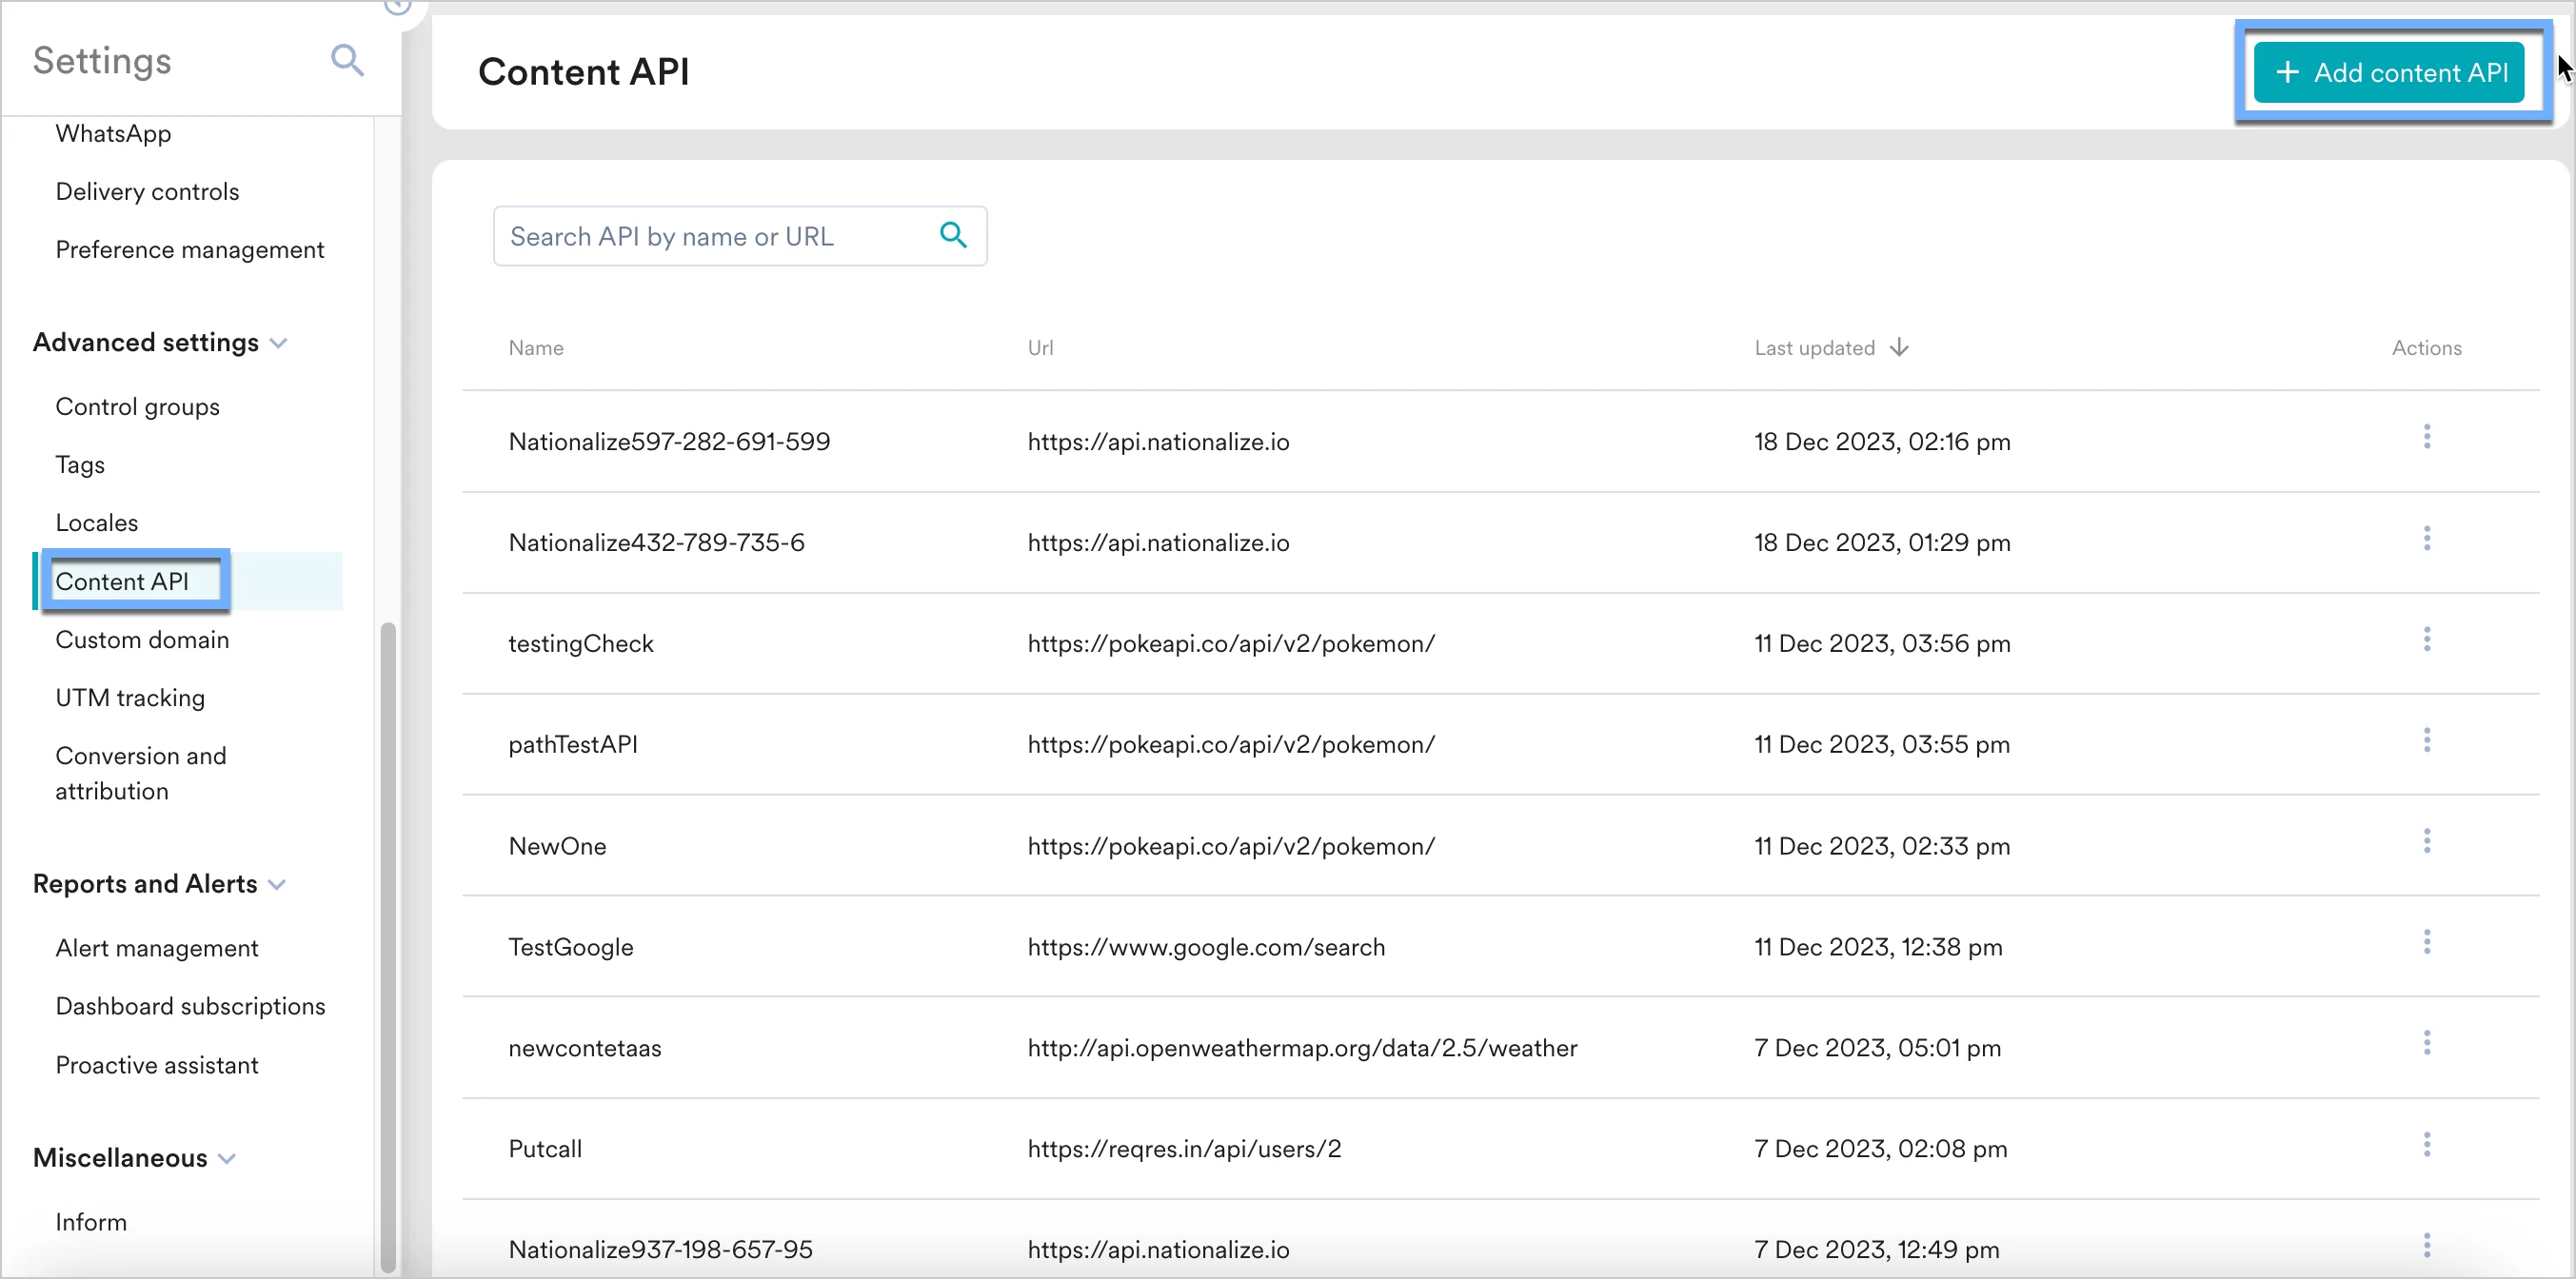 2. Add your Xeno API to the endpoint URL. Depending on your use case, the endpoint will change.\
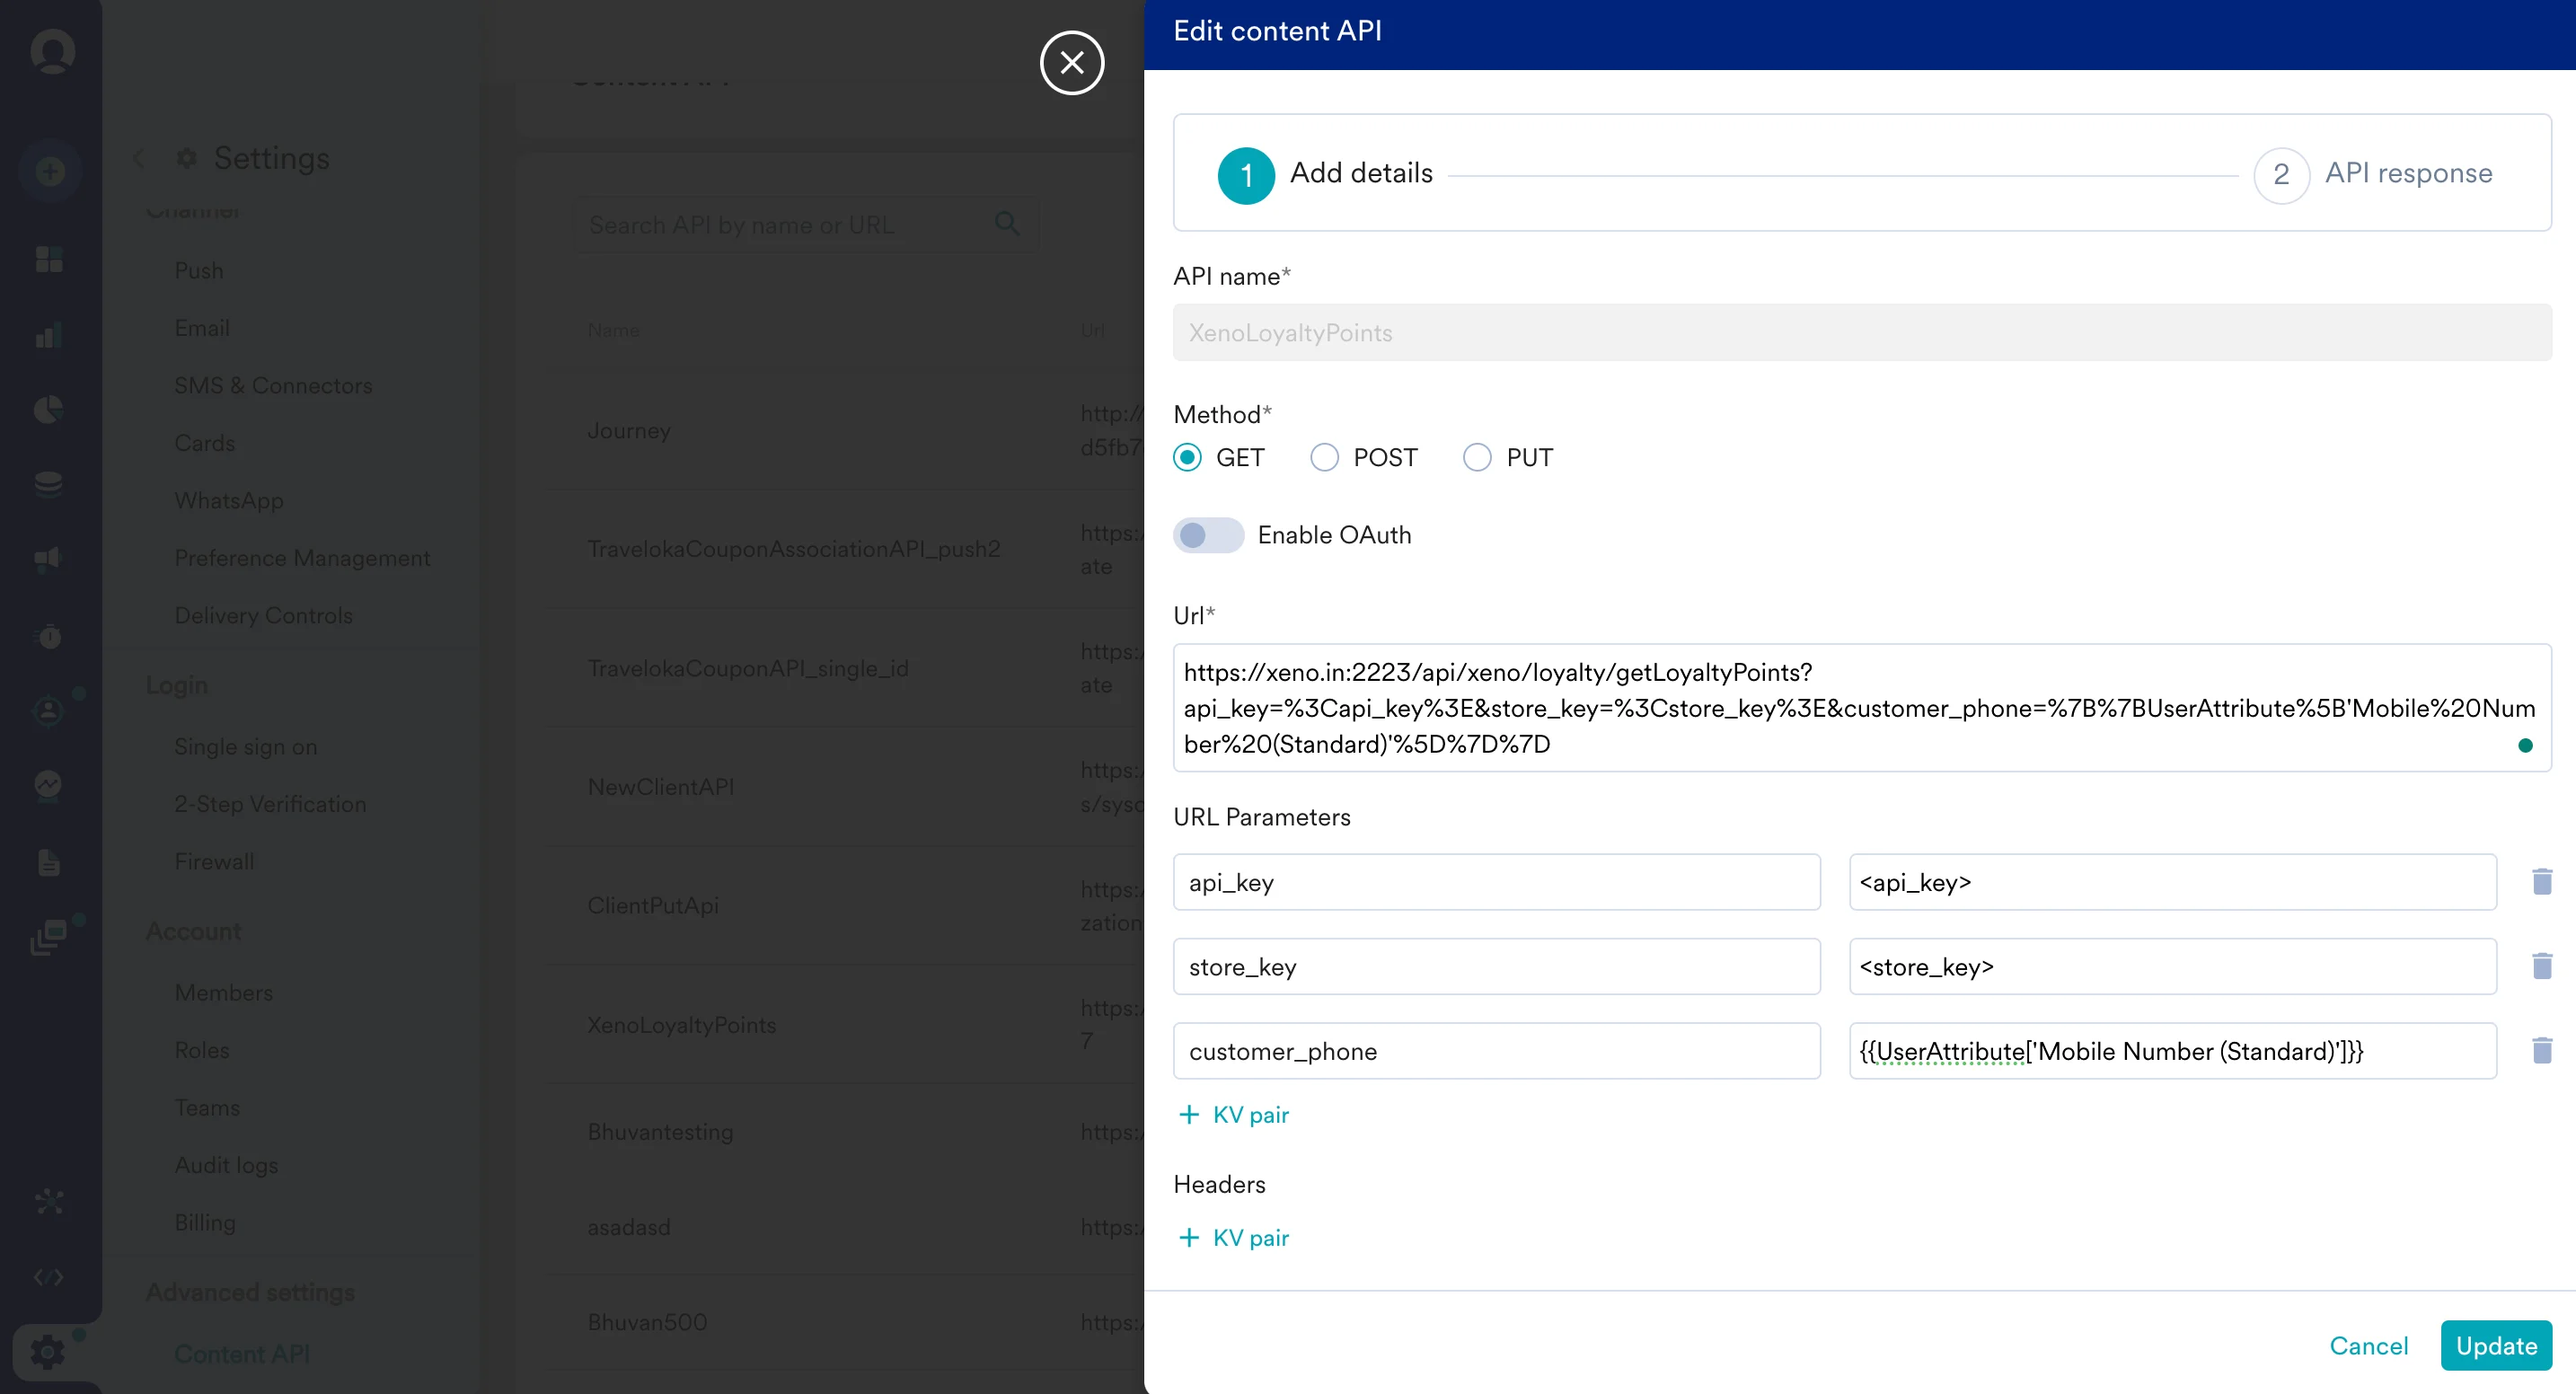 \
To display your customers' loyalty points, use Xeno's [Get Loyalty Points API](https://xeno.in/apidoc#/Loyalty/getLoyaltyPoints).
3. While setting up your content API, insert the following URL:
`https://xeno.in:2223/api/xeno/loyalty/getLoyaltyPoints`
Under URL Parameters, add the following:
1. `api_key`: The API key will be provided by Xeno for communicating with the Xeno server for authentication.
2. `store_key`: Your outlet key.
3. `customer_phone`: Type @ to personalize and select the relevant user attribute from MoEngage.
Under Headers, add the following: `accept: application/json`
1. Click on "Save" and then "Done" once you see a successful response.
You can also test your APIs. To test your APIs, from the Content API's action menu, click on "Test". You can test your API response and validate it.
### Step 2: Display your customers' loyalty points inside MoEngage campaigns
To use this API in your MoEngage campaigns,
1. On step 2 on your campaign creation, enter @.
2. In the pop up, you can select the Xeno Loyalty Points configured in Step 1.
3. You can use [MoEngage Templating Language](/user-guide/campaigns-and-channels/getting-started/message-personalization/jinja-templating-language) to parse through the API response and use the content in your campaigns.
\
To display your customers' loyalty points, use Xeno's [Get Loyalty Points API](https://xeno.in/apidoc#/Loyalty/getLoyaltyPoints).
3. While setting up your content API, insert the following URL:
`https://xeno.in:2223/api/xeno/loyalty/getLoyaltyPoints`
Under URL Parameters, add the following:
1. `api_key`: The API key will be provided by Xeno for communicating with the Xeno server for authentication.
2. `store_key`: Your outlet key.
3. `customer_phone`: Type @ to personalize and select the relevant user attribute from MoEngage.
Under Headers, add the following: `accept: application/json`
1. Click on "Save" and then "Done" once you see a successful response.
You can also test your APIs. To test your APIs, from the Content API's action menu, click on "Test". You can test your API response and validate it.
### Step 2: Display your customers' loyalty points inside MoEngage campaigns
To use this API in your MoEngage campaigns,
1. On step 2 on your campaign creation, enter @.
2. In the pop up, you can select the Xeno Loyalty Points configured in Step 1.
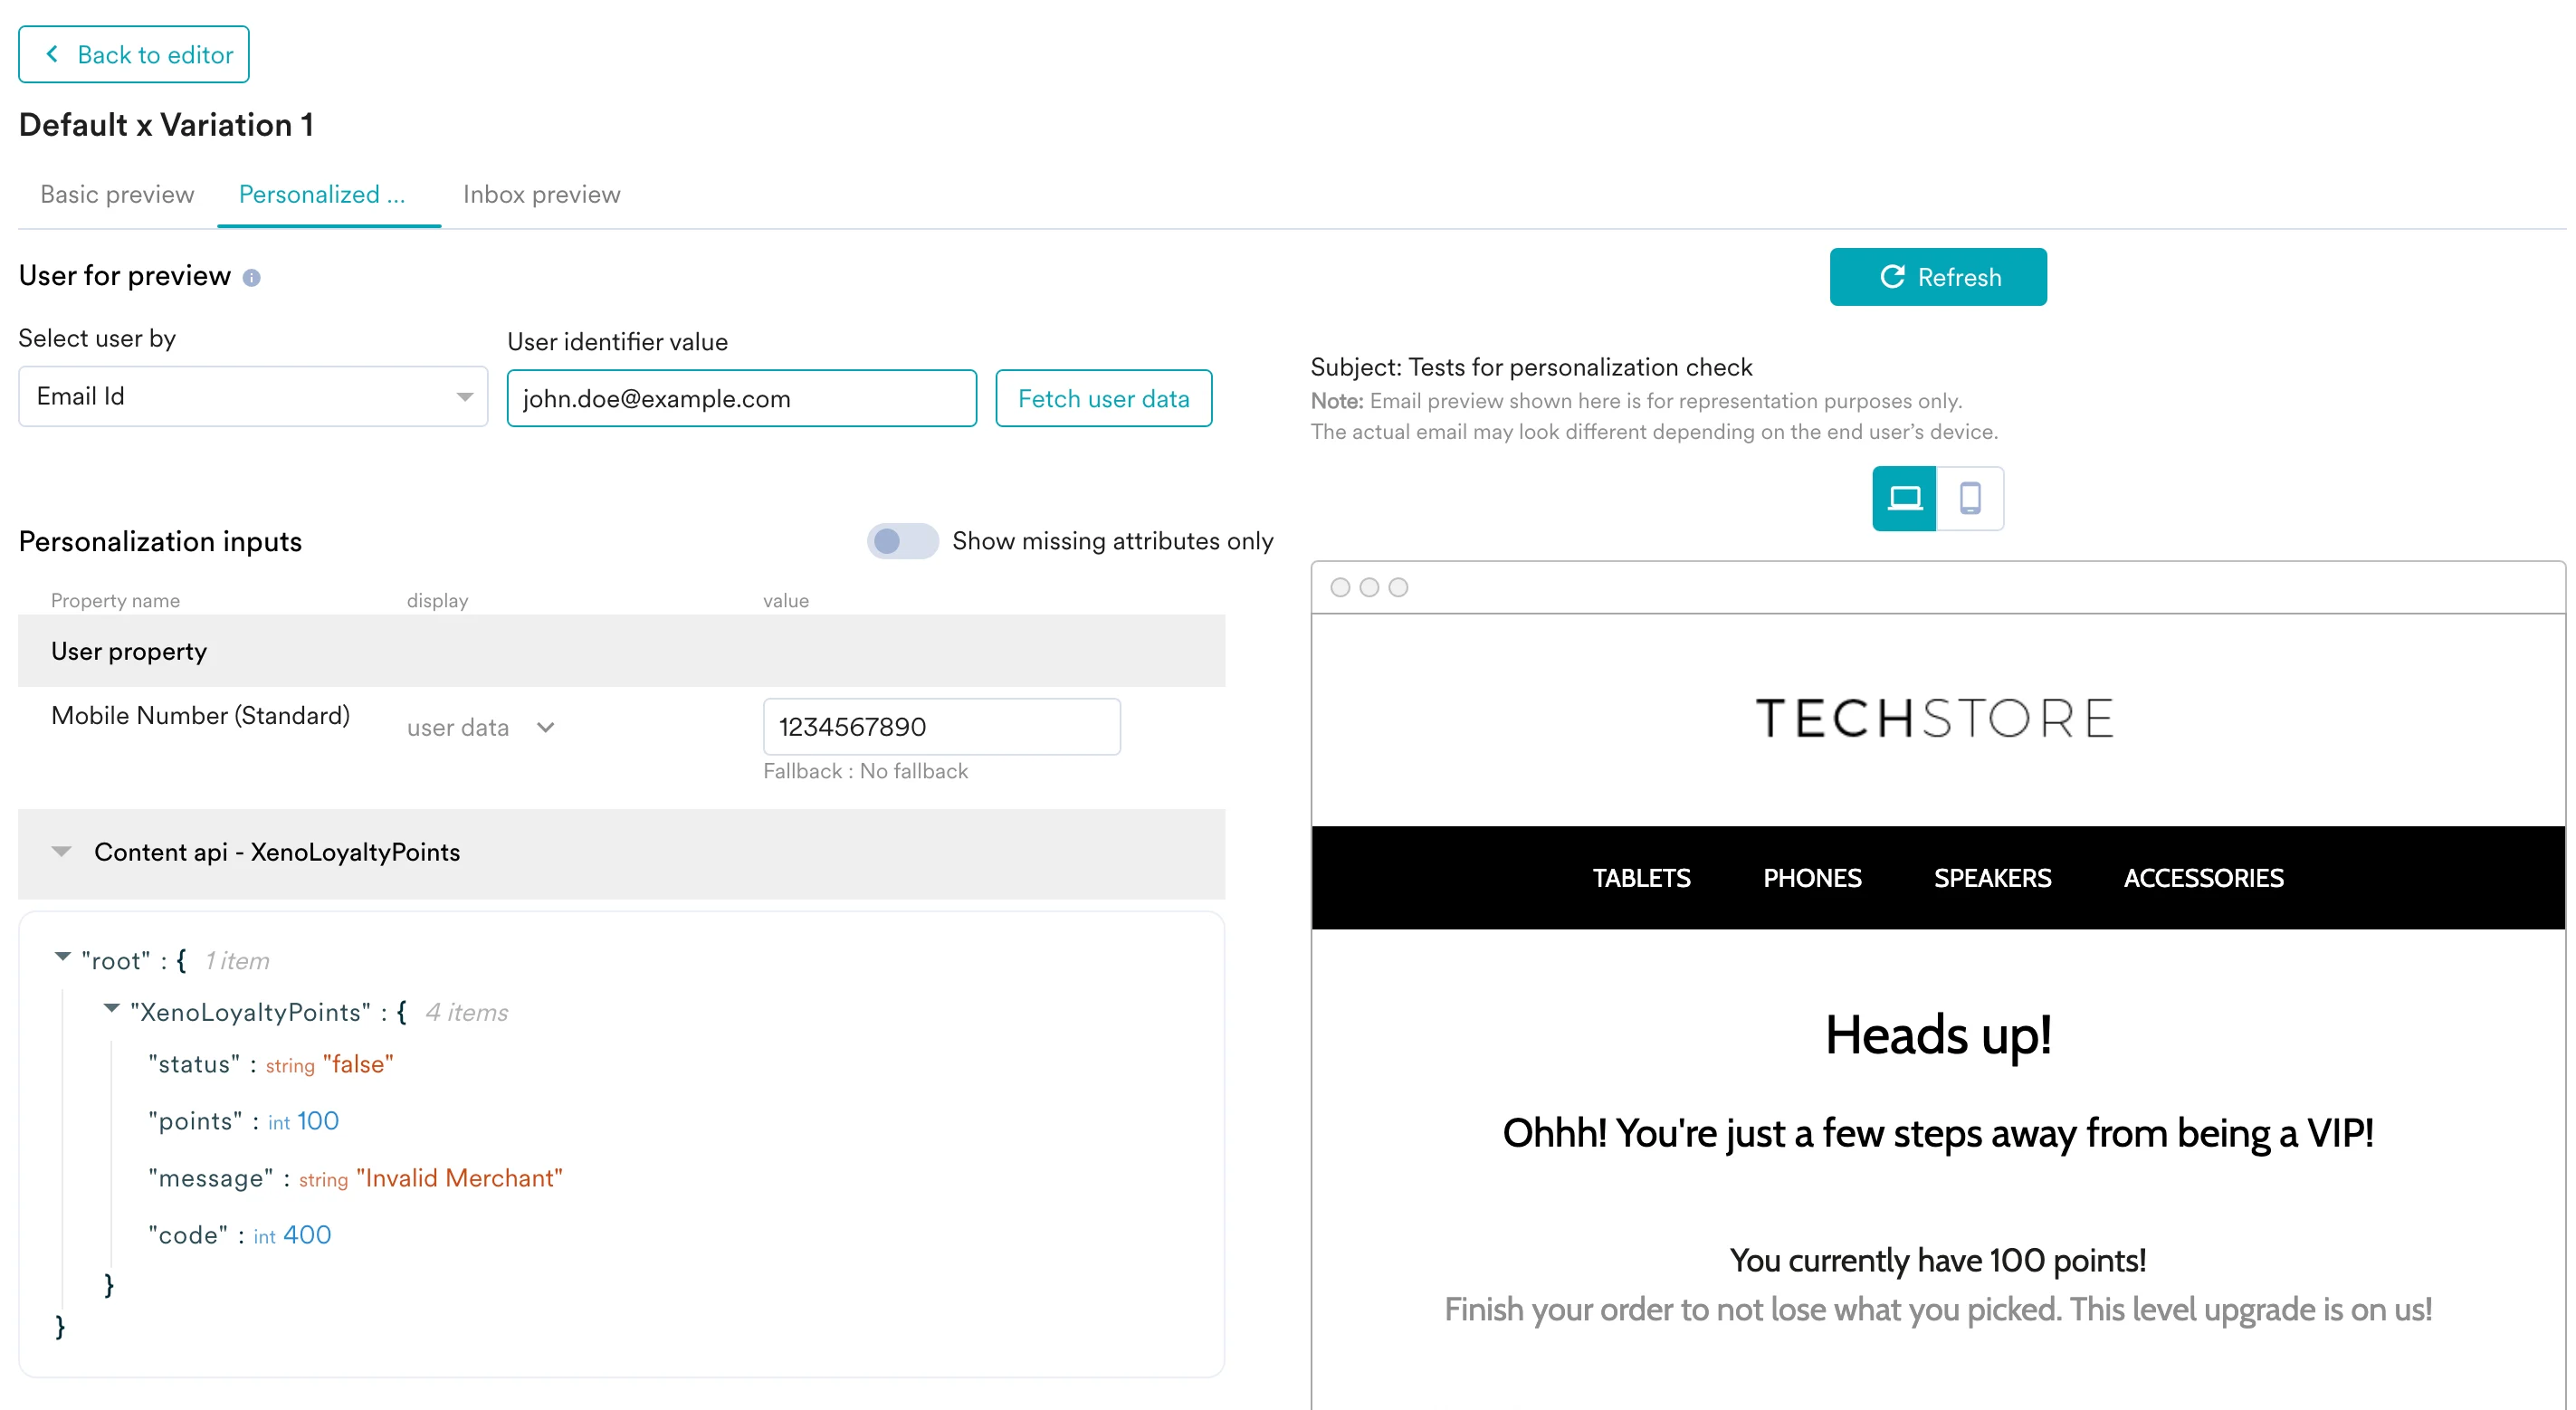
3. You can use [MoEngage Templating Language](/user-guide/campaigns-and-channels/getting-started/message-personalization/jinja-templating-language) to parse through the API response and use the content in your campaigns. 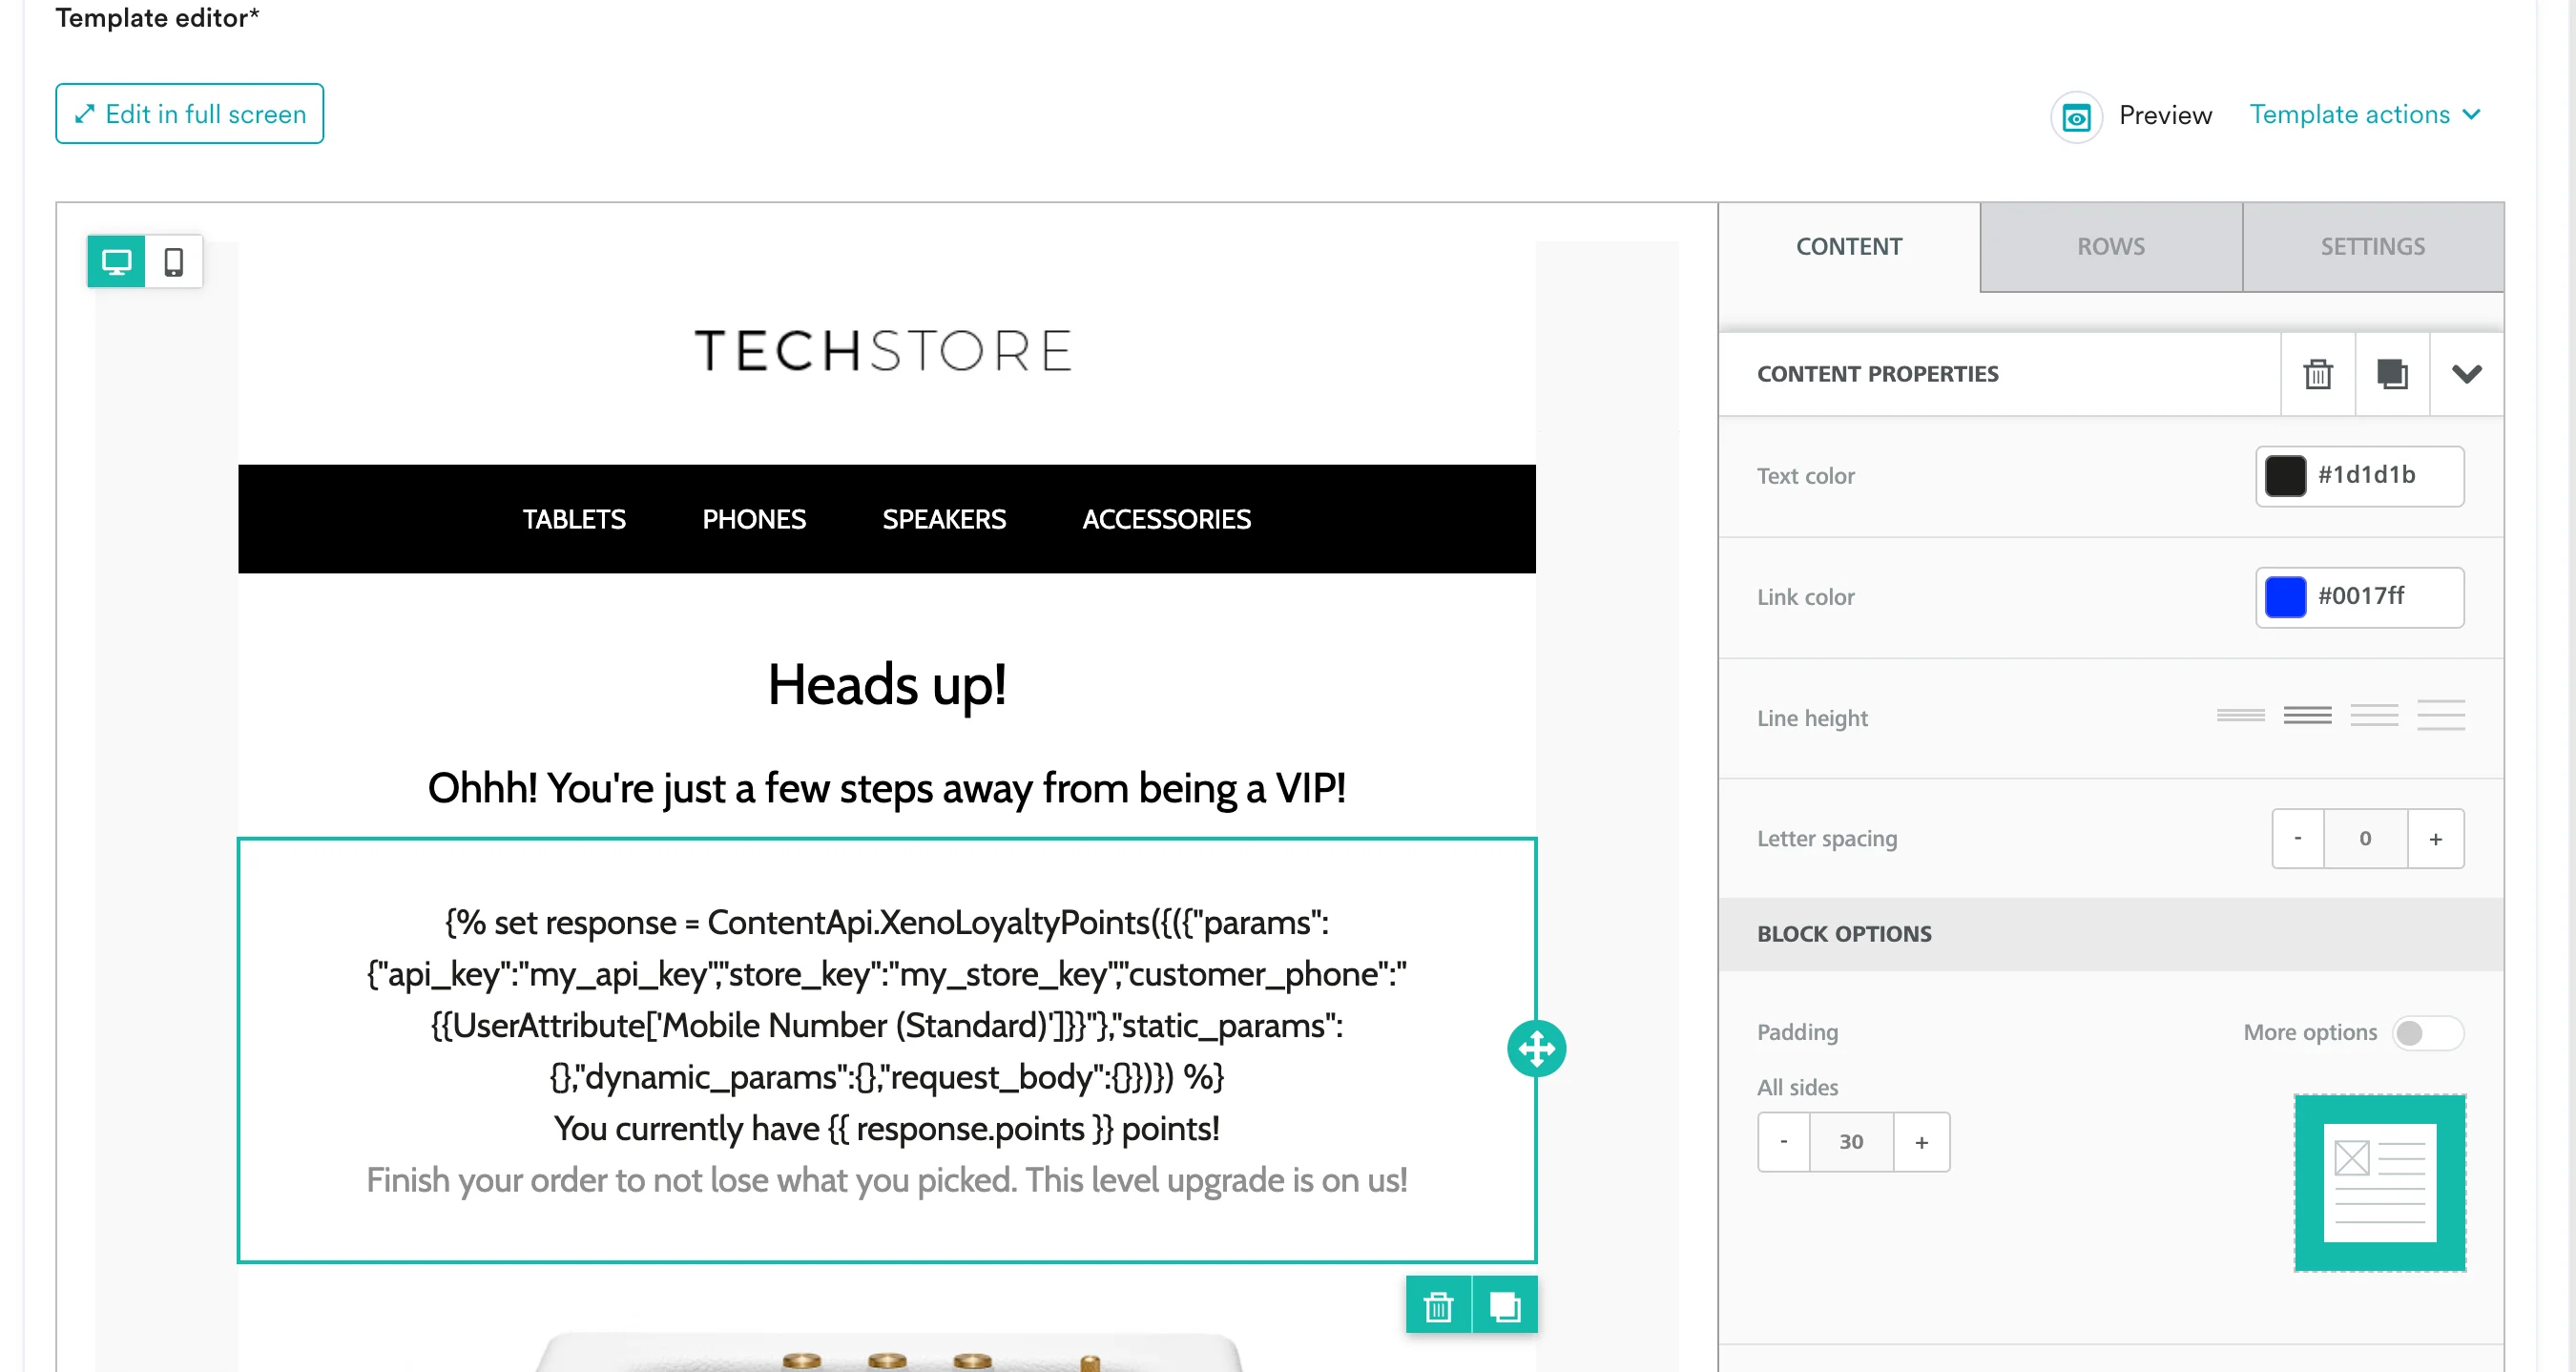 4. You can click on the Preview tab to view your campaign in real-time personalization:
  ## Add a new customer to Xeno
With MoEngage's Connector Campaigns, you can add your customers to Xeno when they perform an action on your app or website.
To create a connector campaign on MoEngage,
1. Navigate to Create Campaign >> Connectors >> Custom and choose the delivery type most suitable to your needs. For this example, we will select "Event Triggered" and select the event as "Purchased".
## Add a new customer to Xeno
With MoEngage's Connector Campaigns, you can add your customers to Xeno when they perform an action on your app or website.
To create a connector campaign on MoEngage,
1. Navigate to Create Campaign >> Connectors >> Custom and choose the delivery type most suitable to your needs. For this example, we will select "Event Triggered" and select the event as "Purchased". 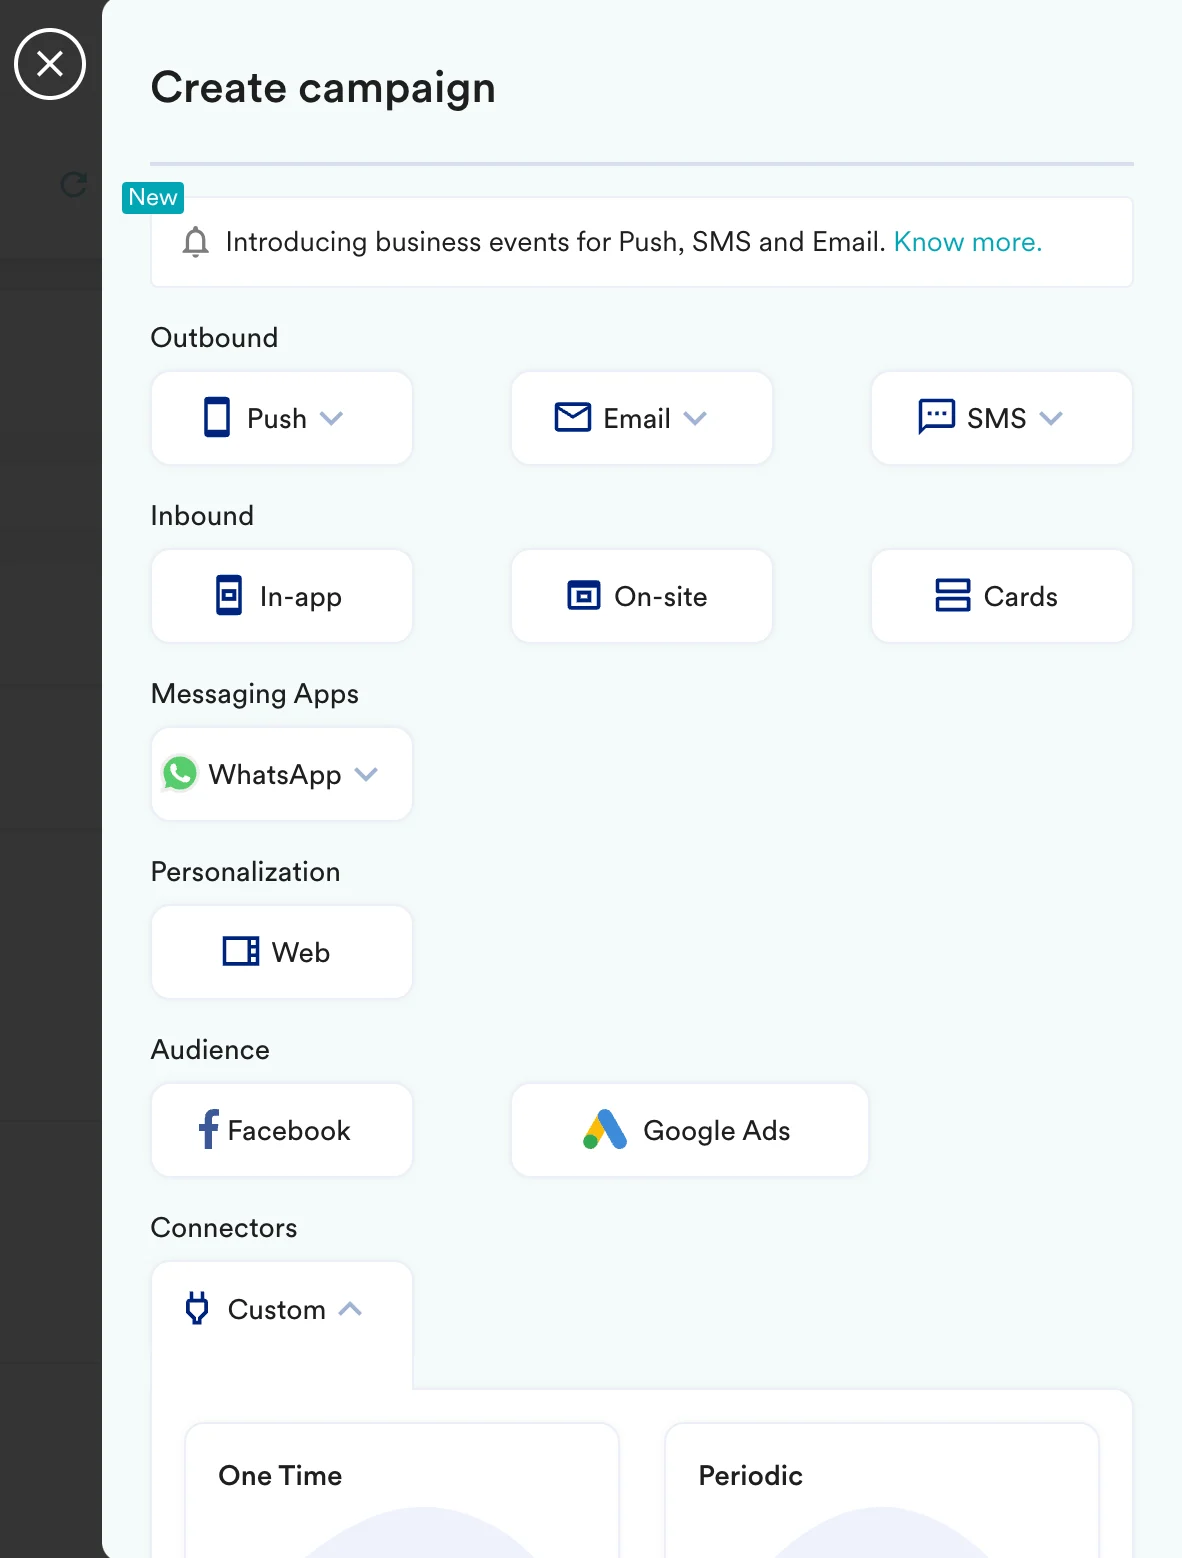 2. On step 2 of the campaign:
### Call the Xeno API
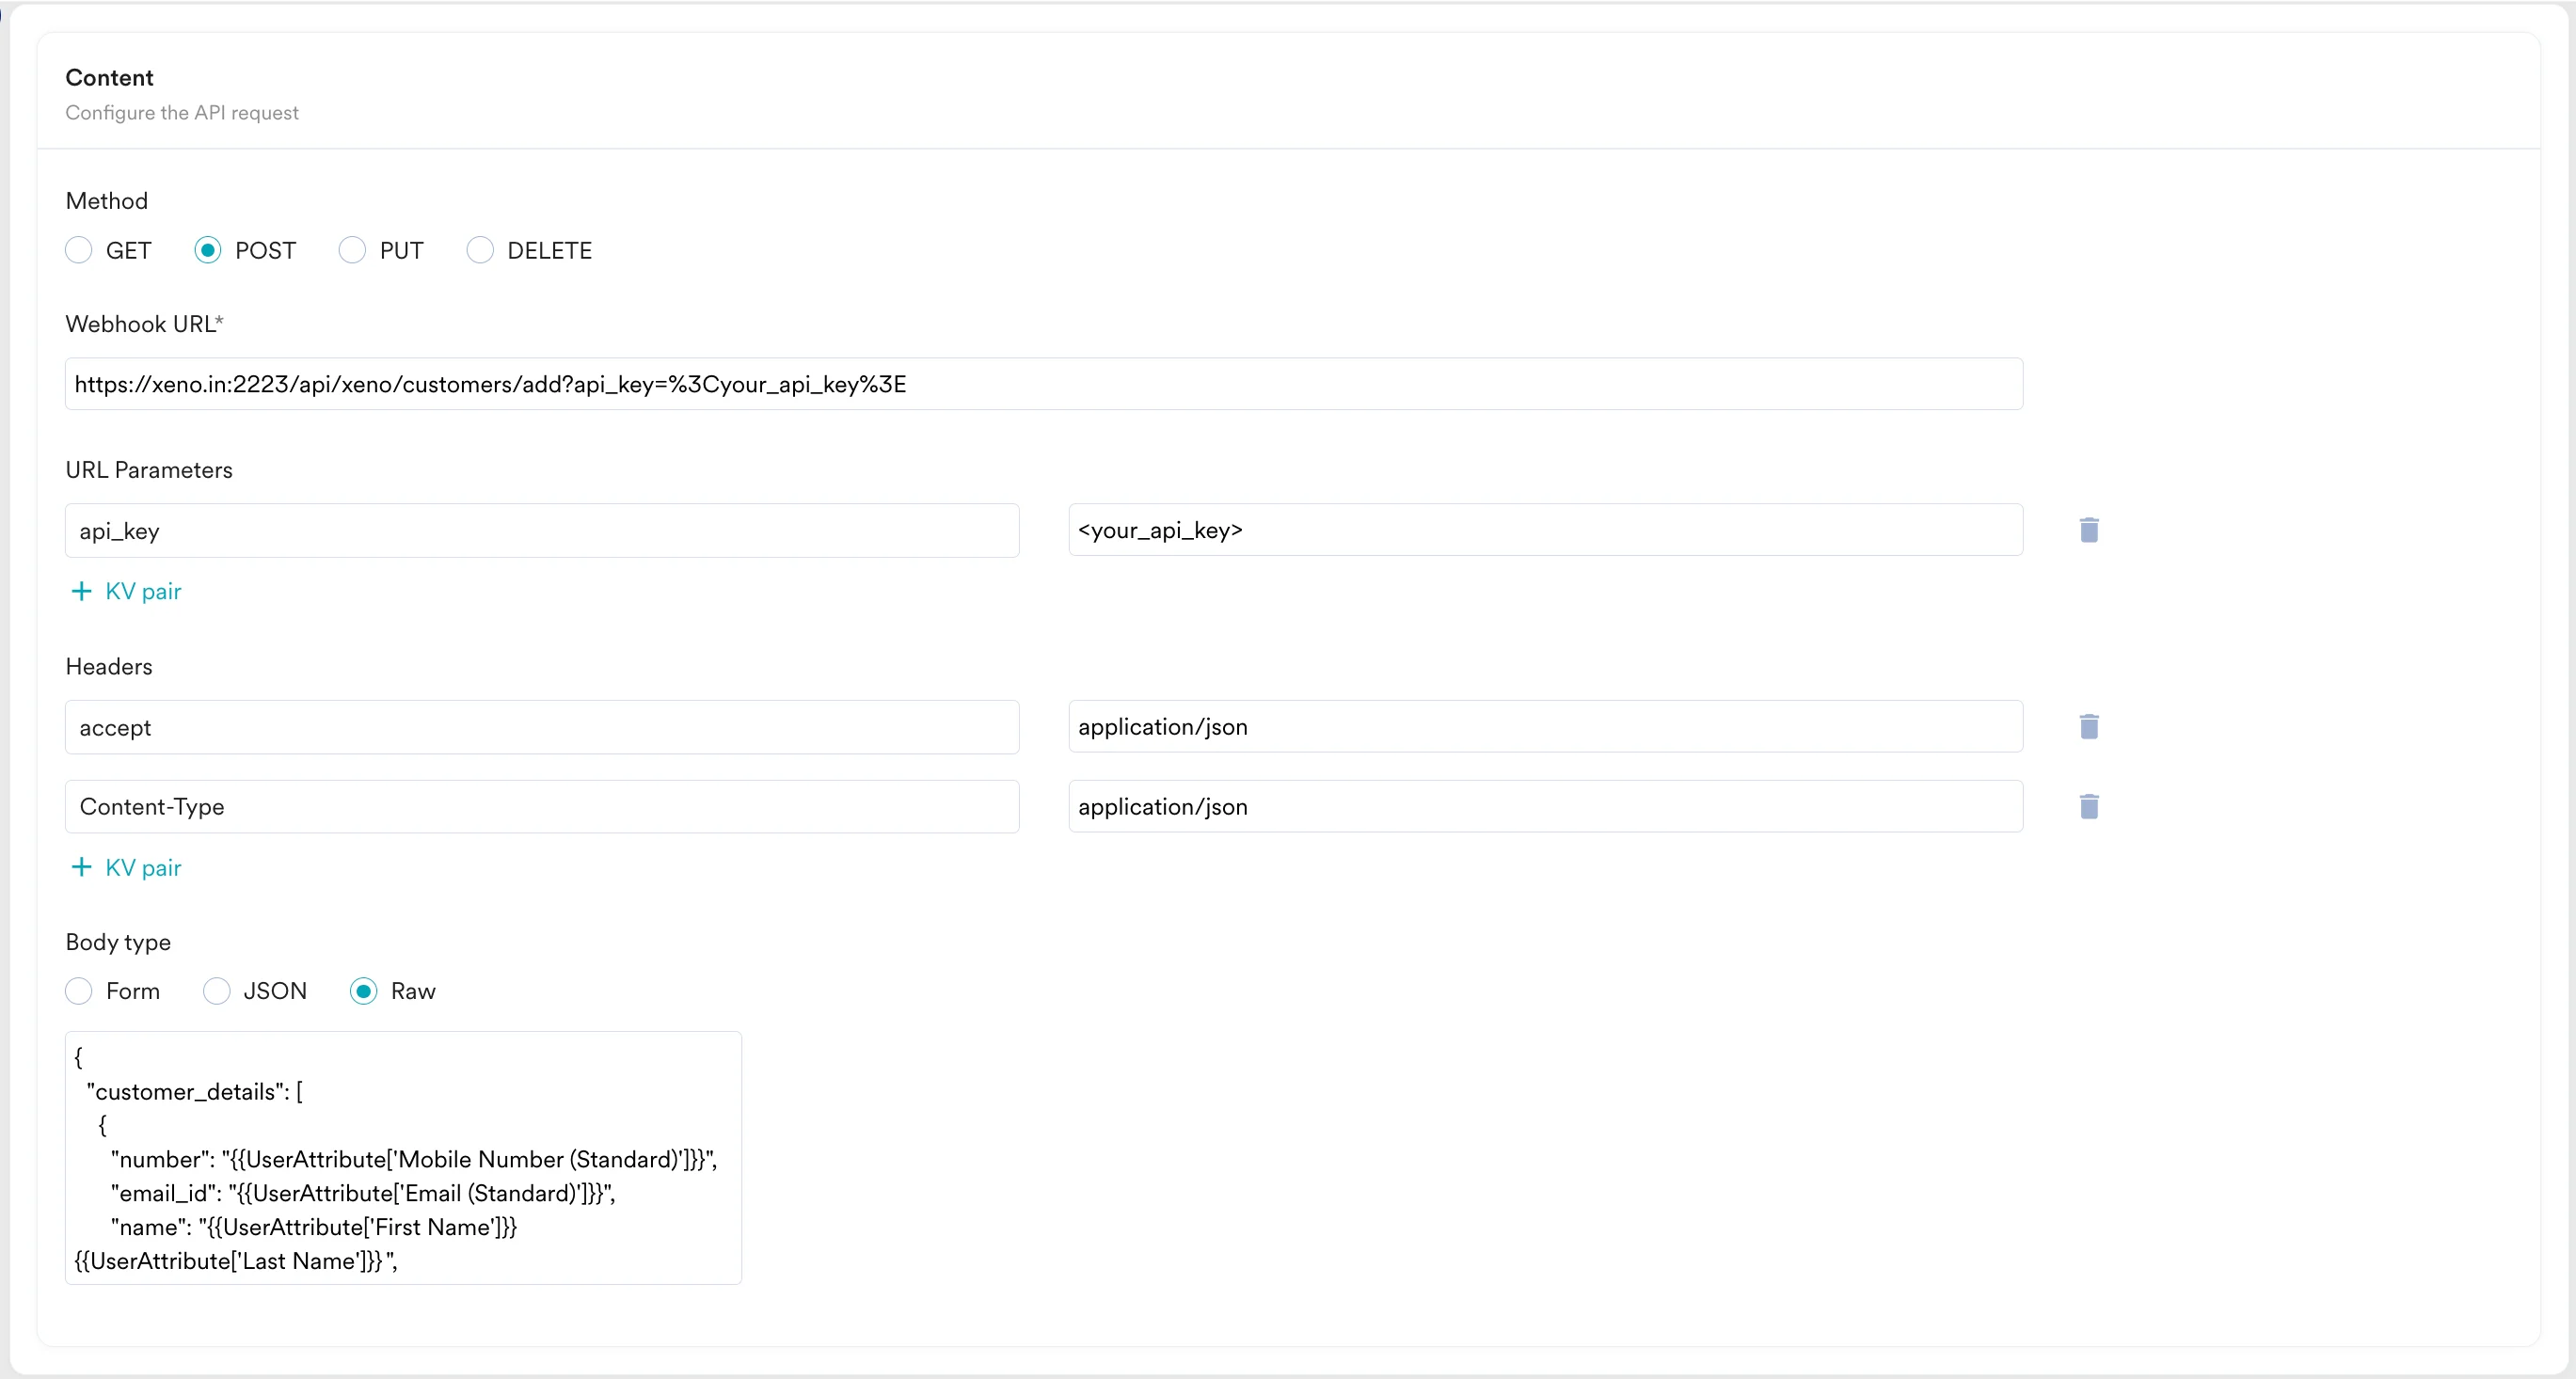
To send your customer to Xeno, use the `POST` method and configure the payload.
* Select the method as POST
* URL Parameters:
* `api_key`: ``
* Headers:
* `accept`: `application/json`
* `Content-Type`: `application/json`
* Add the endpoint as Webhook URL: `https://xeno.in:2223/api/xeno/customers/add`
* Body:\
Type @ to personalize your payload.
```json JSON wrap theme={null}
{
"customer_details": [
{
"number": "{{UserAttribute['Mobile Number (Standard)']}}",
"email_id": "{{UserAttribute['Email (Standard)']}}",
"name": "{{UserAttribute['First Name']}} {{UserAttribute['Last Name']}}",
"gender": "{{UserAttribute['Gender']}}",
"amount": "{{EventAttribute['price']}}",
"channel": "Website",
"store_id": "A123",
"admin_id": "123"
}
]
}
```
2. On step 2 of the campaign:
### Call the Xeno API
To send your customer to Xeno, use the `POST` method and configure the payload.
* Select the method as POST
* URL Parameters:
* `api_key`: ``
* Headers:
* `accept`: `application/json`
* `Content-Type`: `application/json`
* Add the endpoint as Webhook URL: `https://xeno.in:2223/api/xeno/customers/add`
* Body:\
Type @ to personalize your payload.
```json JSON wrap theme={null}
{
"customer_details": [
{
"number": "{{UserAttribute['Mobile Number (Standard)']}}",
"email_id": "{{UserAttribute['Email (Standard)']}}",
"name": "{{UserAttribute['First Name']}} {{UserAttribute['Last Name']}}",
"gender": "{{UserAttribute['Gender']}}",
"amount": "{{EventAttribute['price']}}",
"channel": "Website",
"store_id": "A123",
"admin_id": "123"
}
]
}
```
 * Refer to the [Xeno API documentation](https://xeno.in/apidoc#/Customer/post_customers_add) for more information.
### Preview your request
At this point, your campaign should be ready to test and send. You can also test your connector configuration using the Test functionality available in Step 2 of Create Connector Campaign.
* Refer to the [Xeno API documentation](https://xeno.in/apidoc#/Customer/post_customers_add) for more information.
### Preview your request
At this point, your campaign should be ready to test and send. You can also test your connector configuration using the Test functionality available in Step 2 of Create Connector Campaign. You can go ahead and Publish the campaign.