Introduction
Pipedream is a low code integration platform built for developers. With Pipedream, you can build workflows by selecting a trigger (HTTP requests, schedules, app events, and more) and adding one or more steps.MoEngage × Pipedream
The MoEngage and Pipedream integration allows you to easily send data between MoEngage and other apps using custom logic and code functions. With this integration, you can -- Use MoEngage as a trigger Pipedream via our Connector campaigns
- Send data from Pipedream to MoEngage using our Data APIs
Use Cases
- When an event occurs in MoEngage, add a new row in Google Sheets.
- Import users from Google Form Leads into MoEngage.
- Send a Slack message when a user performs an event.
- Import events into MoEngage from a WebHook setup in Pipedream.
Integration Prerequisites
- Ensure you have access to your Pipedream account.
- Ensure you have access to Data API keys in MoEngage Dashboard.
- The Data API ID and Data API Key are available at Settings -> Account -> APIs. The Data API ID is the same as the Workspace ID. The Data API Key is available in the same screen in the API Keys -> Data section.
Use MoEngage as a Trigger
You can make use of MoEngage’s Connector Campaigns to use MoEngage as a trigger.Step 1: Add HTTP Webhook Requests as a Trigger

- Click on “Add a Trigger”.
- Search for “HTTP / Webhook”.
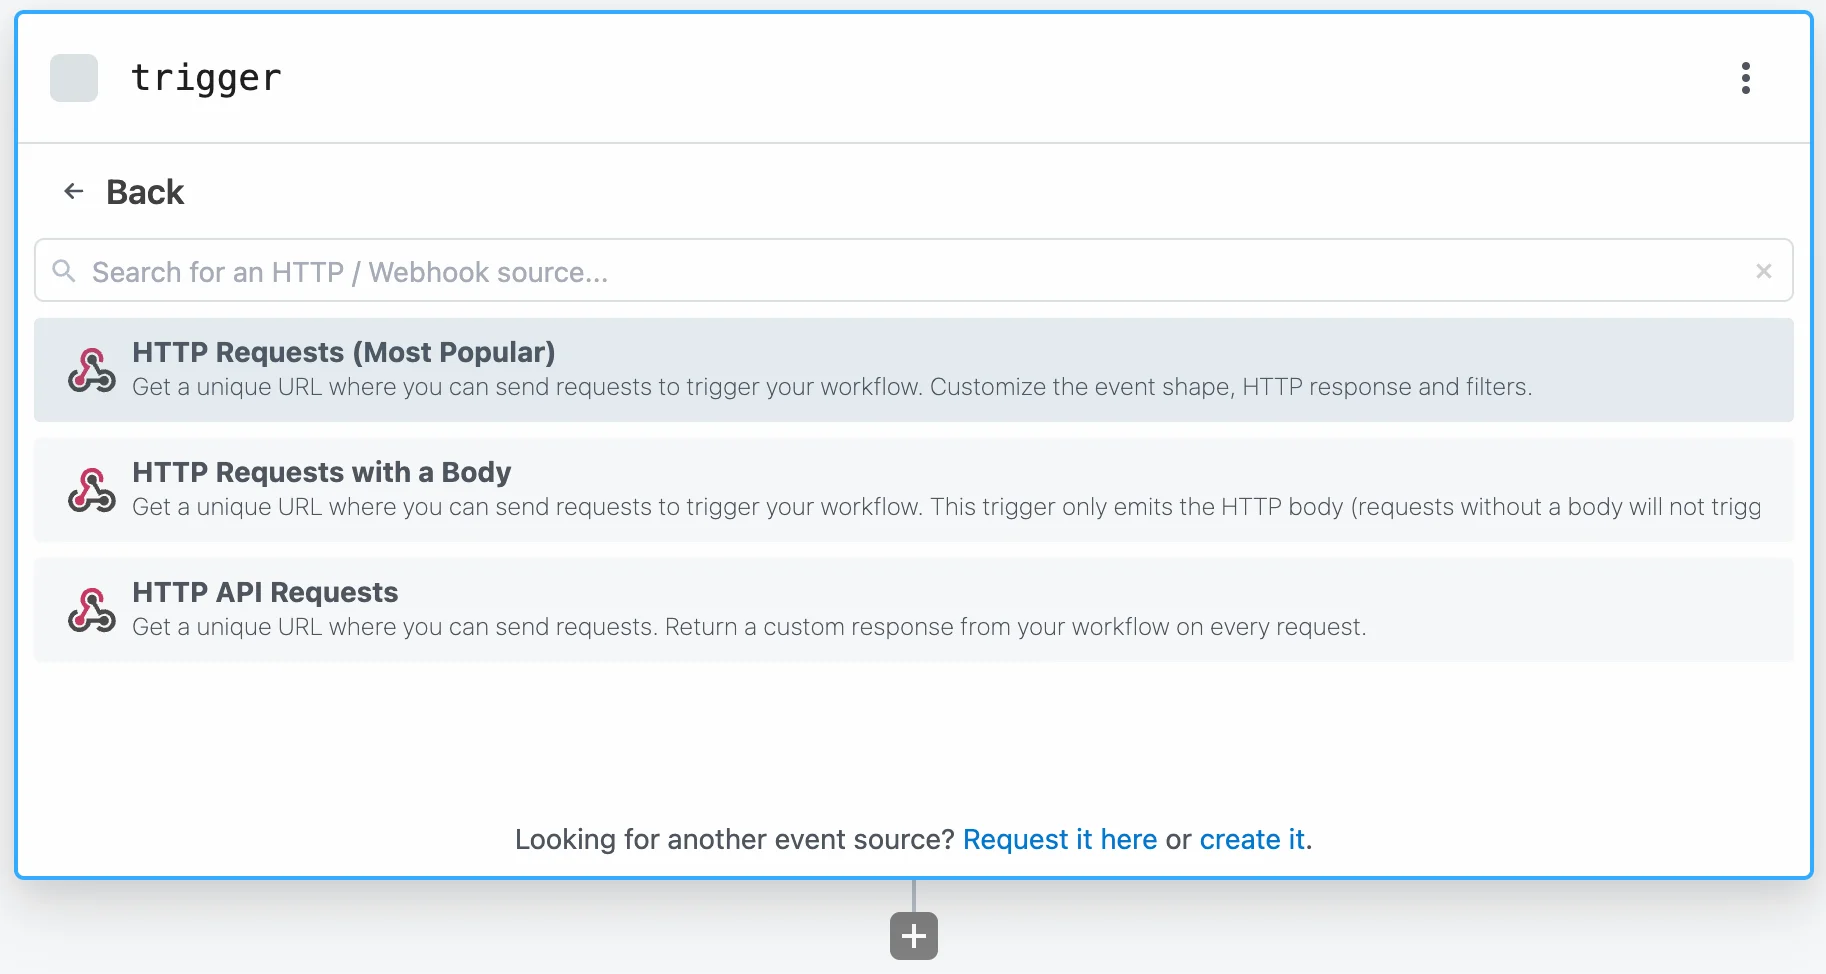
- Event Data =>
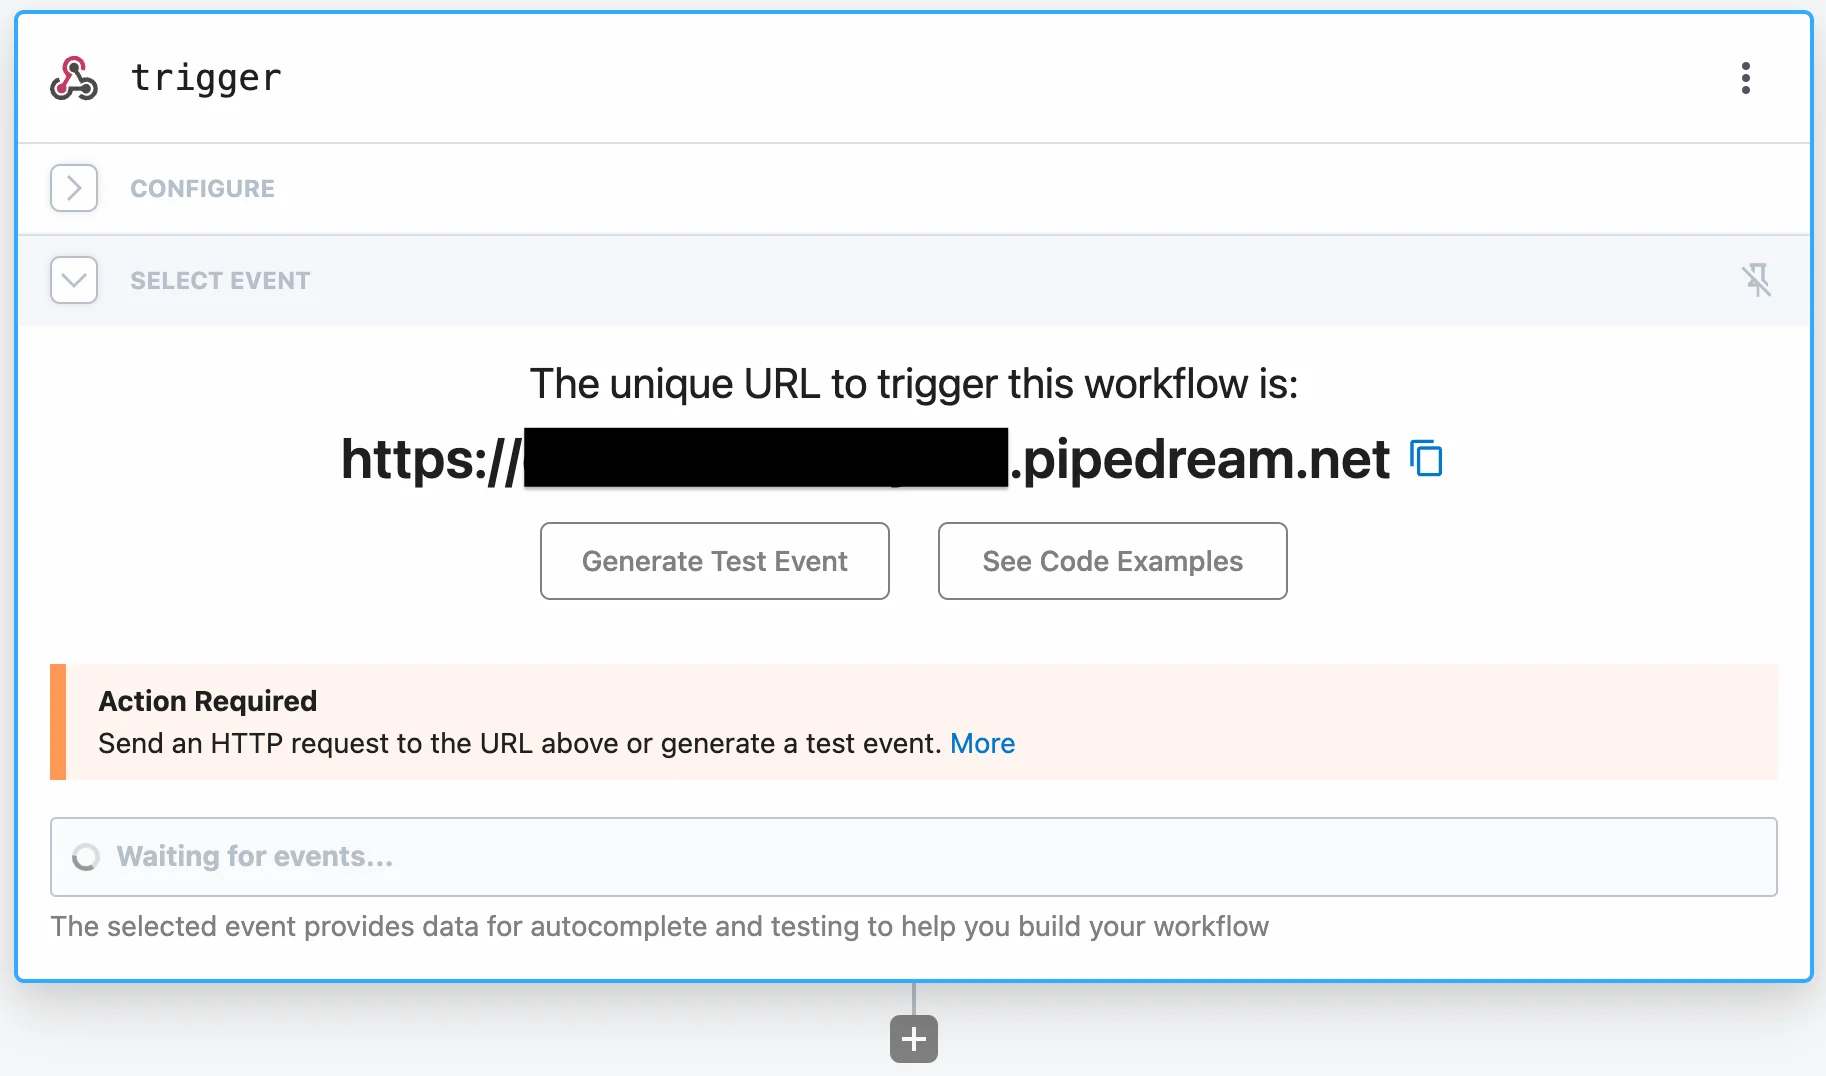
Full HTTP RequestHTTP Response =>Return HTTP 200 OK - Click on “Save and continue”.
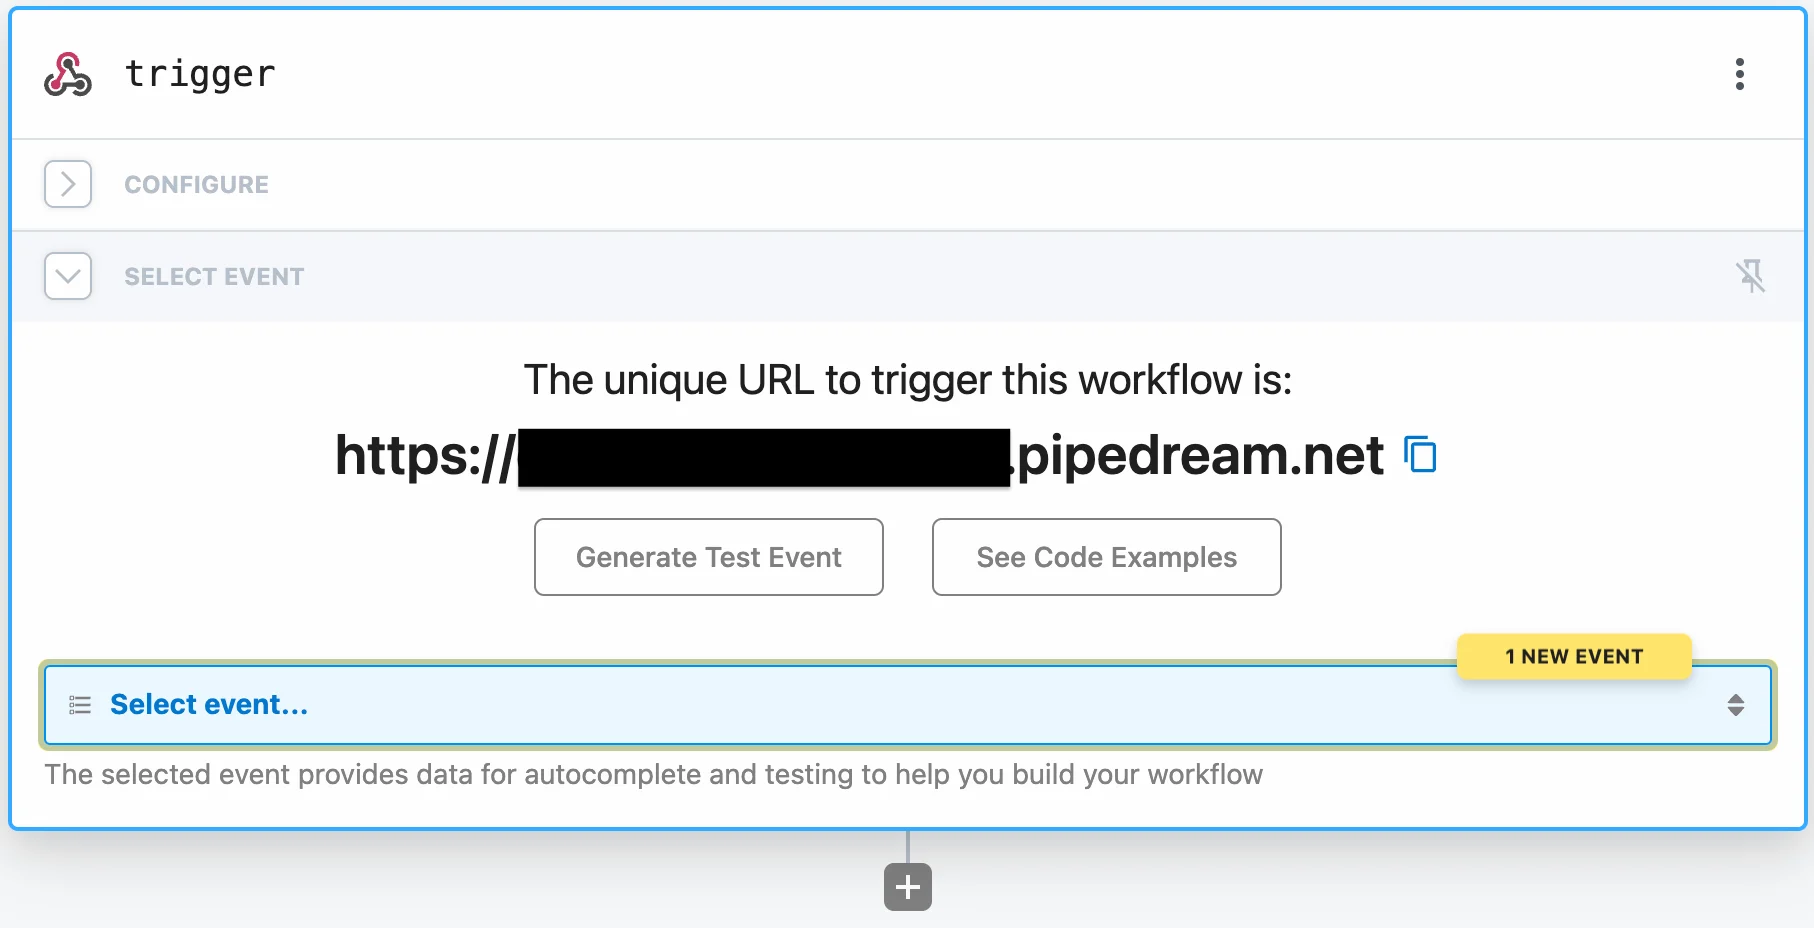
- A new unique URL to trigger your workflow will be displayed. Save this URL as we will need it to set up the Connector Campaign.
Step 2: Setup the Connector Campaign in MoEngage Dashboard
- Navigate to MoEngage Dashboard.
- Use any one of the following options:
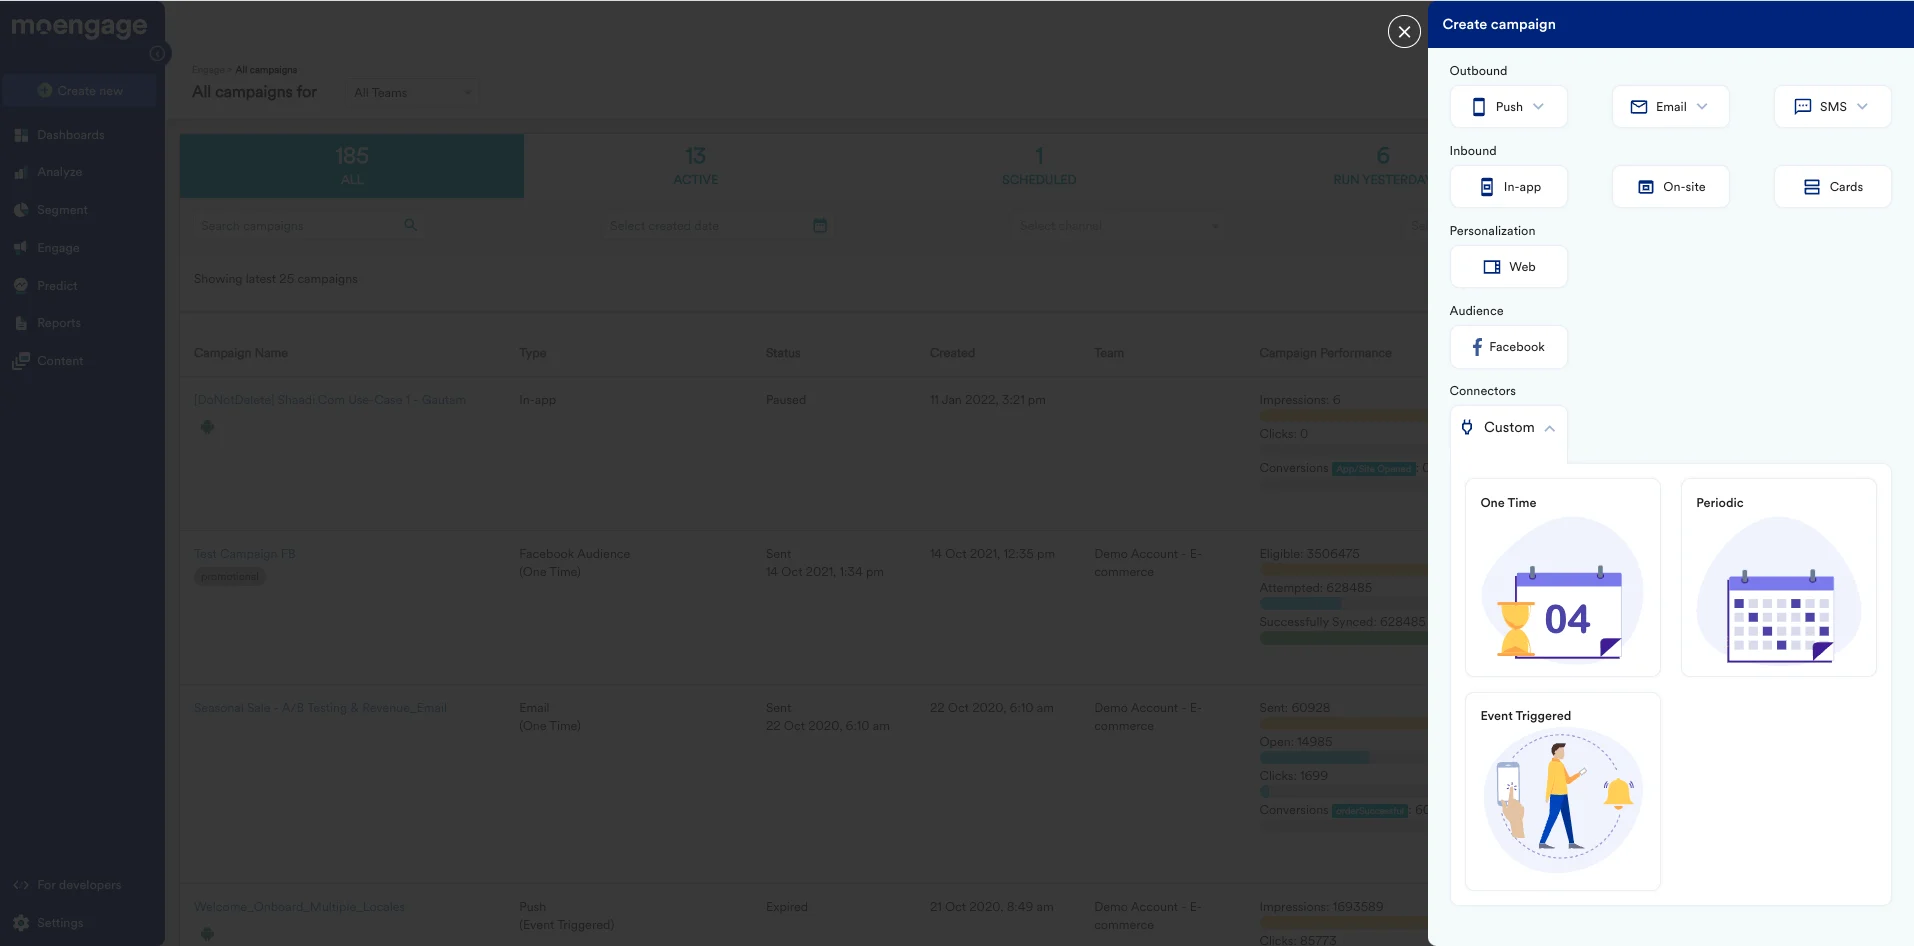
- On the All Campaigns page, click Create Campaign. The Create Campaign page is displayed.
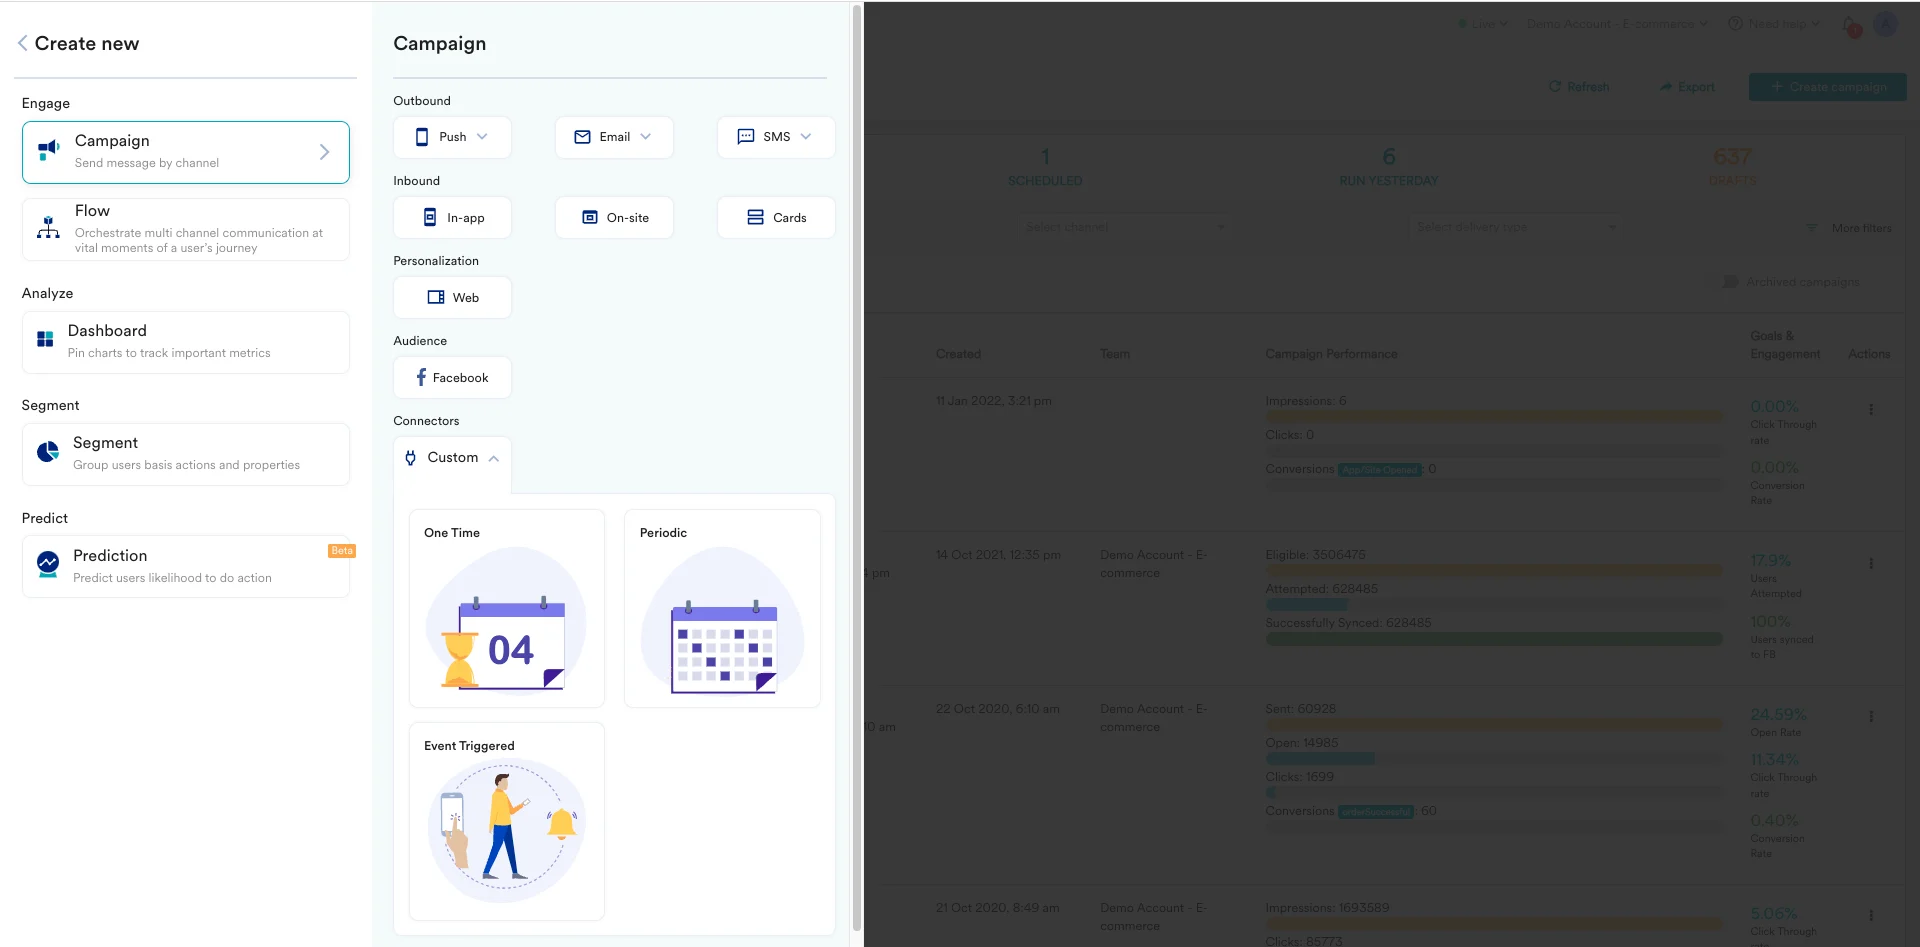
- Click Create New > Campaign. The Create Campaign page is displayed.
- On the All Campaigns page, click Create Campaign. The Create Campaign page is displayed.
- Click Custom under Connectors.
- For the campaign delivery types, choose “Event-Triggered”.
- For more information about delivery types, refer to Delivery Types.
- On the next screen, give your Campaign a name, and select the Criteria as “Device Uninstall”.
- For the trigger, choose “immediately”.
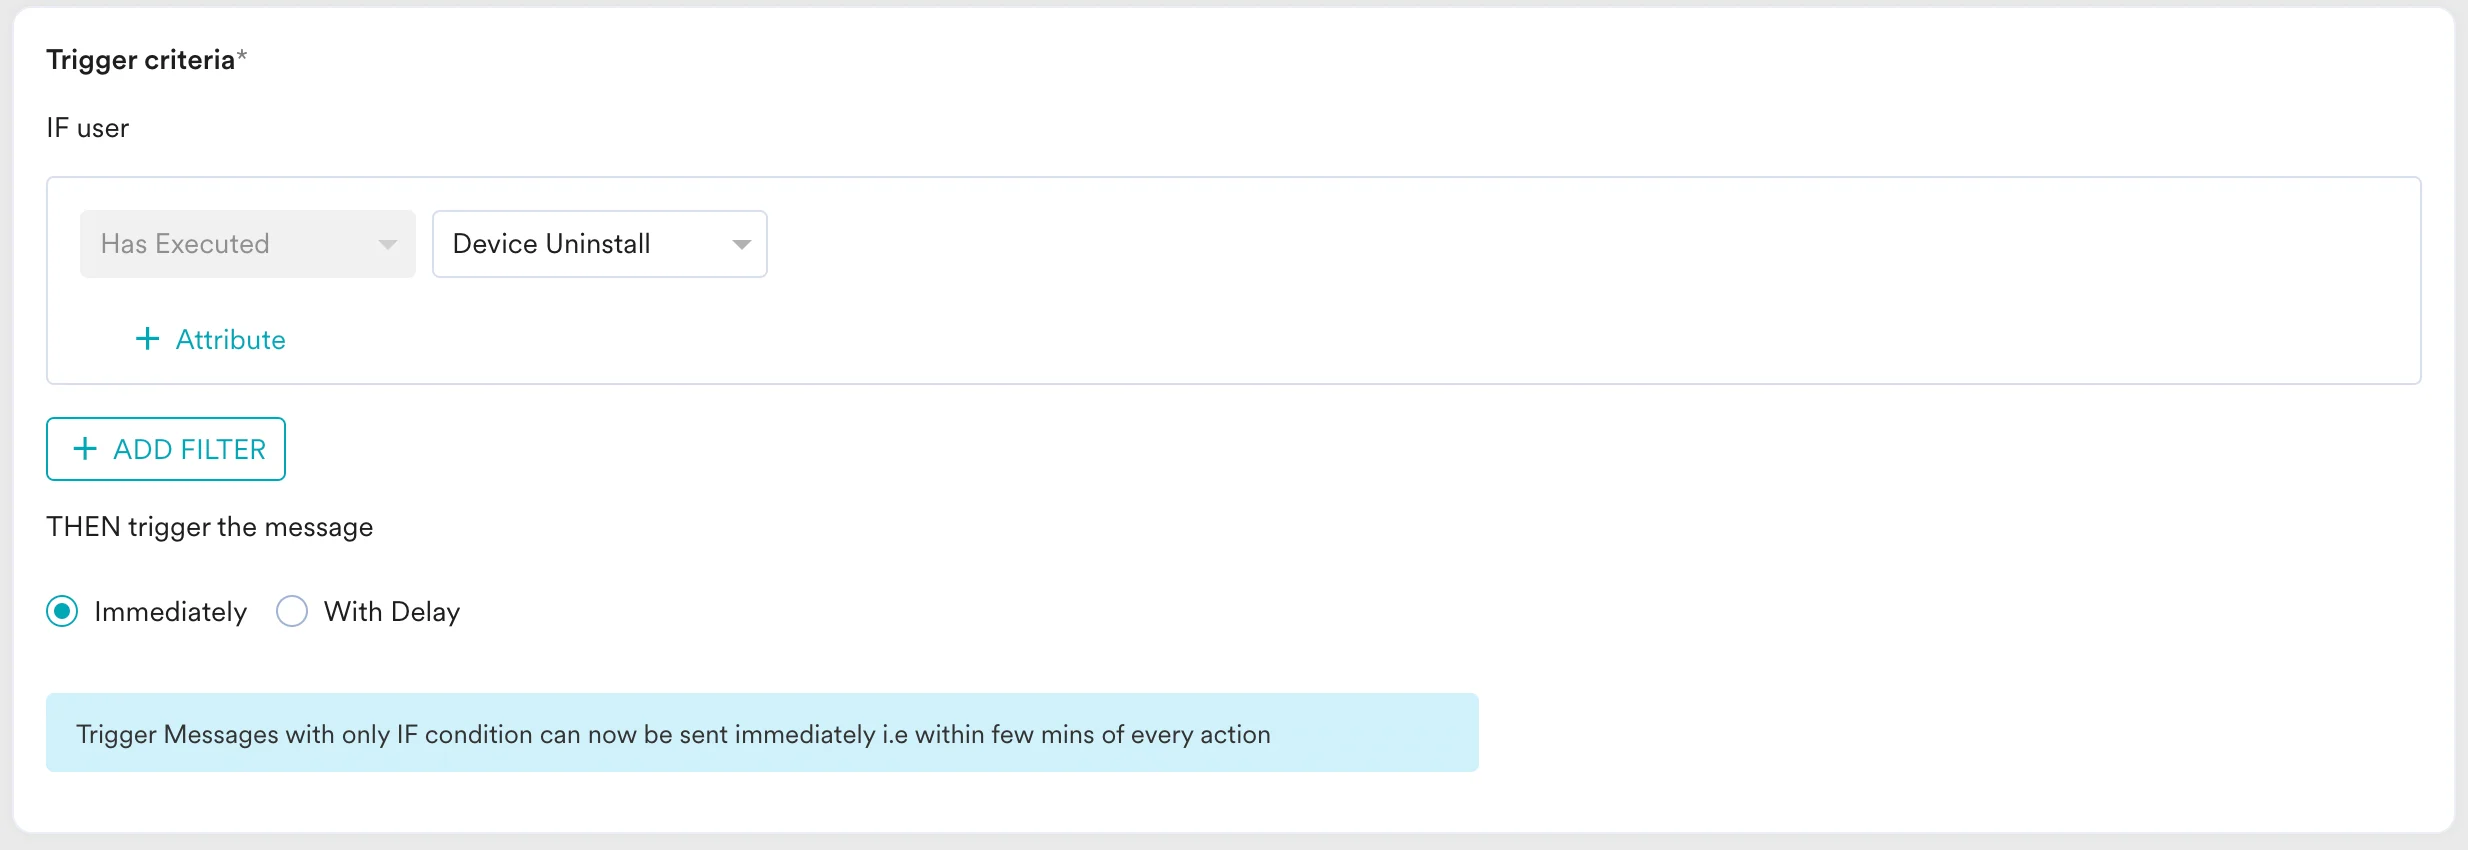
- For the audience, let us choose “All users” for this use case. Click “Next” when satisfied.
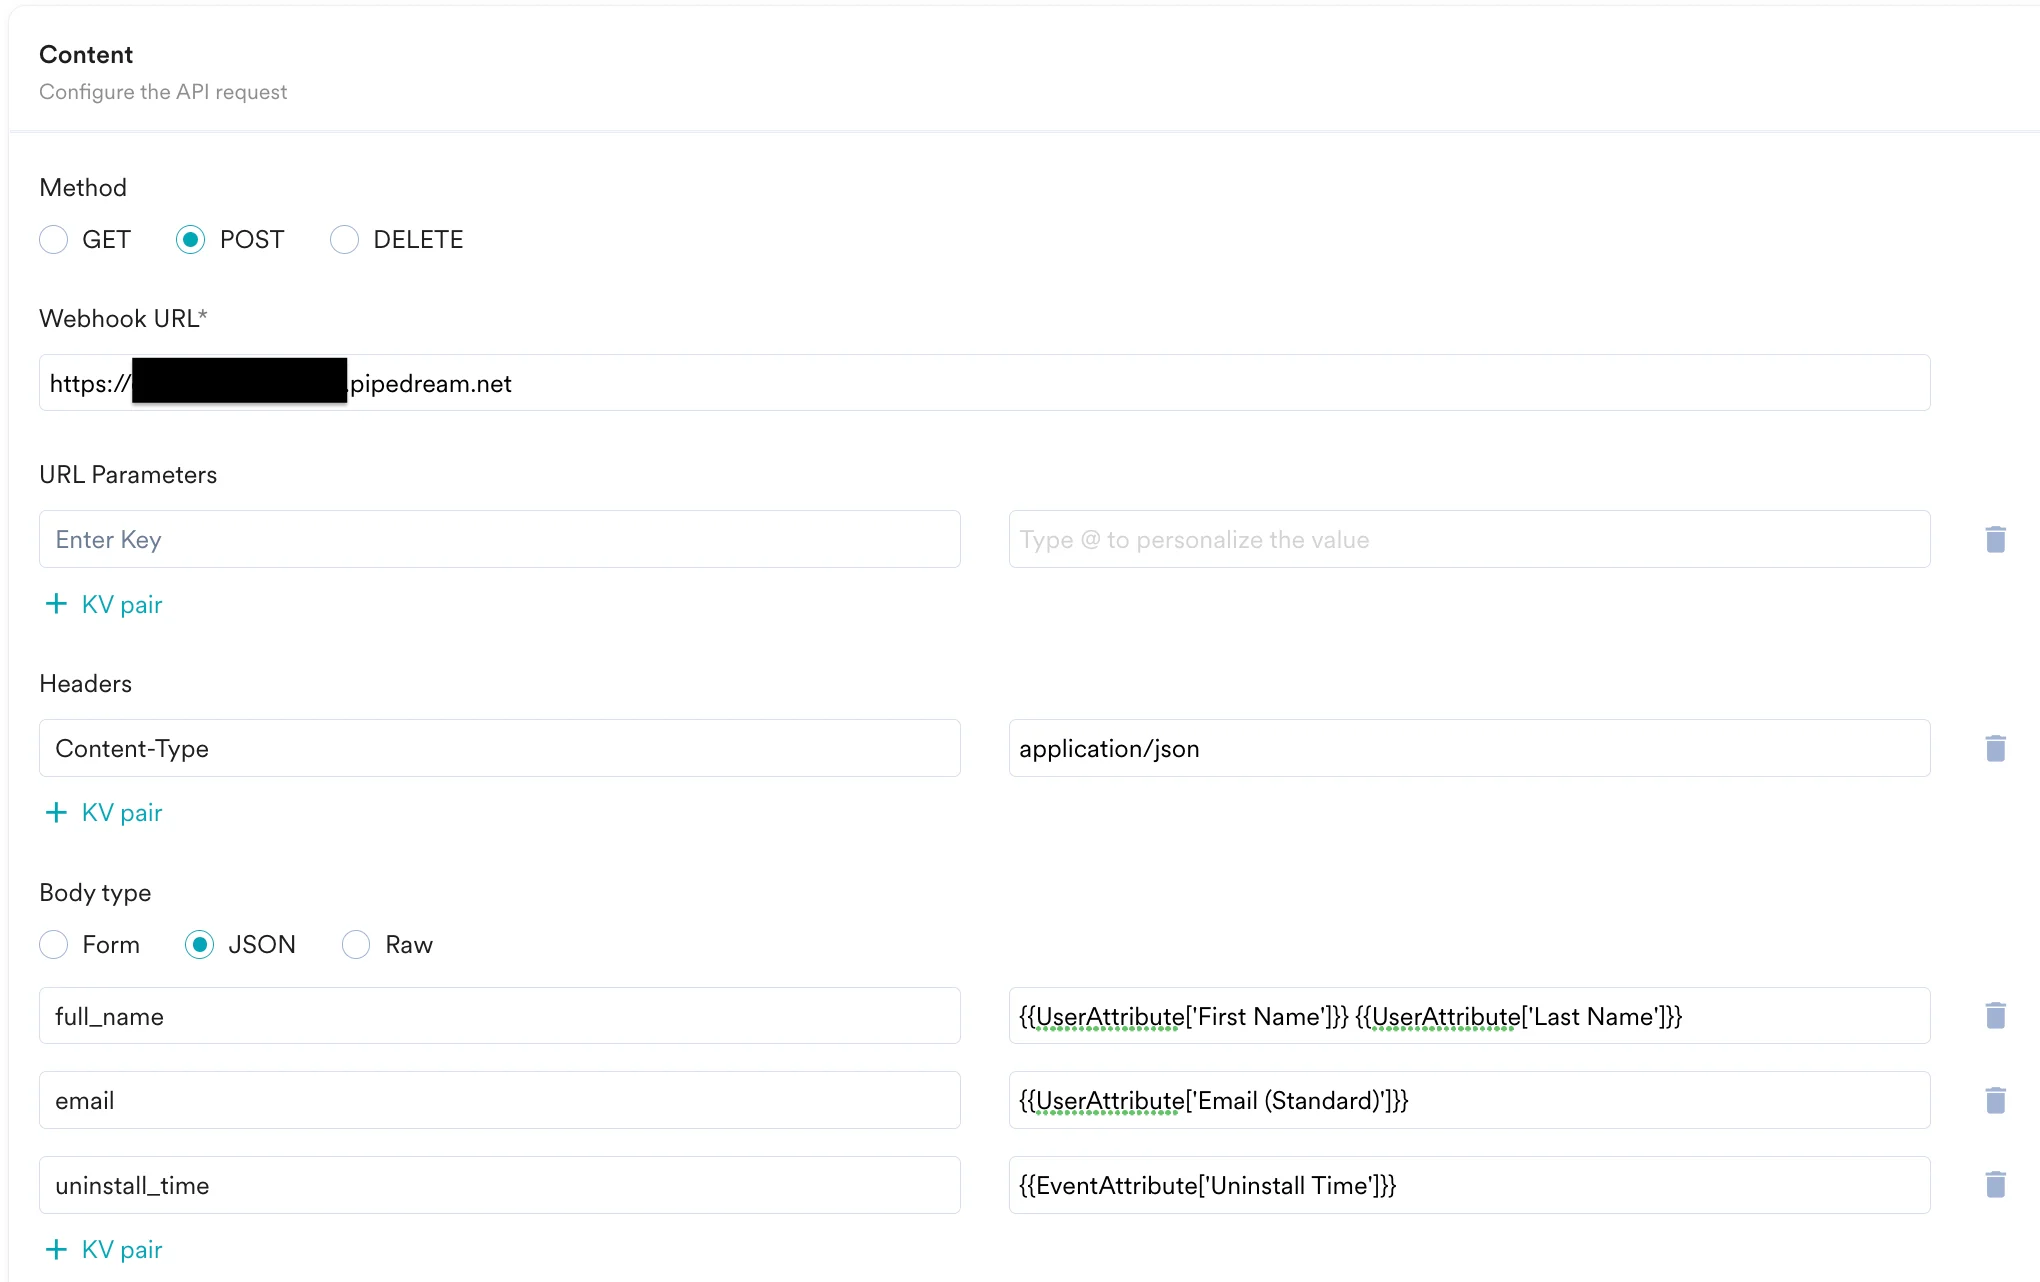
- On the content screen, we will define our payload and webhook URL we got from the previous step.
- Choose the method as “POST” (know more about Pipedream HTTP Requests).
- Enter the webhook URL you copied earlier.
- Define the headers and parameters as per your requirements. For this use case, we will just define our payload body- (you can type @ to insert personalized values as well)
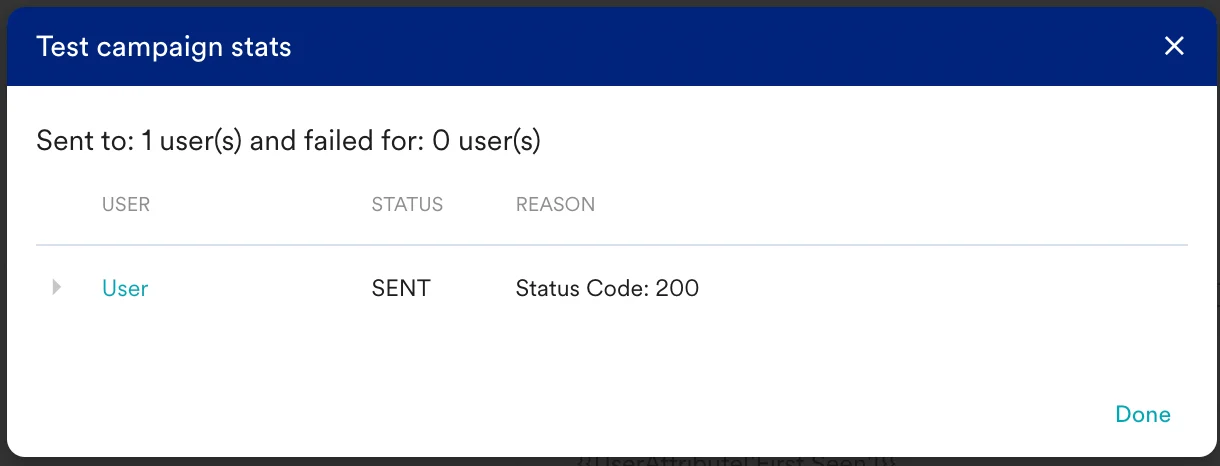
- Now you need to test this webhook, scroll down and enter a test user’s data and click on “test”.
- You should see a new modal saying the test was successful:
- Now go back to the Pipedream editor. You should see “1 New Event” in the Select Event dropdown.
Step 4: Test Trigger on Pipedream
- Select the latest event from the “Select Event” dropdown. You should see the API request in the Exports tab. Click continue.

- You can now publish your Connector Campaign on MoEngage.
- In Pipedream, add a new step in your workflow. For example, let’s pick Google Sheets. Choose “Add Single Row” Action.
- Select or connect a new Google Sheets Account.
- Pick your Spreadsheet.
- Pick your Sheet.
- Pick “Yes” if you have the first row as Header in your Sheet.
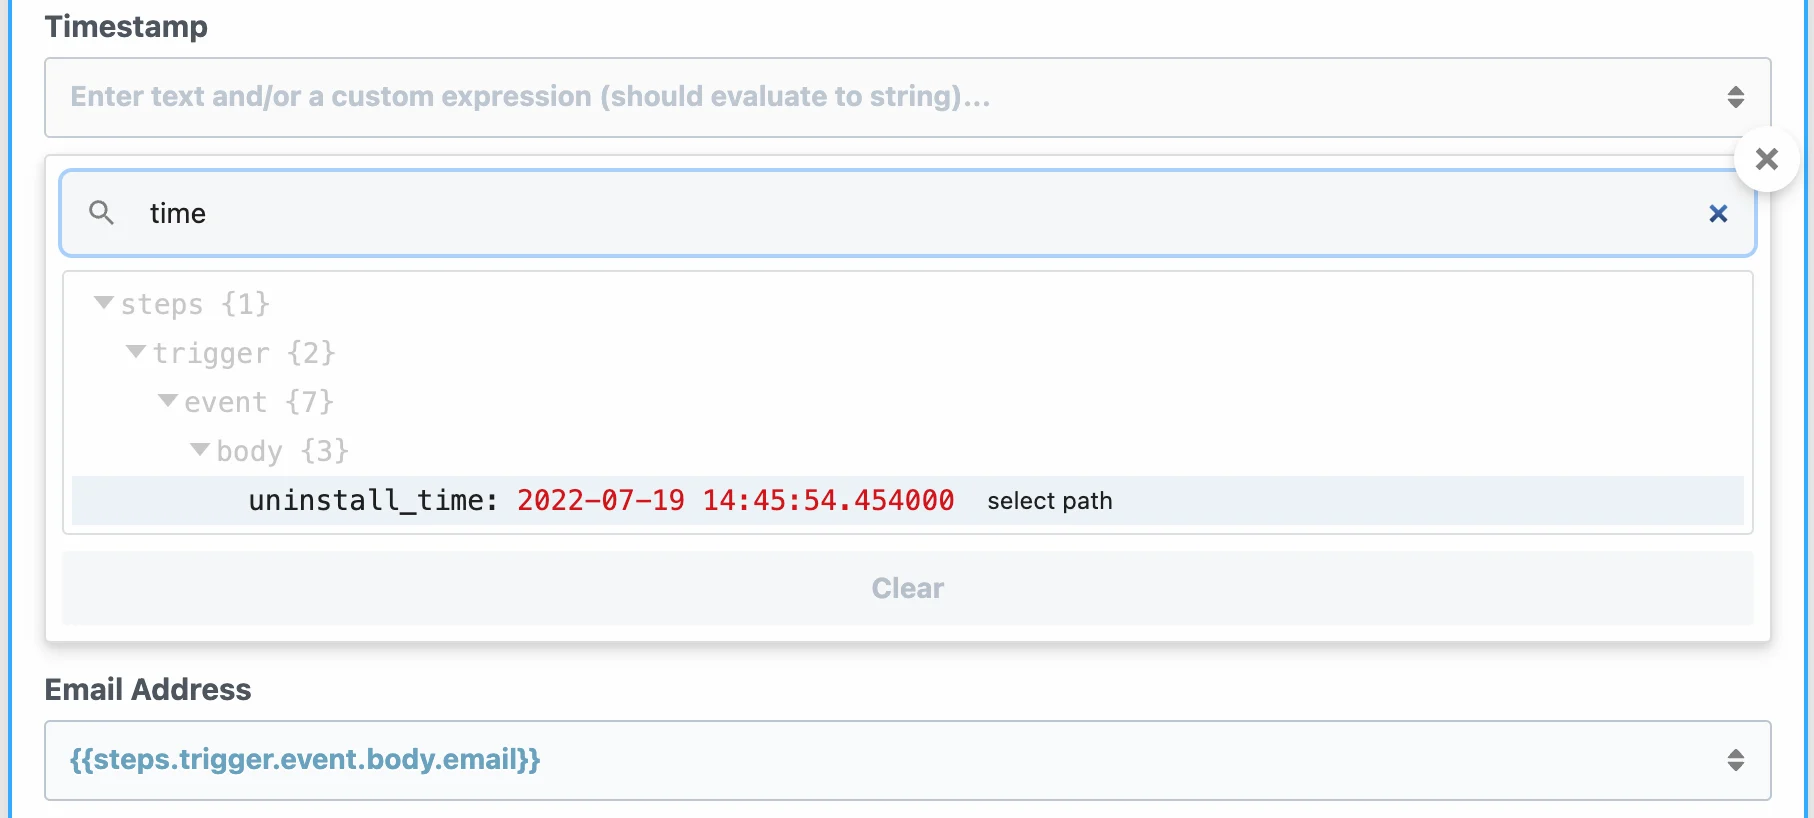
- Map each of the columns of your Sheet from the response of the Trigger. You can also enter custom values.
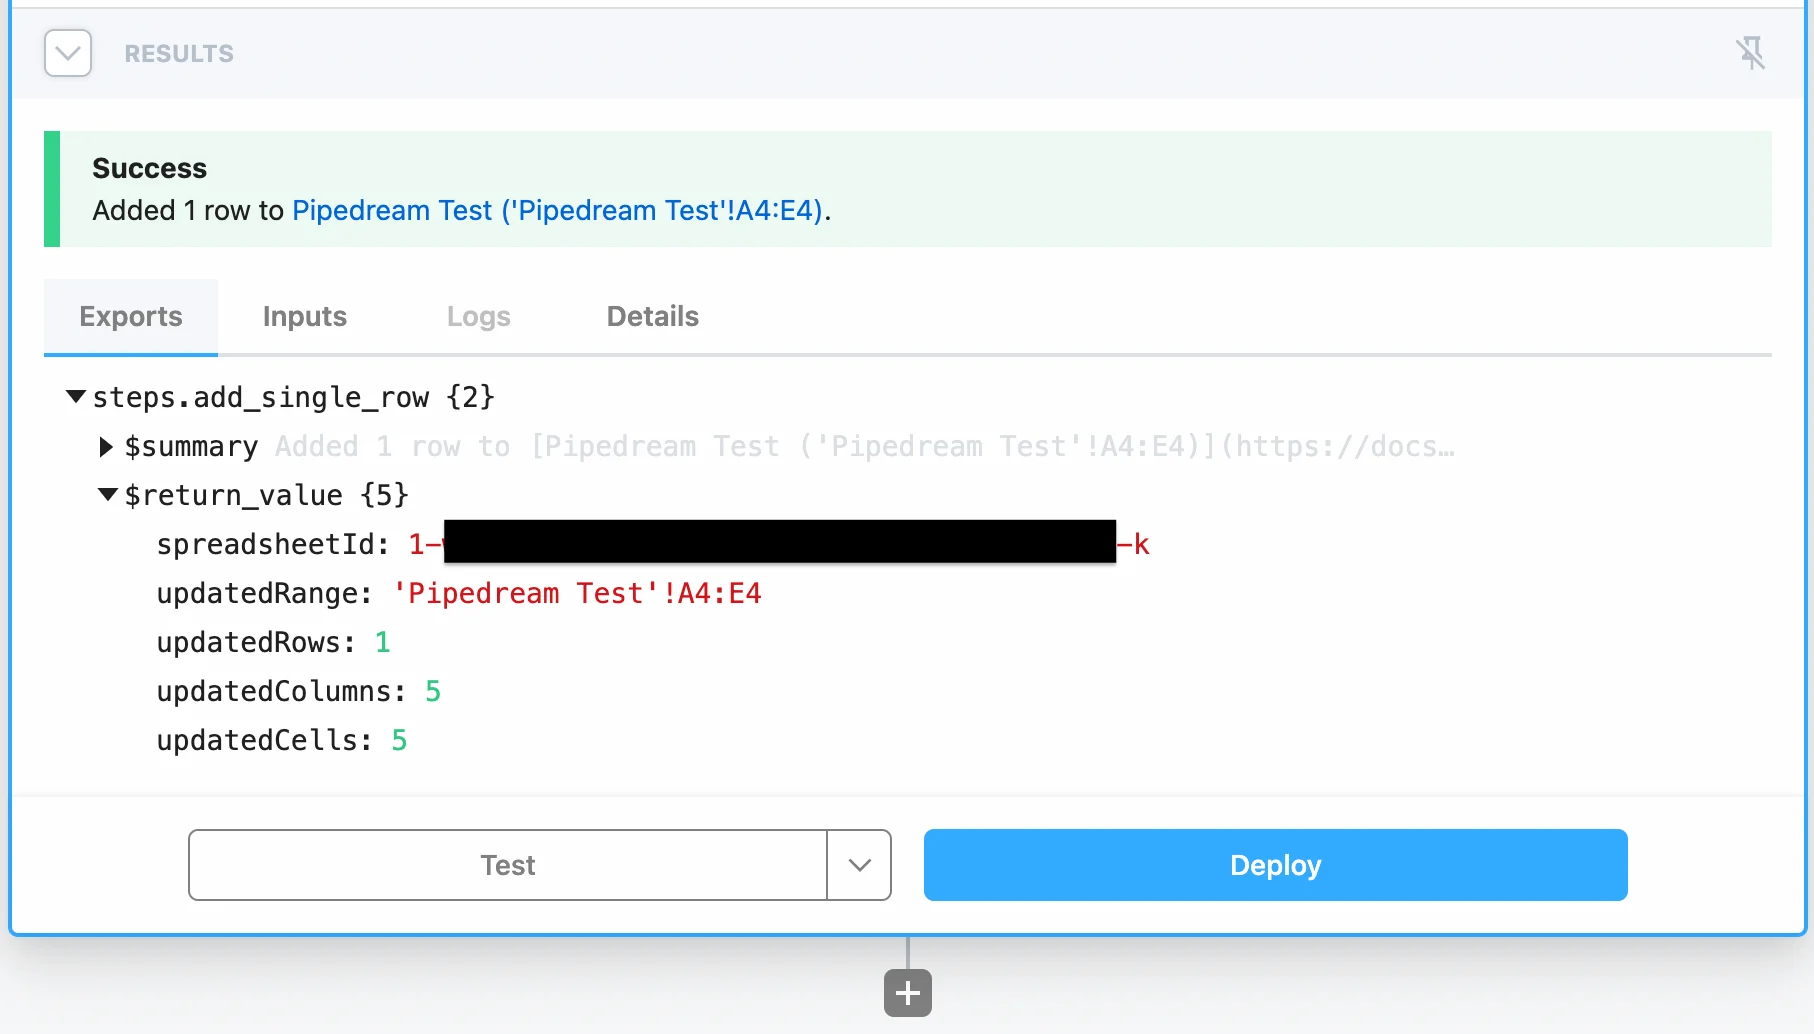
- Once you are satisfied with the configuration, you can choose to test this step or the entire workflow.

- Once the insert is successful, you can then deploy this workflow. It will insert new rows to Google Sheets each time a user performs your selected event in MoEngage.
Using Data APIs in Pipedream
Using MoEngage’s Data APIs, you can:- Create or Update users
- Import Events
- Add or remove users in cohort (segment)
Step 1: Add Webhook Step in Pipedream
- Choose “HTTP / Webhook” from the list of apps.
- Select “Send POST Request” from the list of actions.
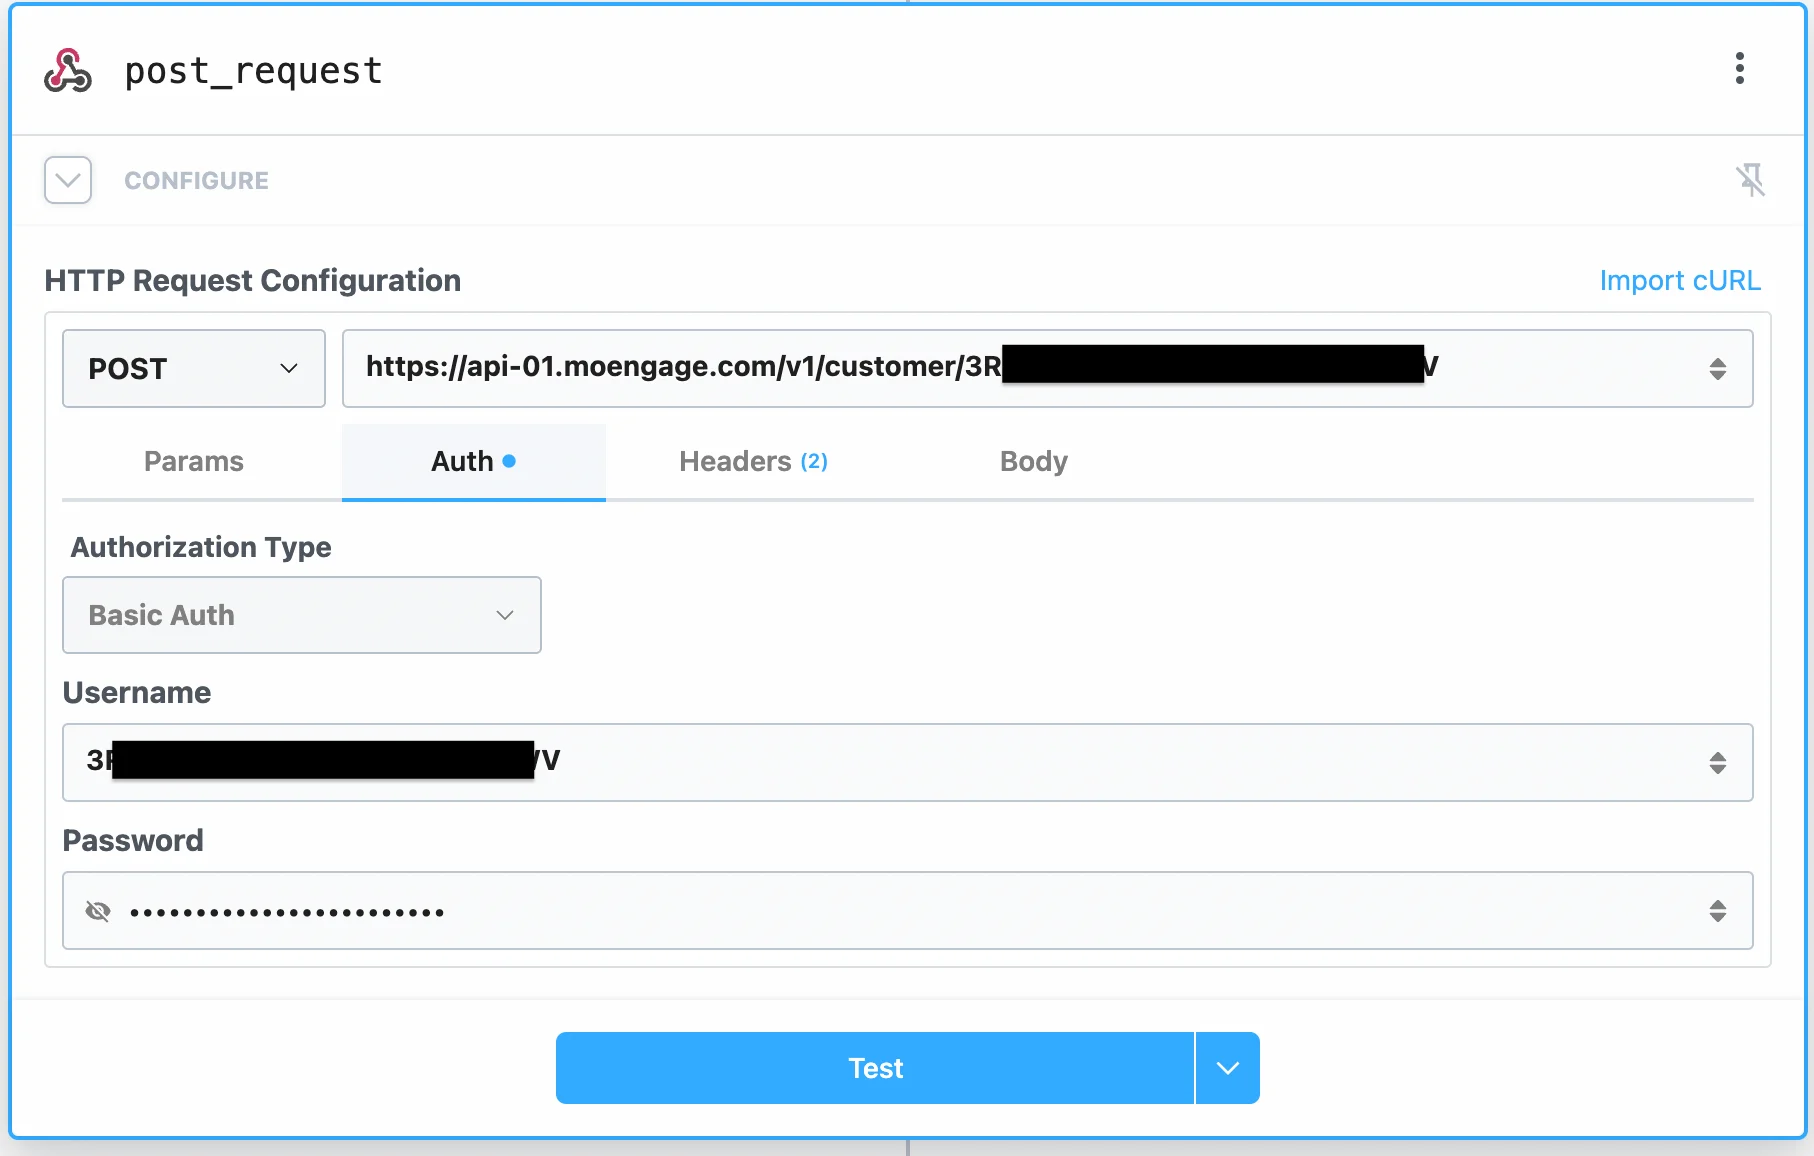
- For the request URL, type
https://api-0X.moengage.com/v1/customer/<Workspcae_ID>. Replace0Xwith the Data Center Region your app resides in, andWorkspace_IDwith your Workspace ID.
- In the Auth tab, select “Basic Auth”.
- For Username, type your Workspace ID.
- For Password, type your Data API Key.
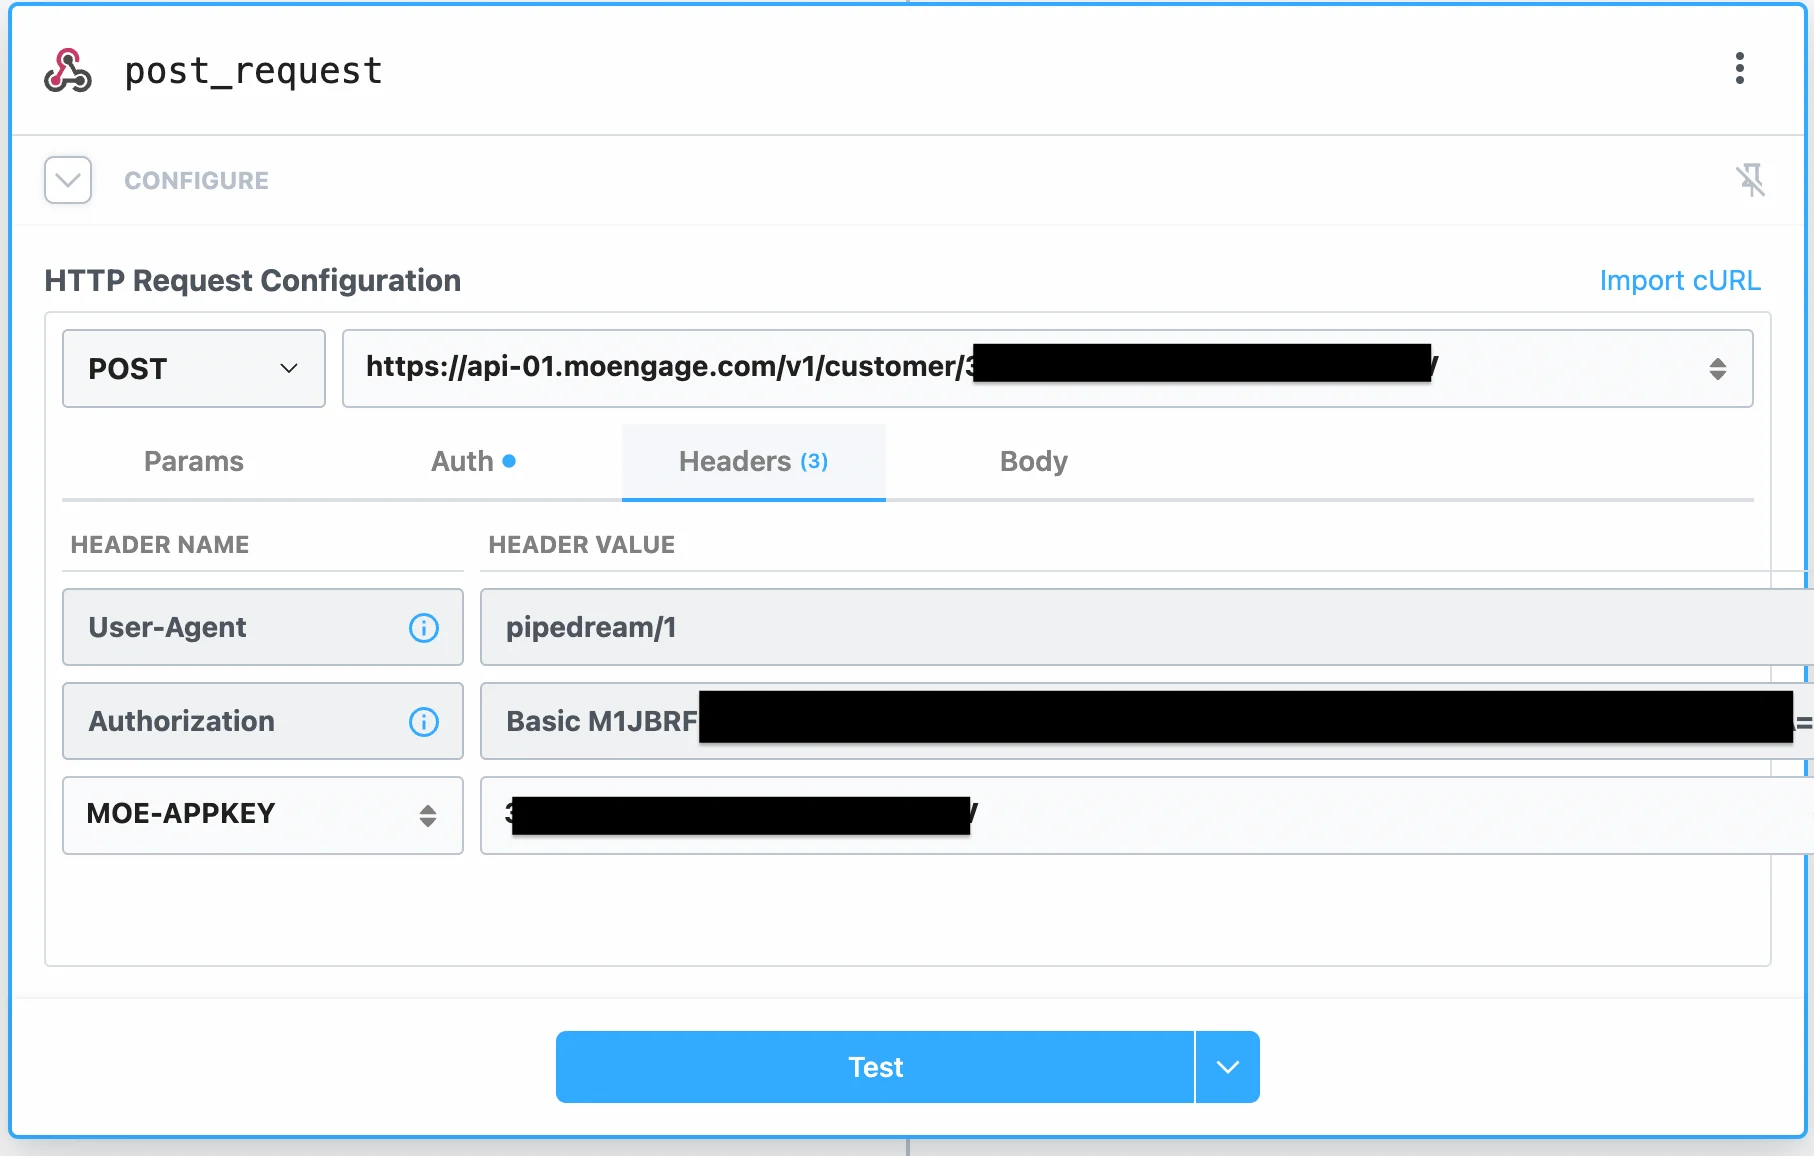
- In the Headers tab, enter a new header:
- Header Name:
MOE-APPKEY - Header Value: type your Workspace ID.
- Header Name:
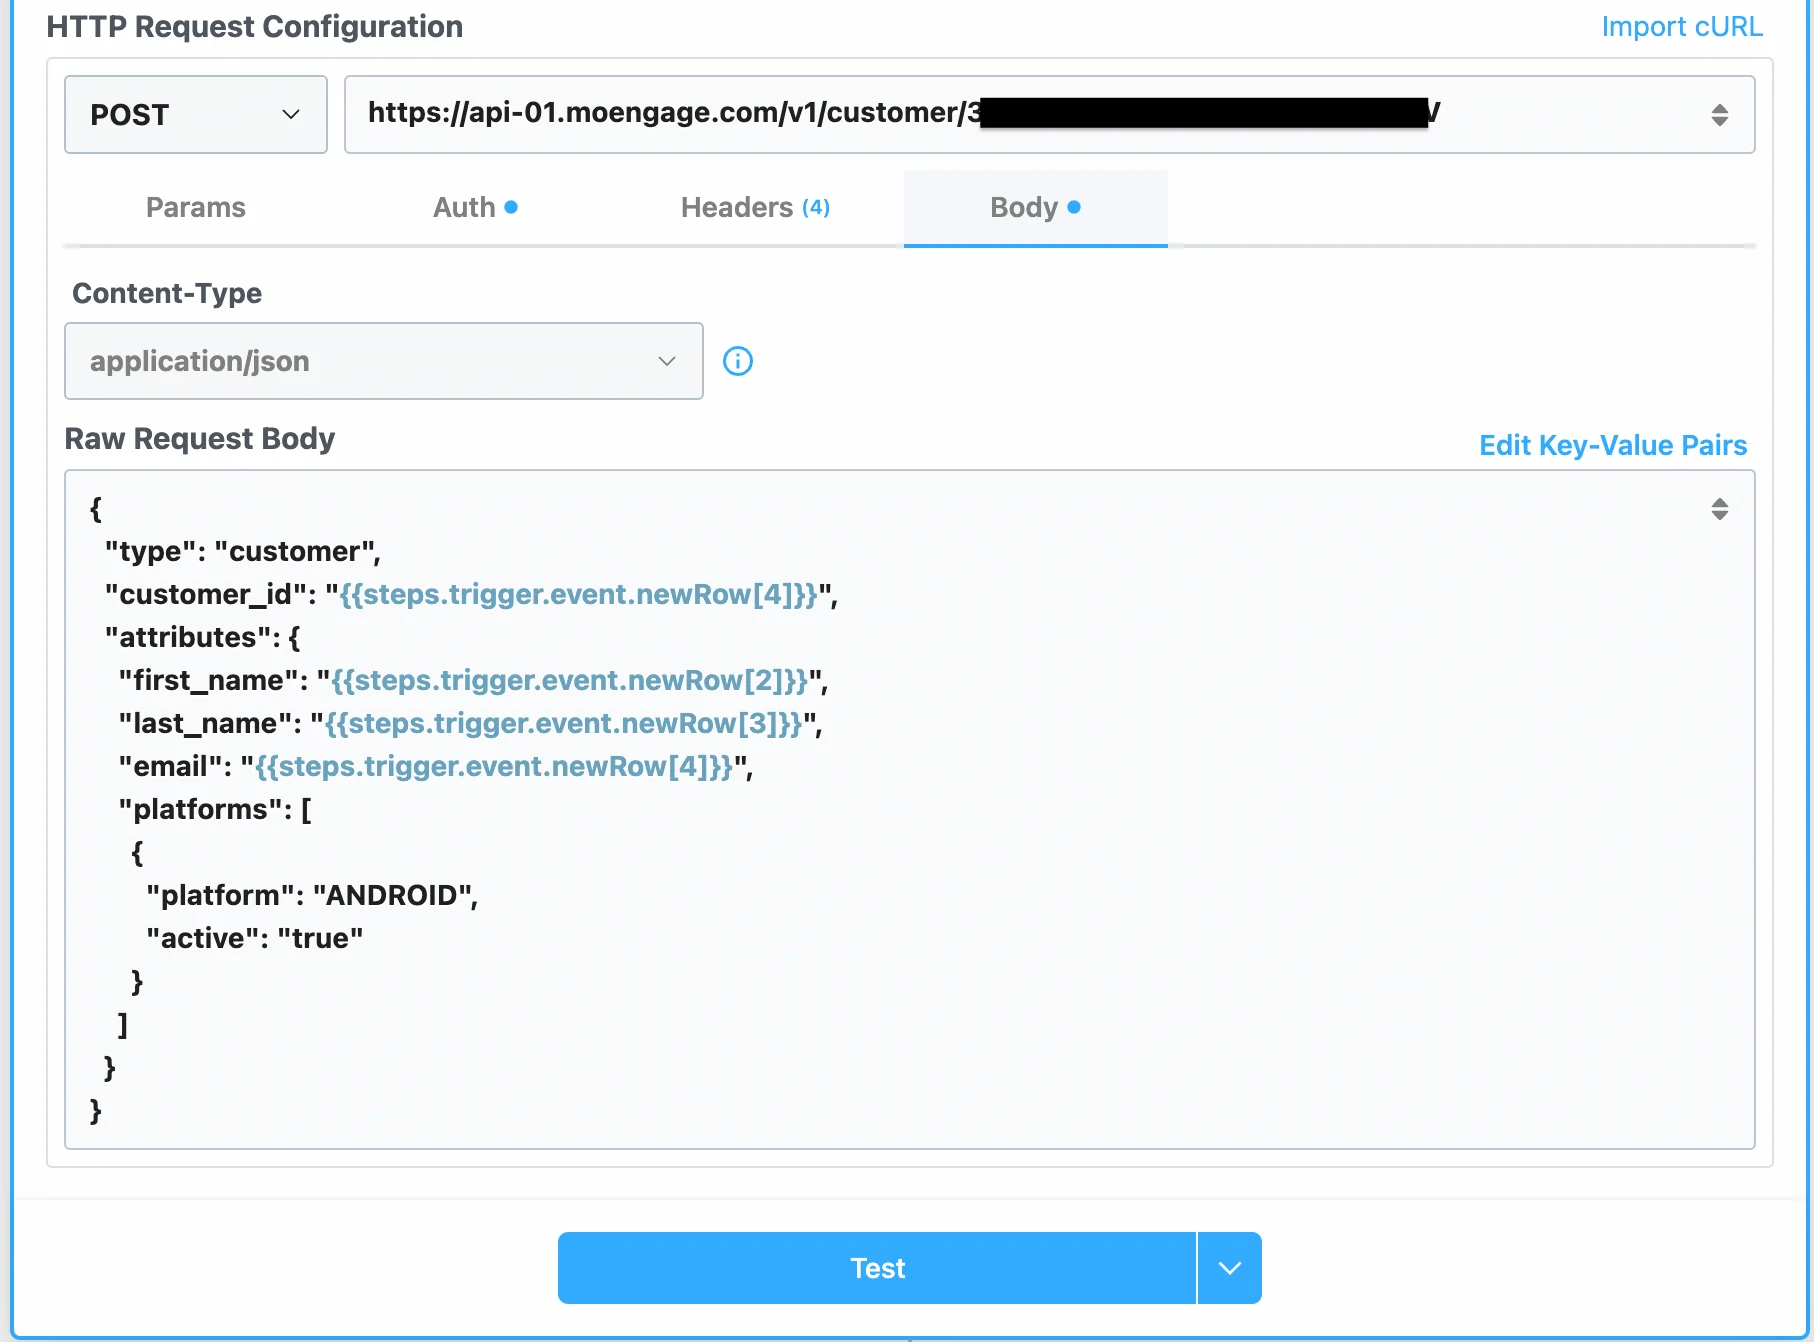
- In the Body tab, select Content-Type as “application/json”.
- Click on the “Edit Raw JSON”.
- Copy and paste the following payload from the User API docs:
- You can now map values from your previous step to this JSON body. Just select the appropriate variable from the Pipedream editor Variable selector dropdown.
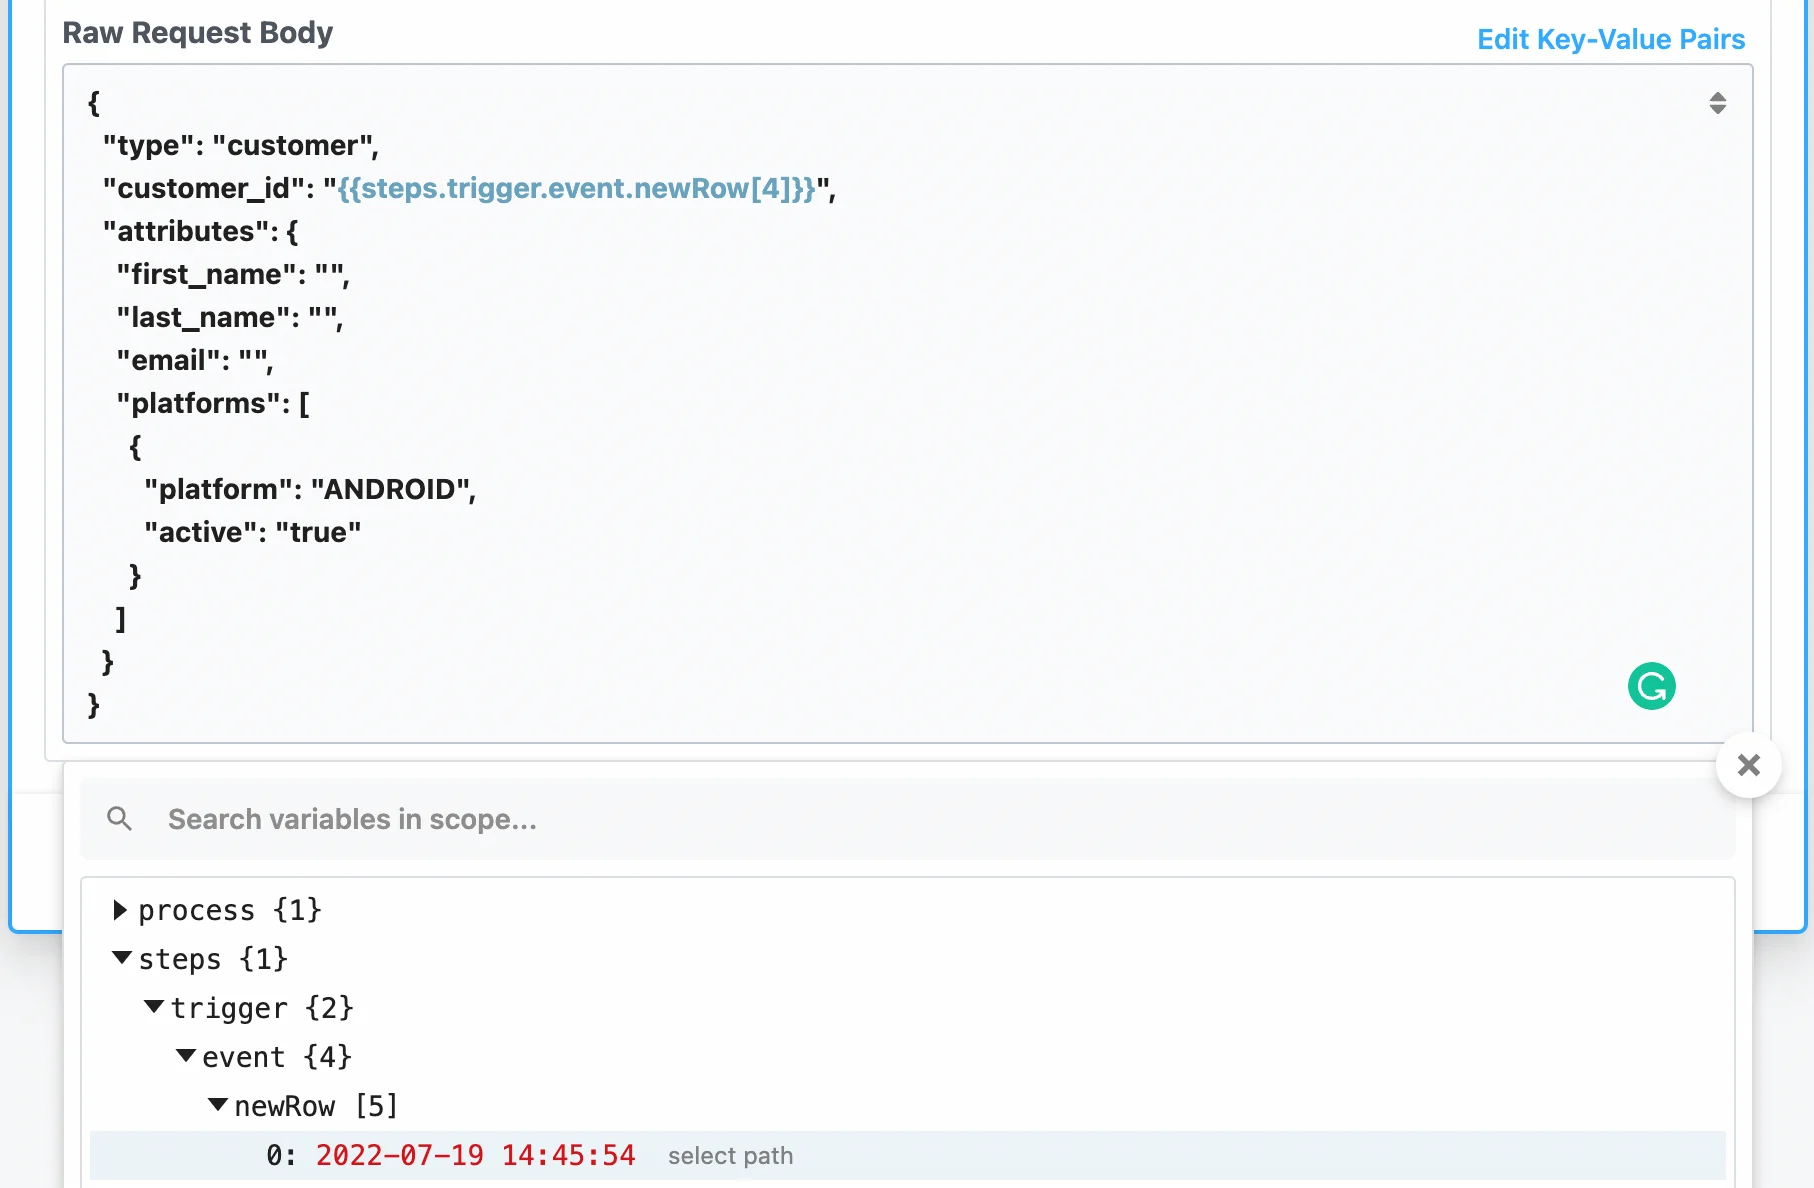
- You can add/remove the fields in the Body as you like. The final payload can look something like this:
- Once you are ready, you can “Test” the step. This will send an API Request to the MoEngage Data Centers.
- If your call is a success, you should see the following in your Results panel:
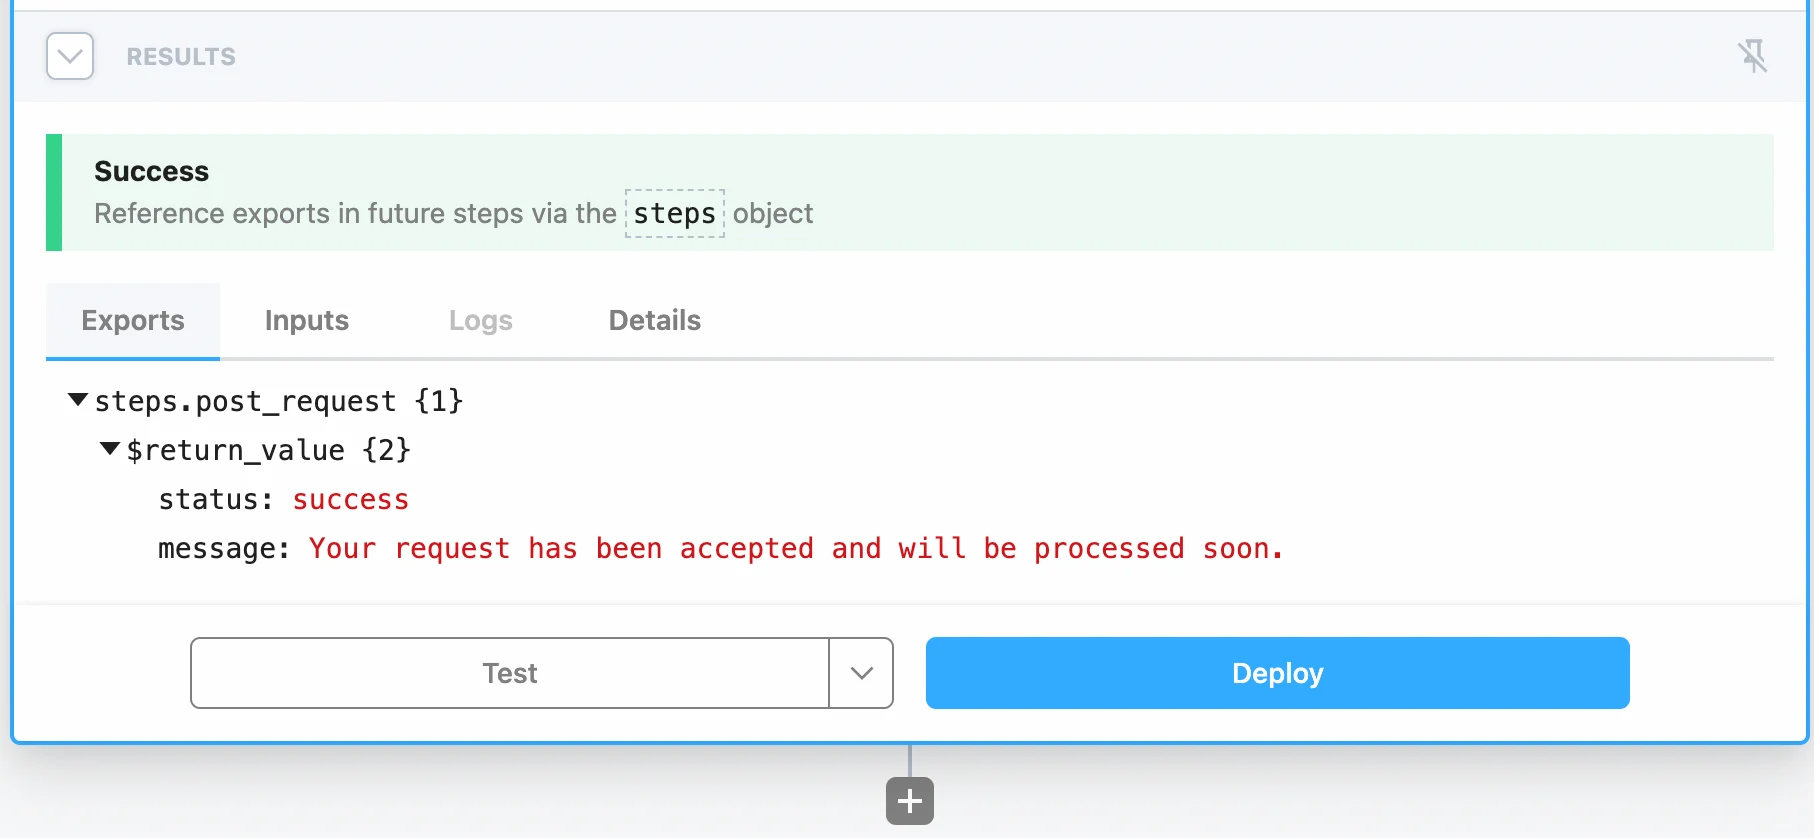
- You can choose to Deploy your workflow once you are happy with the results.