MoEngage × Criteo
The integration between MoEngage and Criteo enables you to transfer user data to Criteo. This allows you to deliver advertisements based on behavioral triggers and segmentation.Use Cases
Integrating Criteo with MoEngage helps you solve the following use case:- Enhanced user engagement and conversions : You can target high-value users via multiple channels to drive purchases or engagement.
- Re-engagement of less responsive users : You can target users who are less responsive to other marketing channels by showing them targeted display ads based on their past behavior.
- Optimized advertising spend : You can create suppression audiences to prevent users from receiving advertisements when they’re already loyal consumers of your brand.
- Efficient new user acquisition : You can create lookalike audiences to acquire new users more efficiently.
Integration
- Criteo ad account : To use this feature, you must have an active advertising account with Criteo.
- Criteo advertising guidelines and Criteo brand safety guidelines : As an active Criteo customer, you must ensure that you can comply with Criteo’s advertising and brand safety guidelines prior to launching any Criteo campaigns.
- Criteo’s marketing APIs : Use Criteo’s marketing APIs to sync audiences or users to Criteo through MoEngage. You must have a Criteo App and an Ad account to use these marketing APIs. You can use your existing app and Ad account or create a new one to connect with MoEngage.
- Criteo Ads is part of the Connected Segments add-on. Contact your dedicated MoEngage CSM (customer success manager) to enable it for your account.
Step 1: Create a Developer App on Criteo
A Criteo developer account is required to use Criteo marketing APIs on MoEngage.
- Go to the Criteo Developers Dashboard.
- Log in to your existing Criteo account or contact your Criteo representative to create an account.
- Create your organization. For more information, refer here.
- Create your App. For more information, refer here.
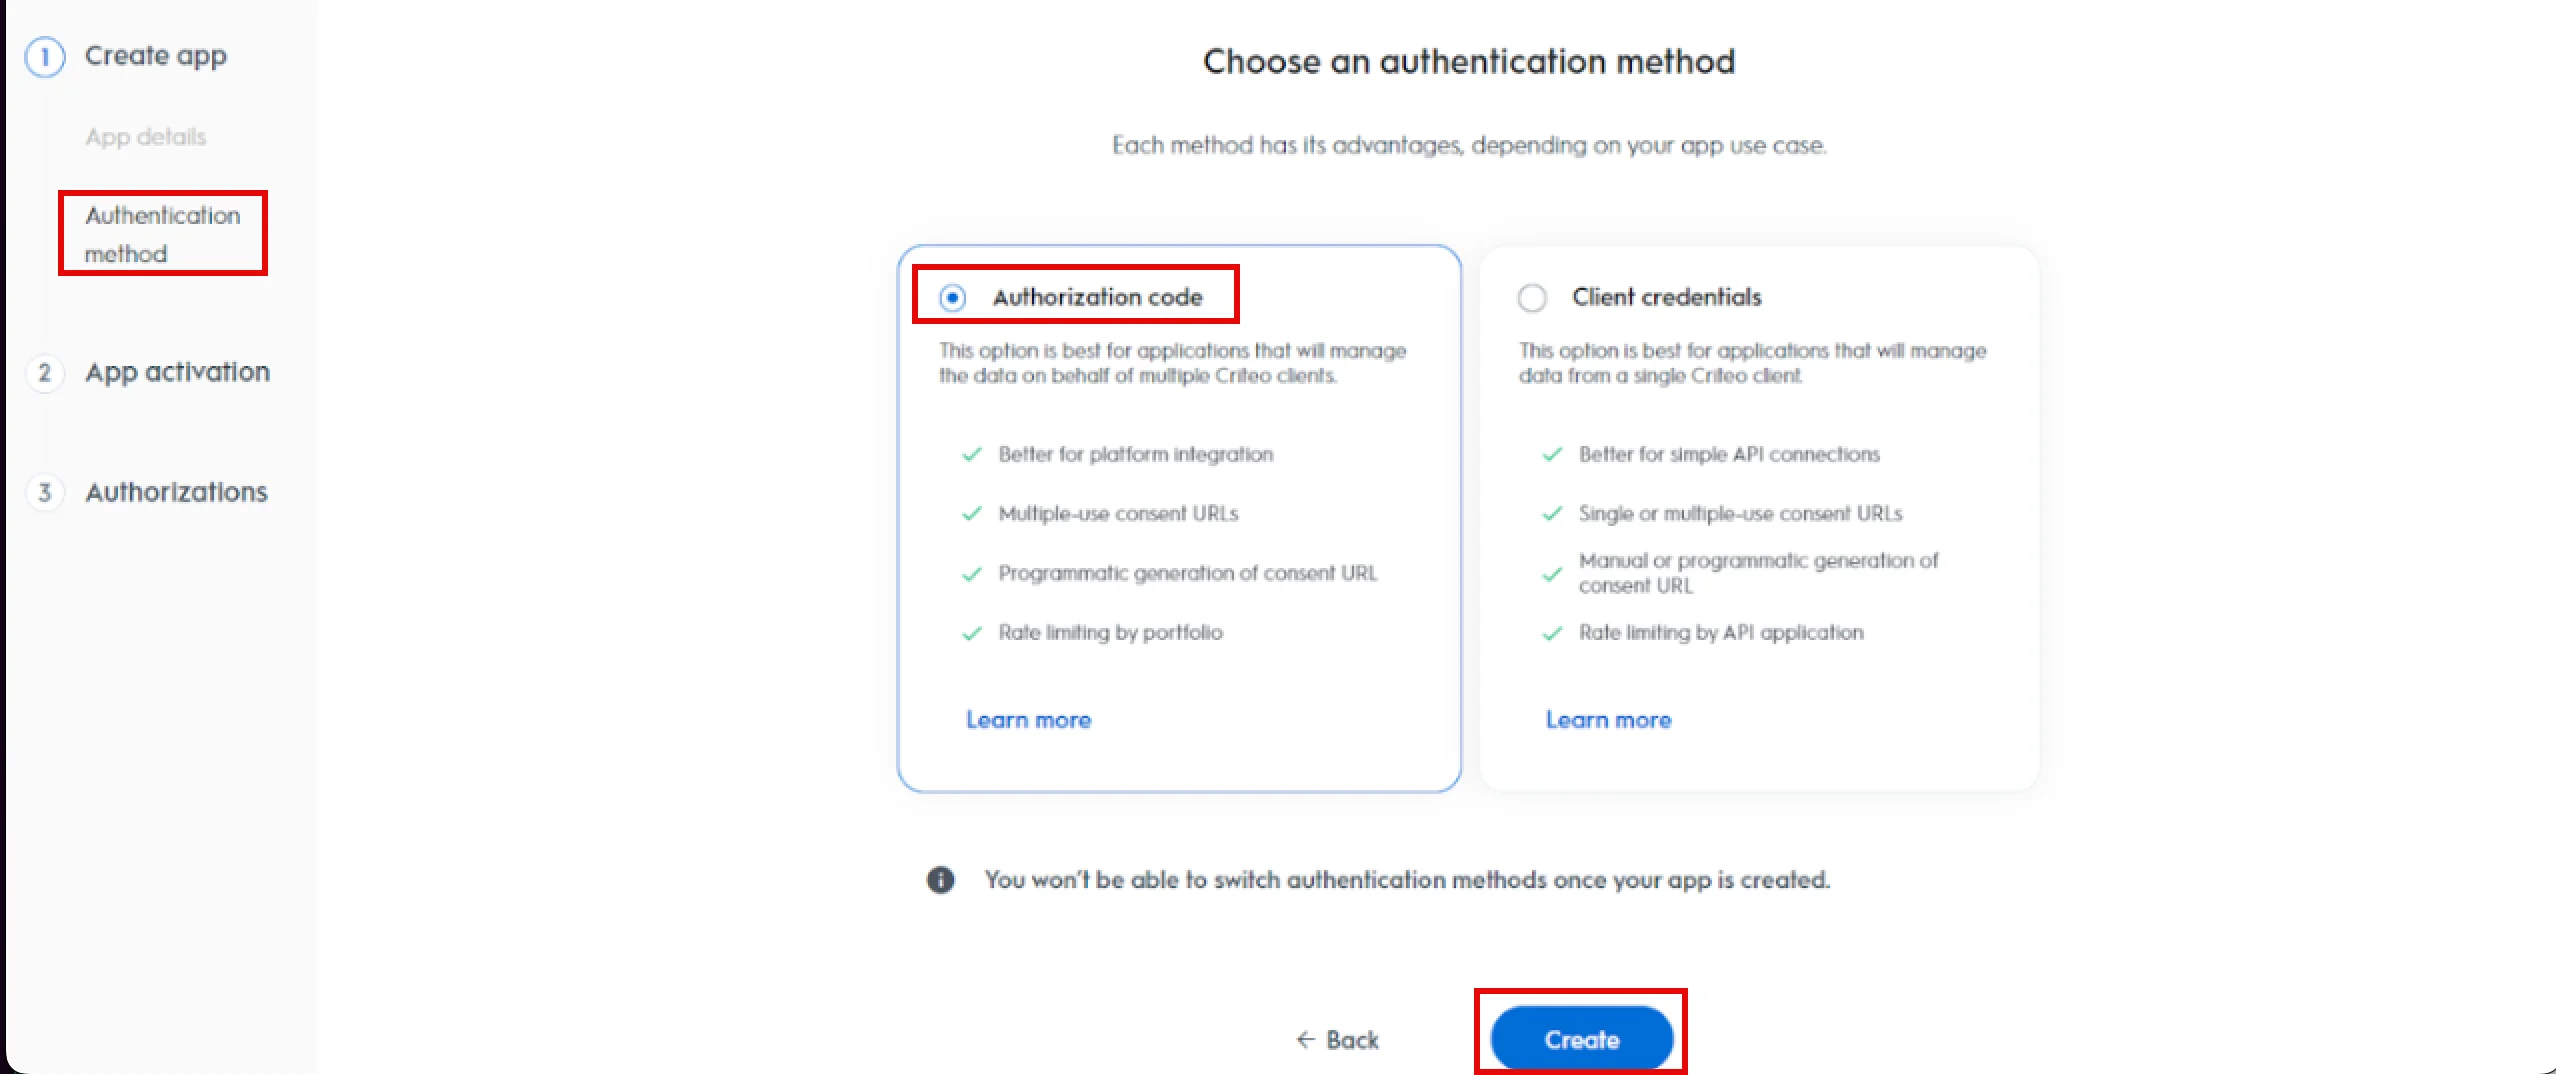
- In the Authentication Method step, select Authorization code as the method and click Create. For more information, refer Authentication Method.
Note : Ensure you select Authorization code as the only method for authentication.
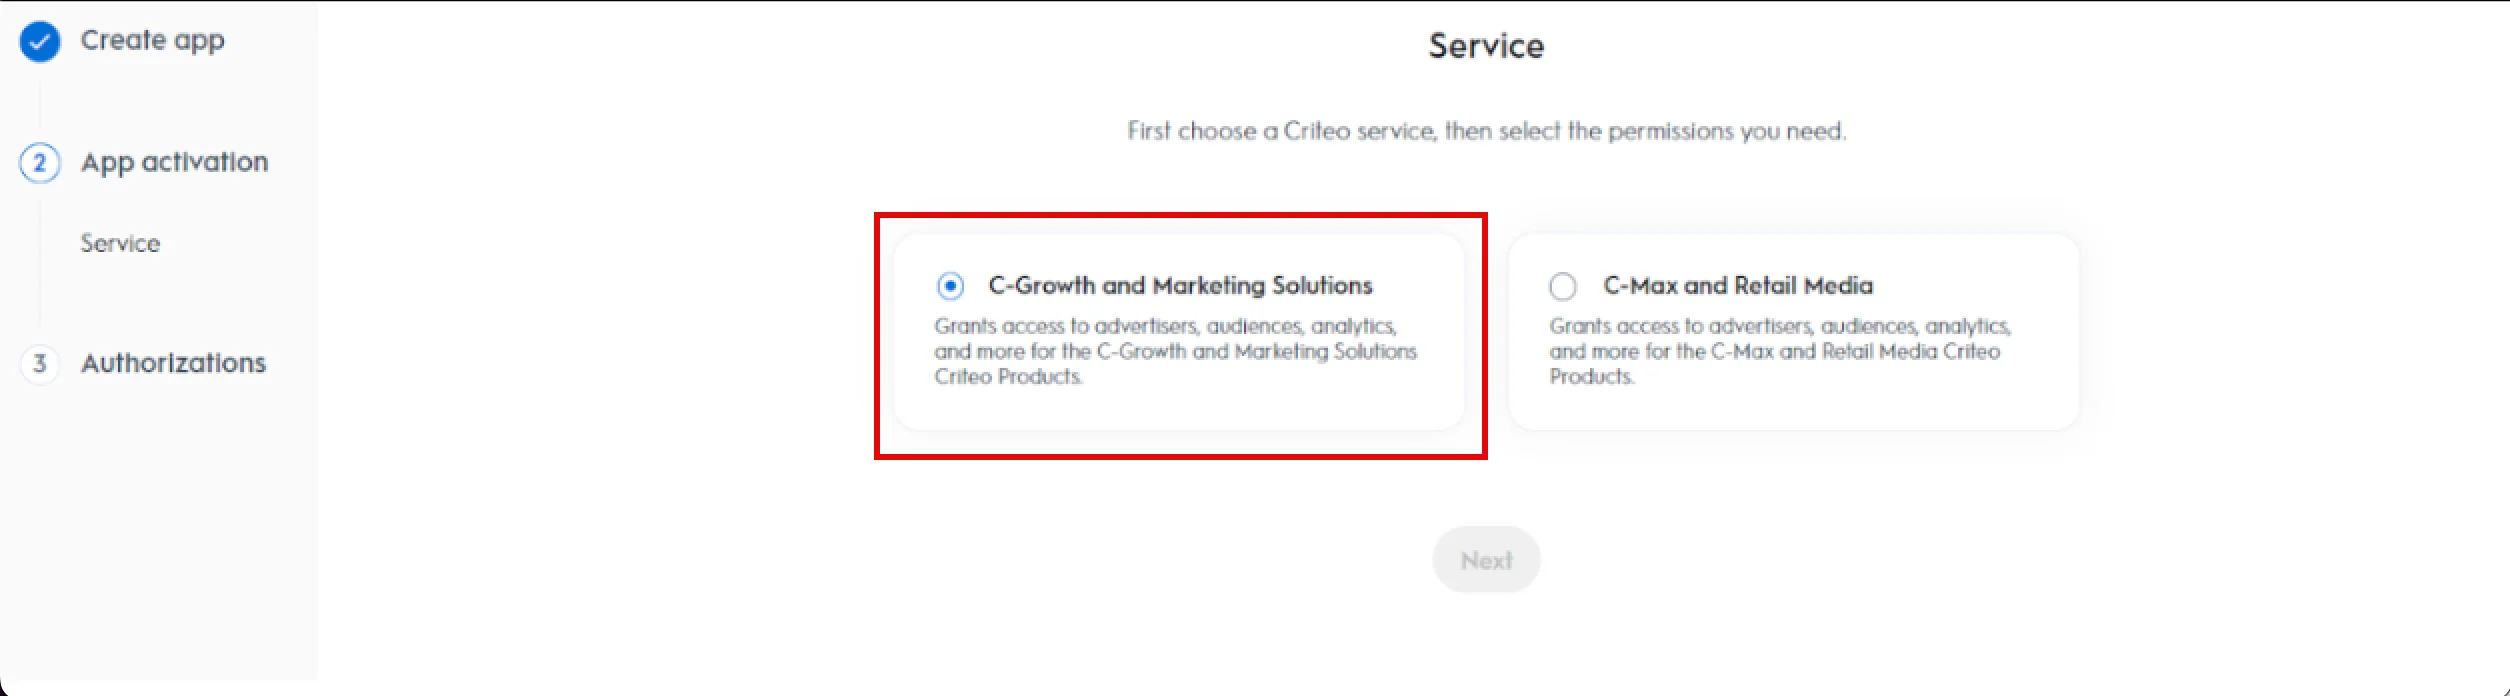
You are taken to theApp activation step. - Select the C-Growth and Marketing Solutions and click Next.
You are taken to the Authorizations step. - For the Audiences domain, select Manage from the associated Authorization list and click Activate app.
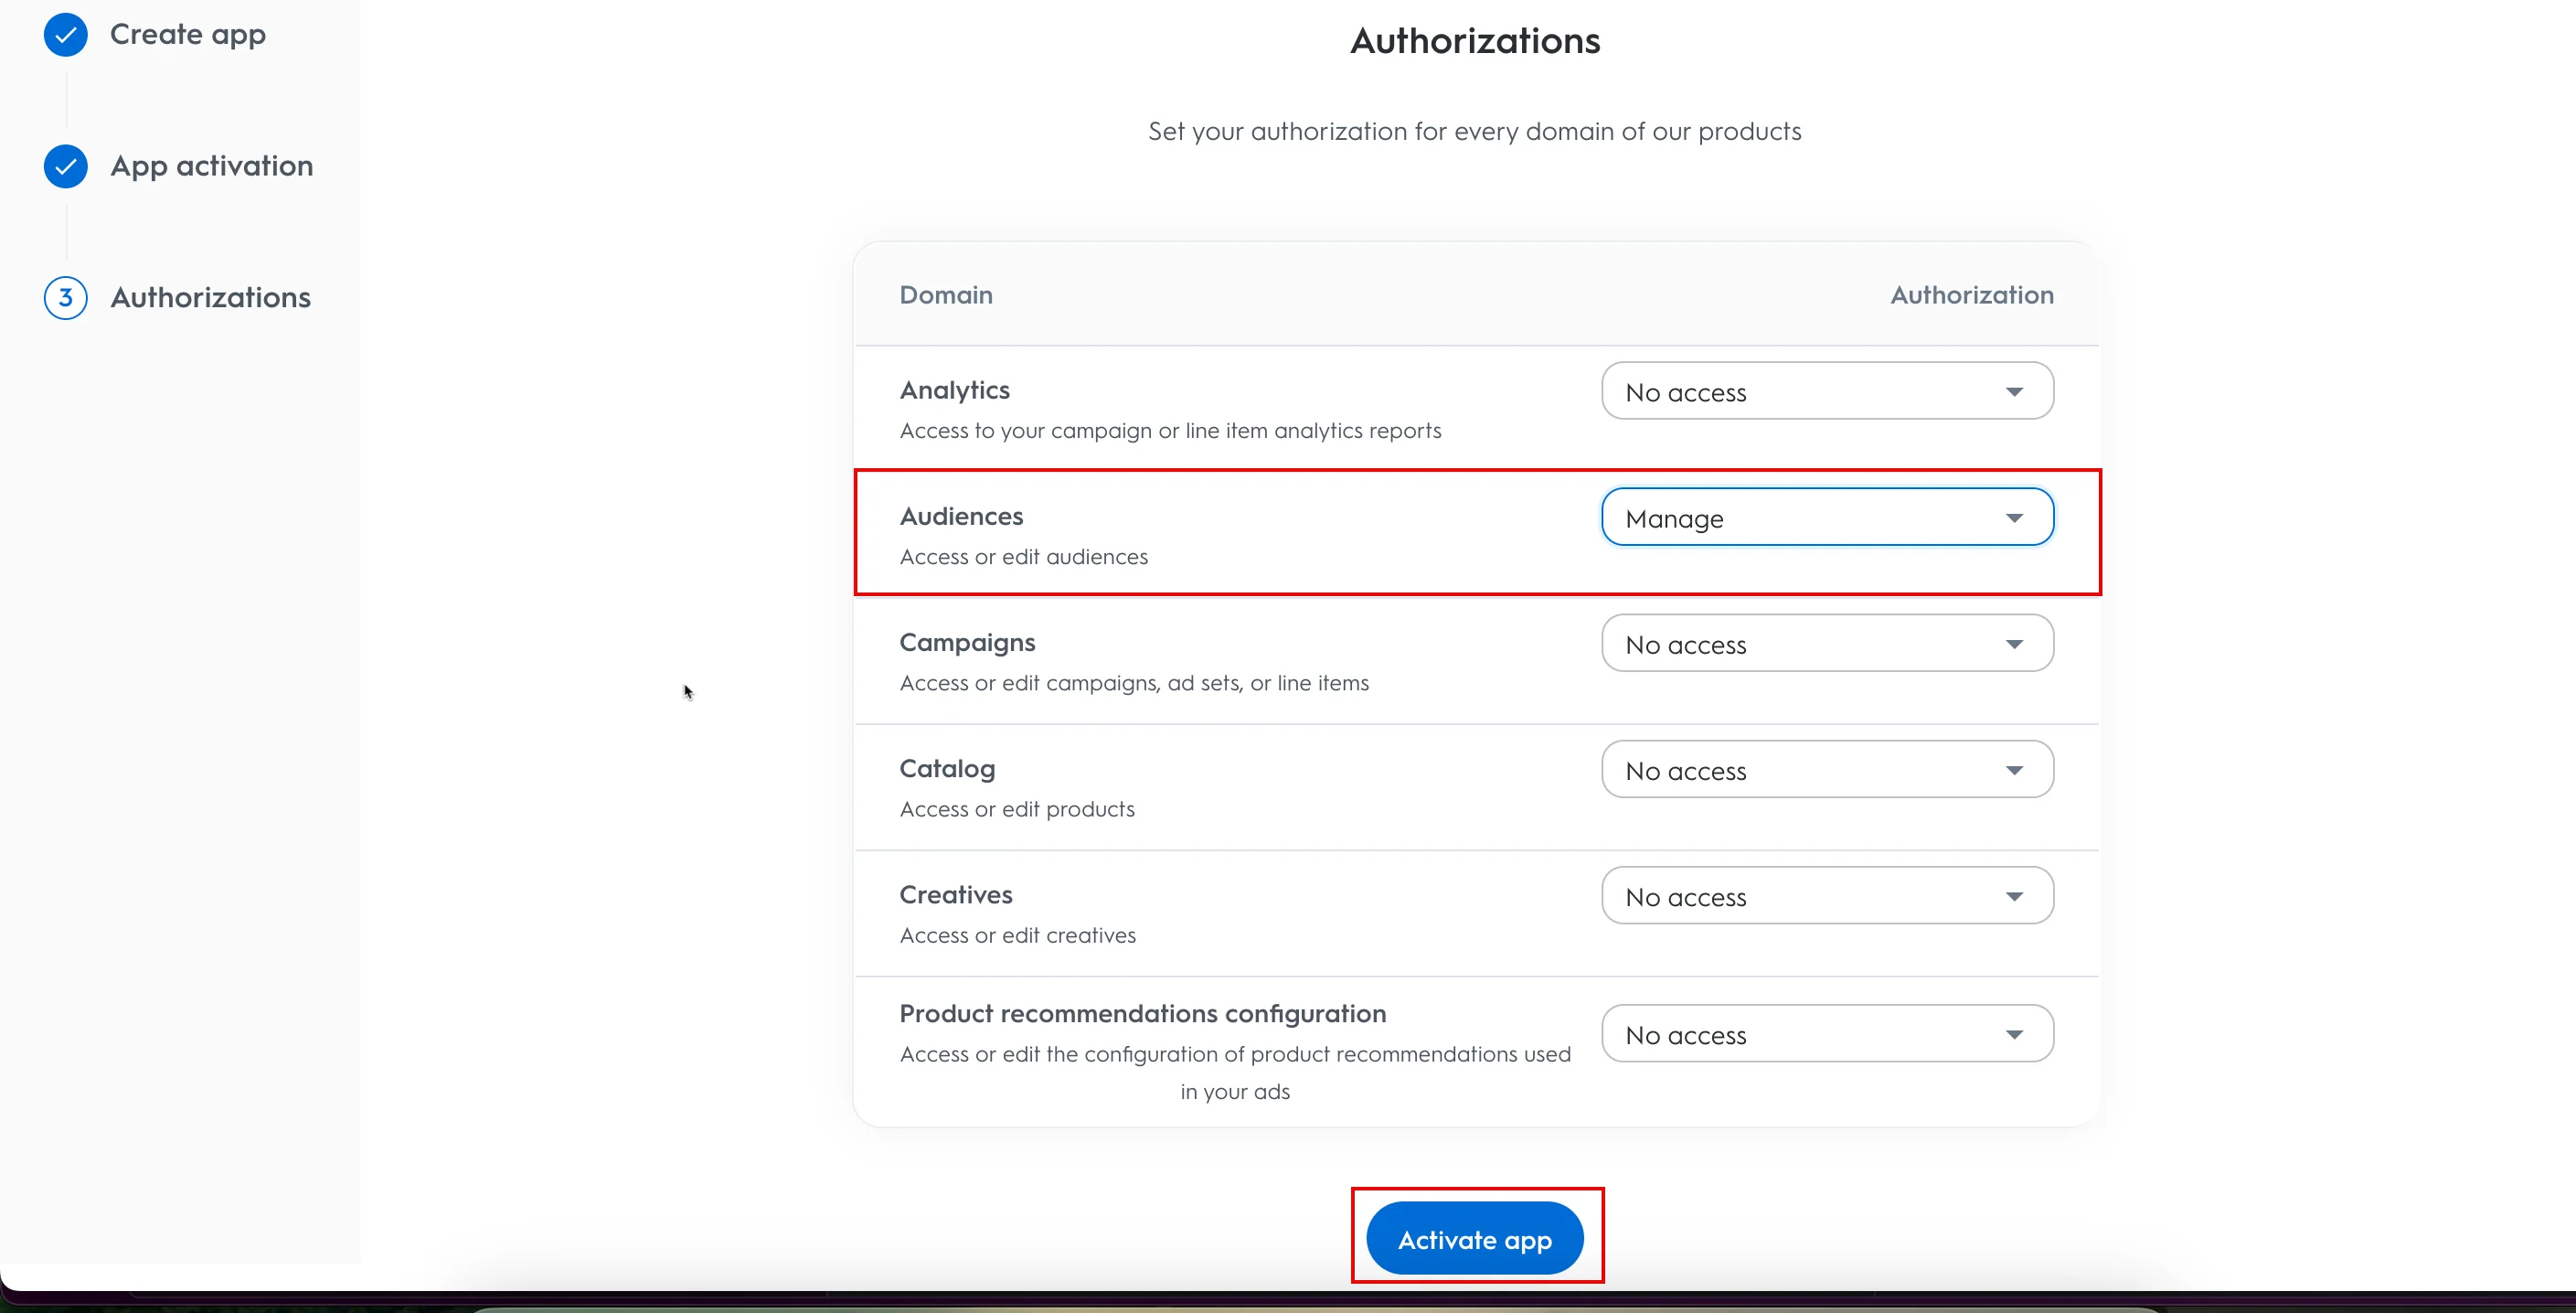
A pop-up window will appear, prompting you to review the instructions properly to activate your Criteo app. - Click Activate.

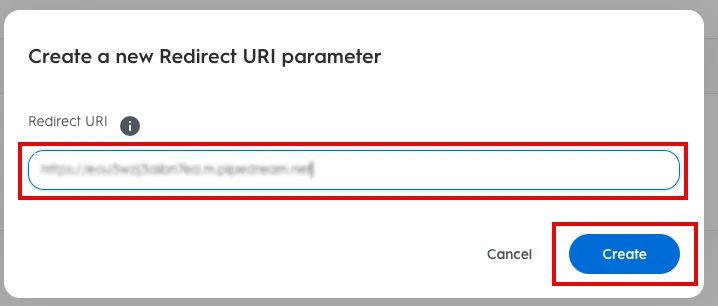
Your app is now activated successfully. You are taken to the Application details page. - You are on the App Settings tab by default. Under Redirect URs , click Create a new Redirect URI.
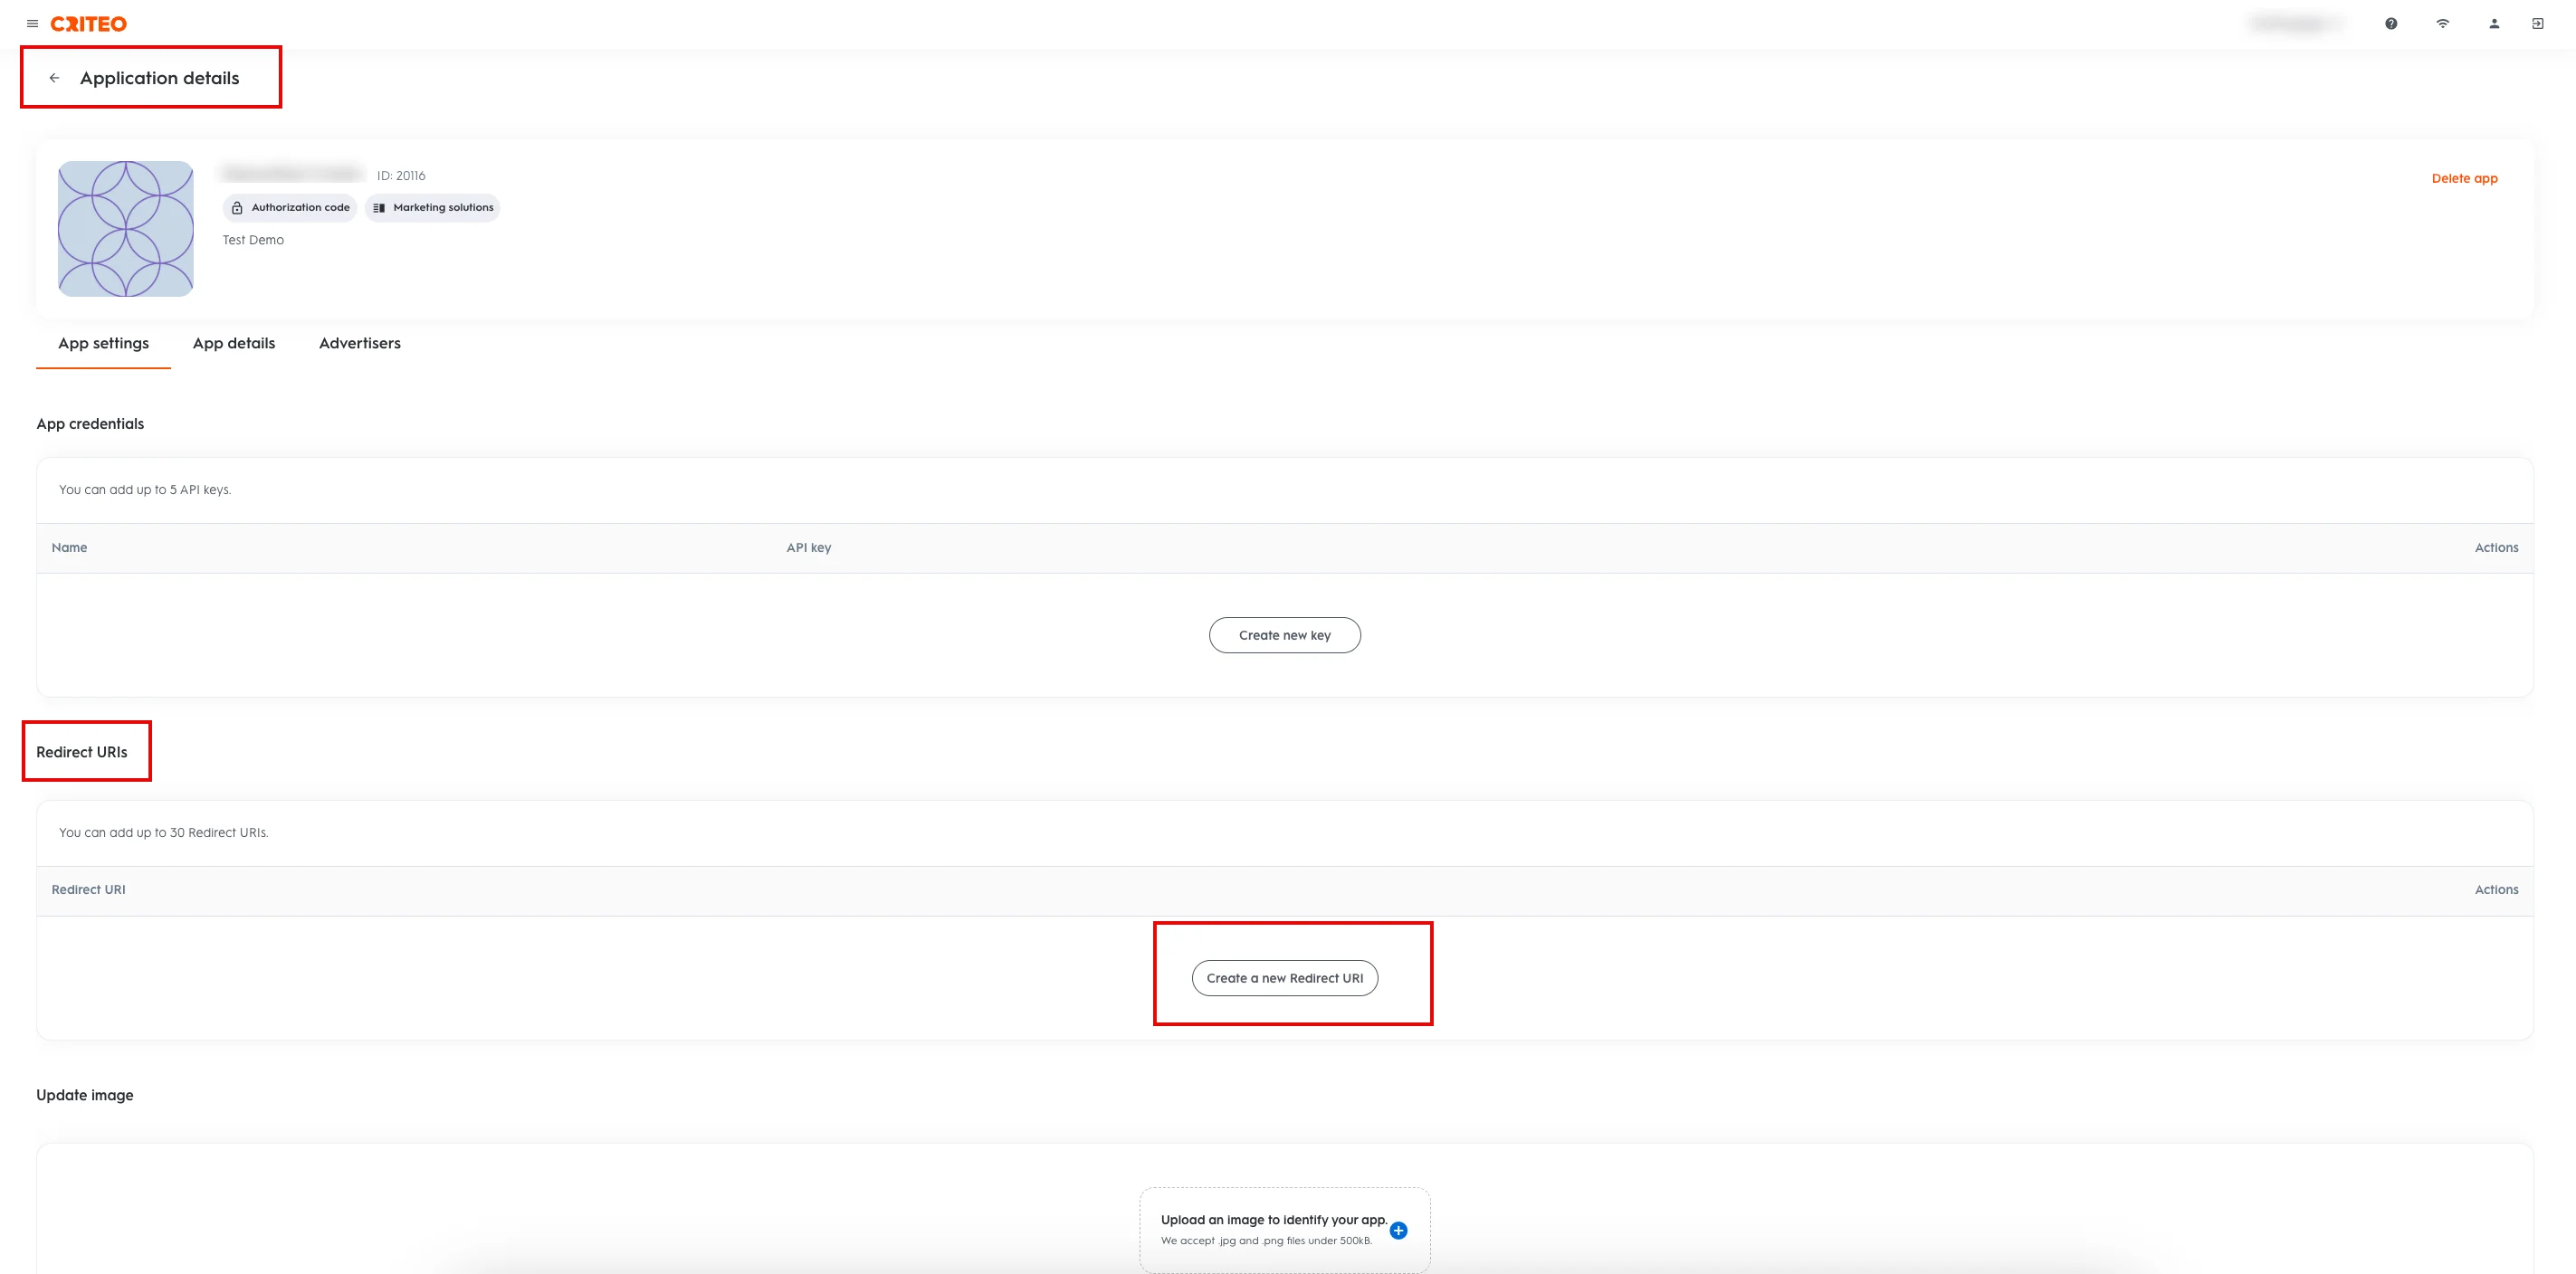
- The Create a new Redirect URI parameter pop-up window will appear. Type the specific URL in the Redirect URL box based on your following MoEngage data center:
- Click Create.
The Redirect URI is now successfully created. - Under App credentials , click Create new key.
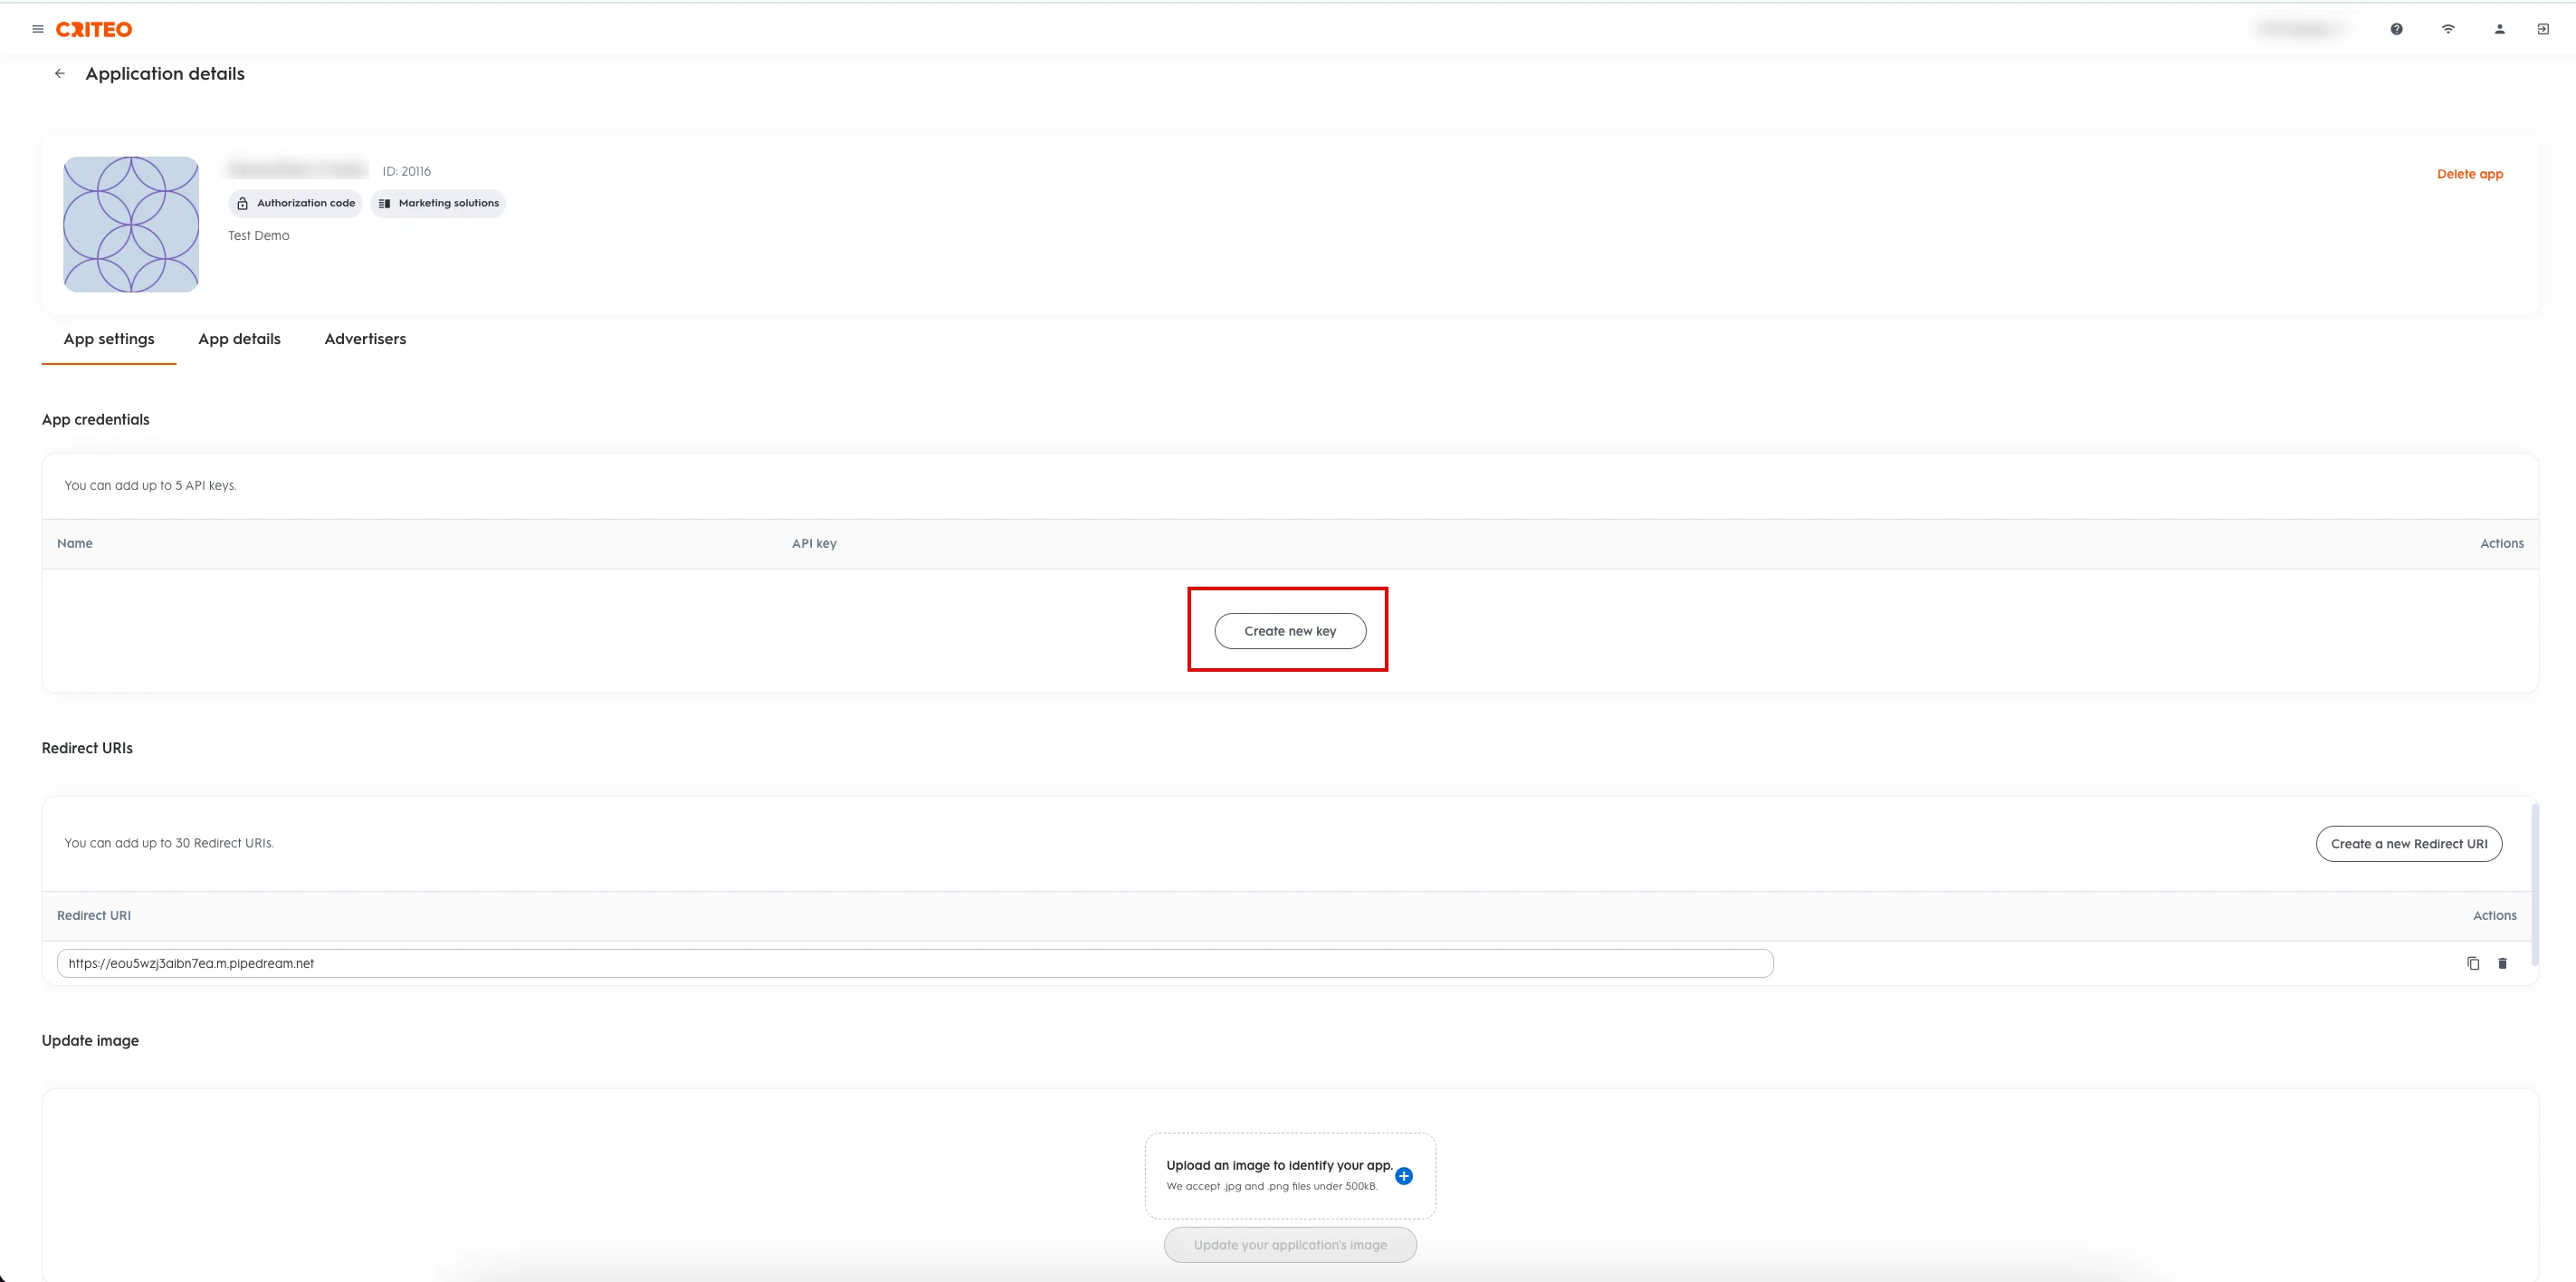
Your API key credentials are now successfully downloaded.
You can access your Client ID and Client Secret from the downloaded API key file. The Client ID and Client Secret keys are required to set up the Criteo integration on the MoEngage App marketplace.
Step 2: Connect Criteo on the App Marketplace
To connect Criteo on the App marketplace, perform the following steps:- On the left navigation menu in the MoEngage dashboard, click App marketplace.
- On the App Marketplace page, search for Criteo.
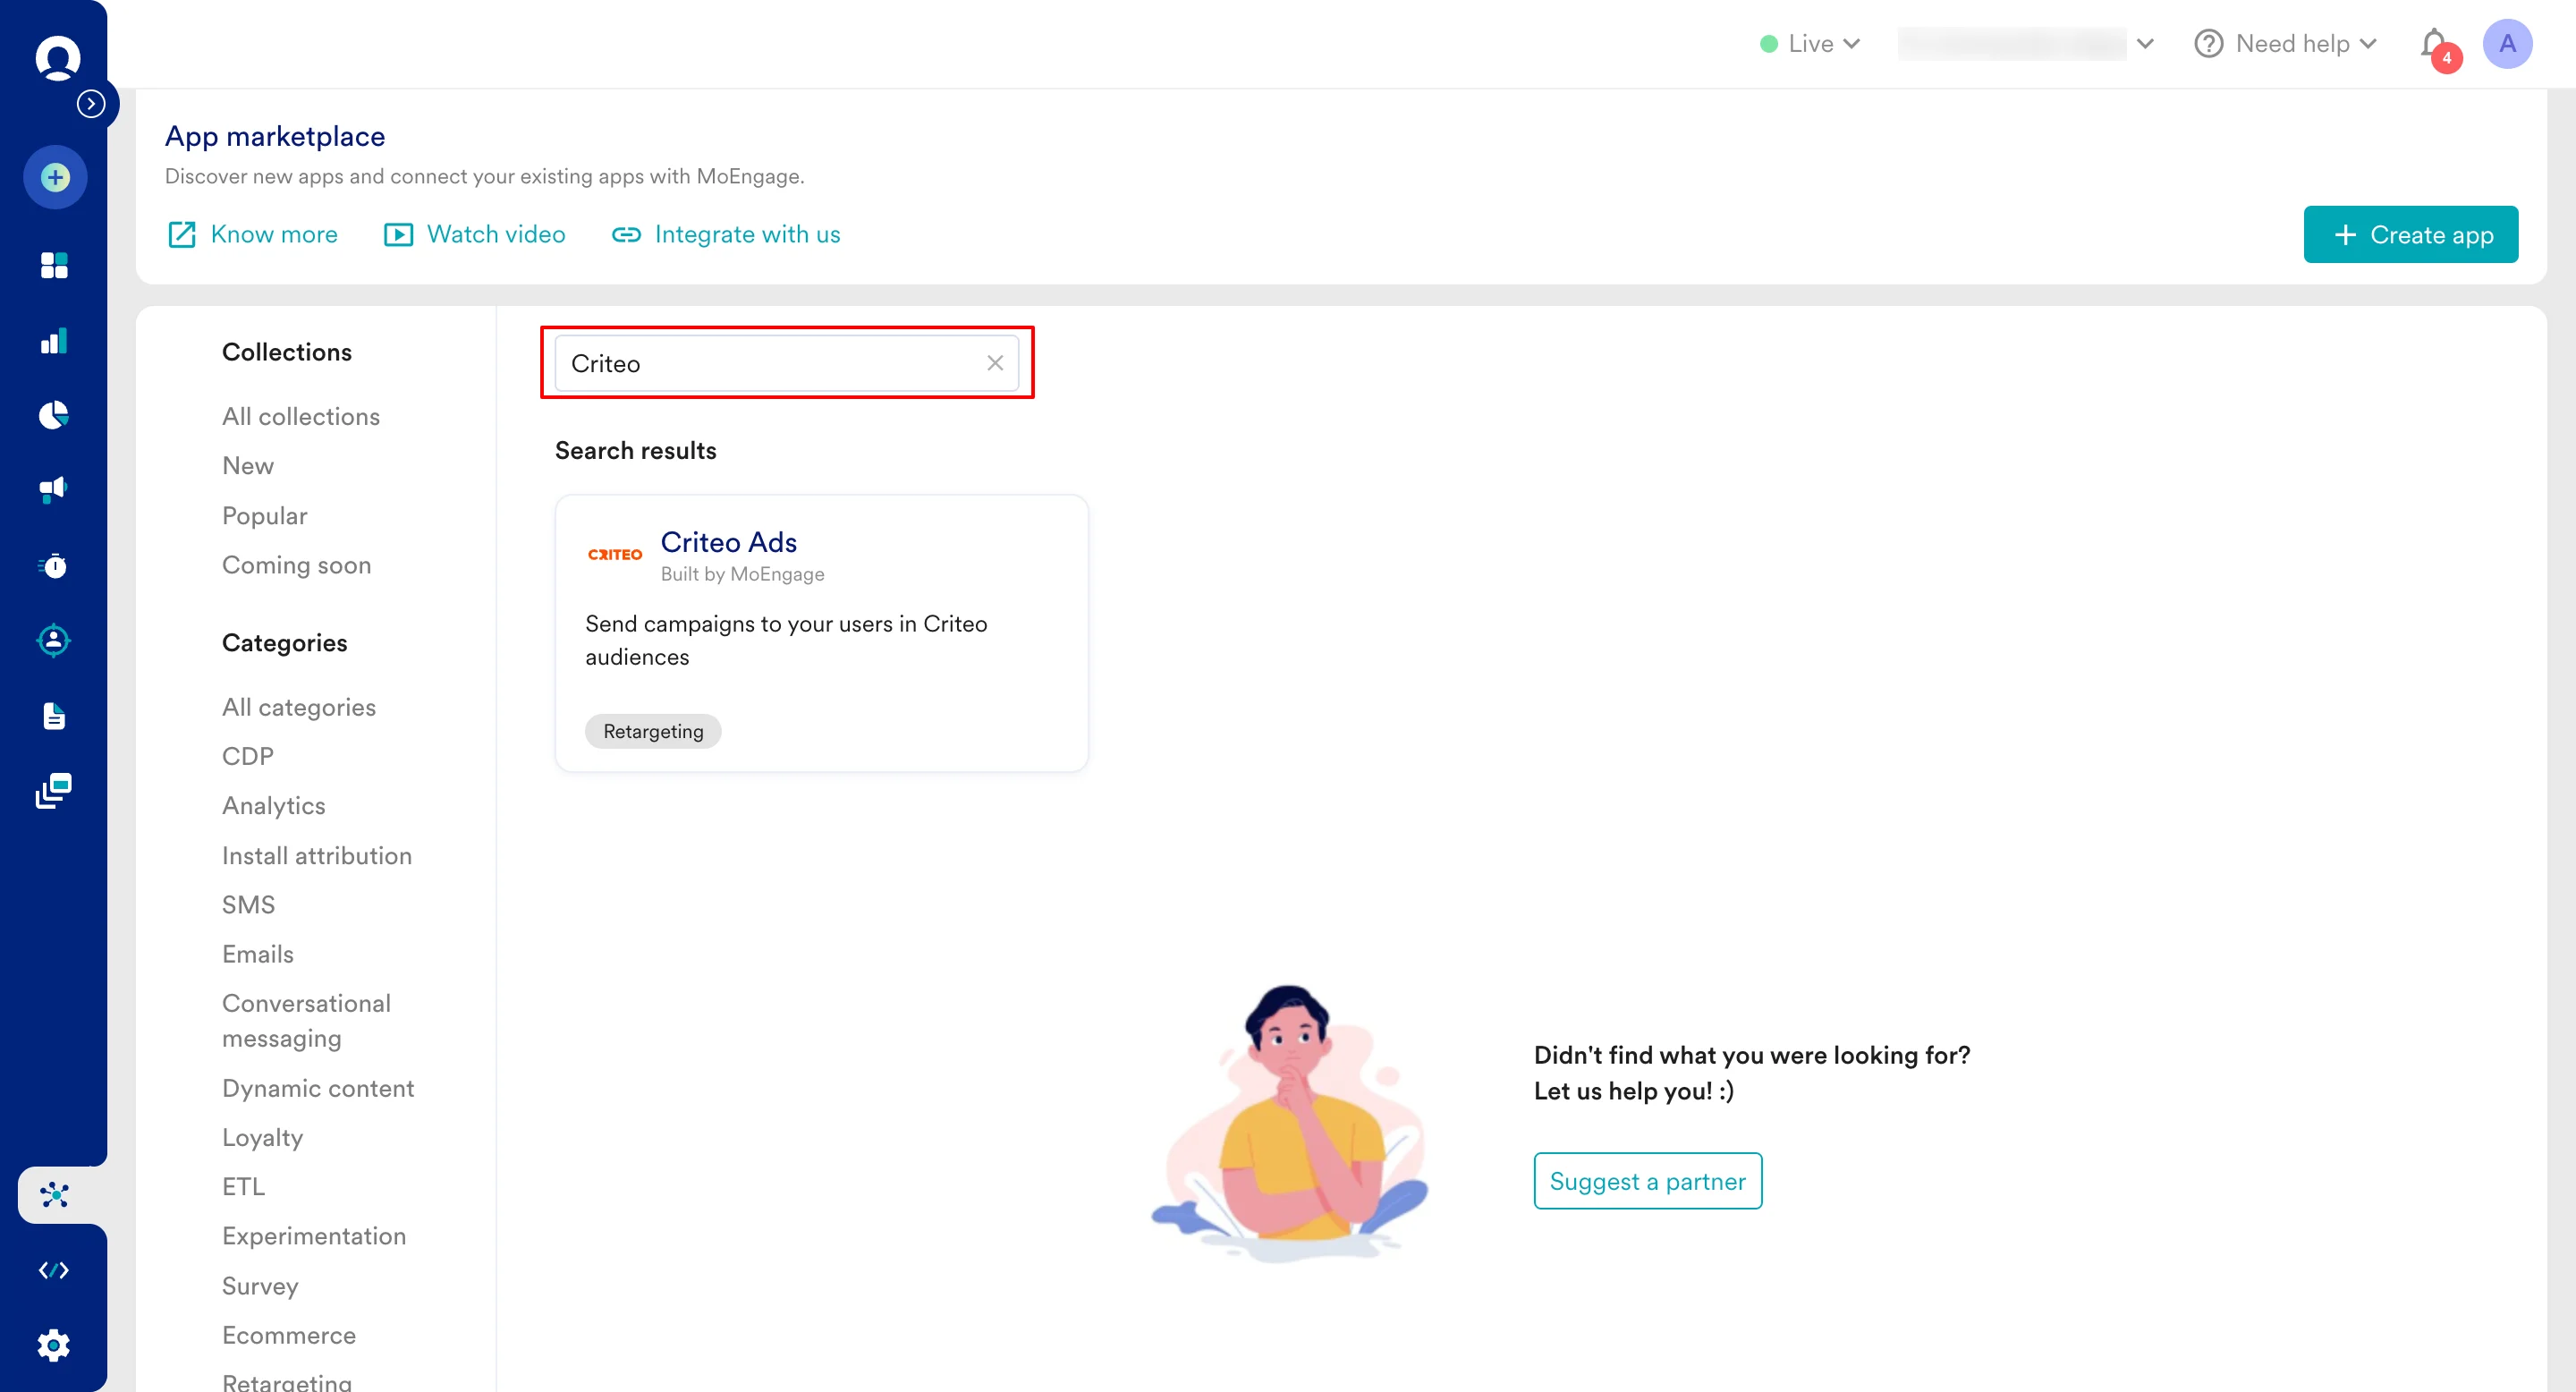
- Click the Criteo Ads tile.
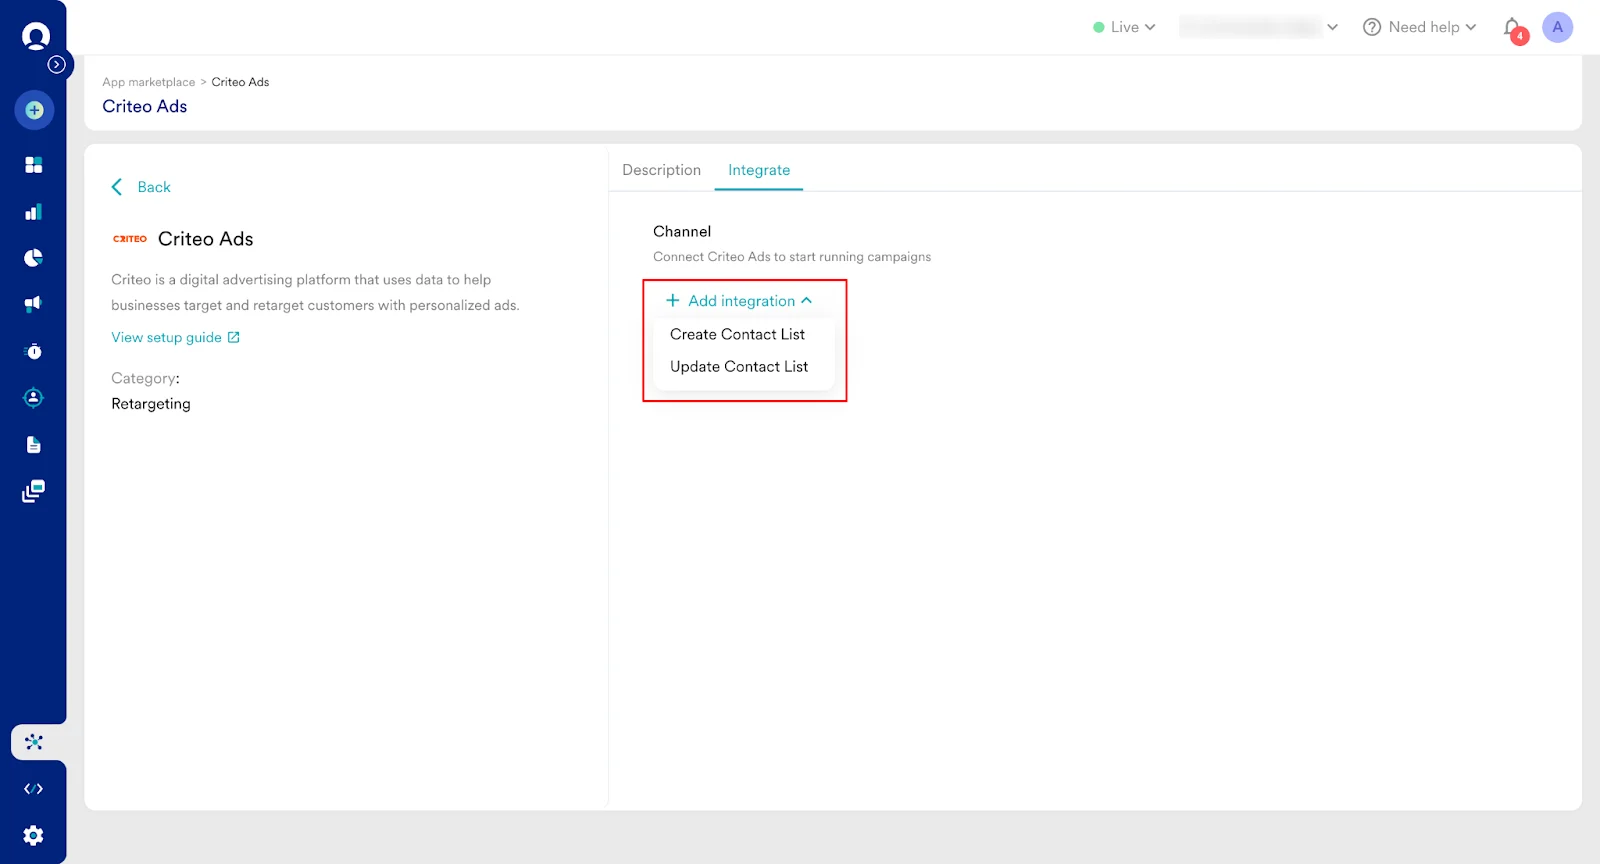
- On the Criteo Ads partner page, go to theIntegrate tab.
- Click the
 arrow and then select one of the following options:
- Create Contact List
- Update Contact List
- Enter the following details:

- Click Connect. Your Criteo connection is now integrated.
Step 3: Create a Campaign on MoEngage to Sync Audiences to Criteo
To create a campaign on MoEngage, perform the following steps:- On the left navigation menu in the MoEngage dashboard, click Engage , and then click Campaigns.
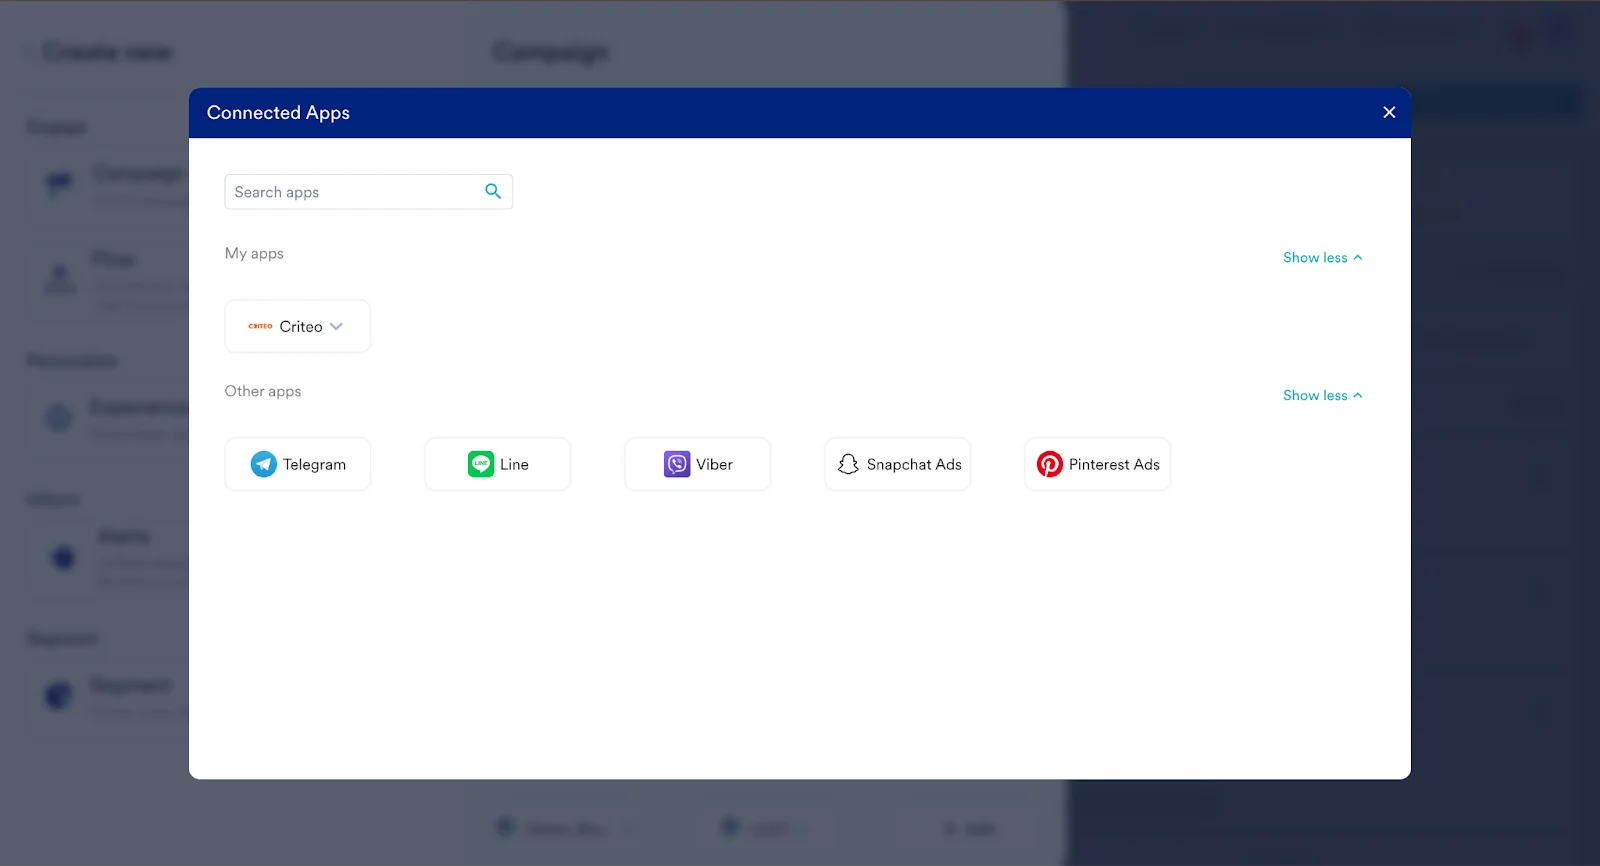
- On the All campaigns page, click**+ Create campaign**.
- On the Create campaign dialog box, under Connected Apps , click Criteo Ads and then click the most suitable delivery type.
- Under Select audience , click Filter users by.
- On the User property tab, select the user segment for Criteo syncing. You can combine this with other segment criteria.
- In step 2 of the campaign, Content , select the pre-configured connectors and specify the content you want to send out. Enter the following details:

Sync to an existing Audience on Criteo
If you want to add/remove users from an existing Audience on Criteo, you would need to provide that Audience’s ID. You can view the audience on Criteo by going into your Criteo Audience Library:- Click the menu in the top left corner >> Assets and select Audiences.
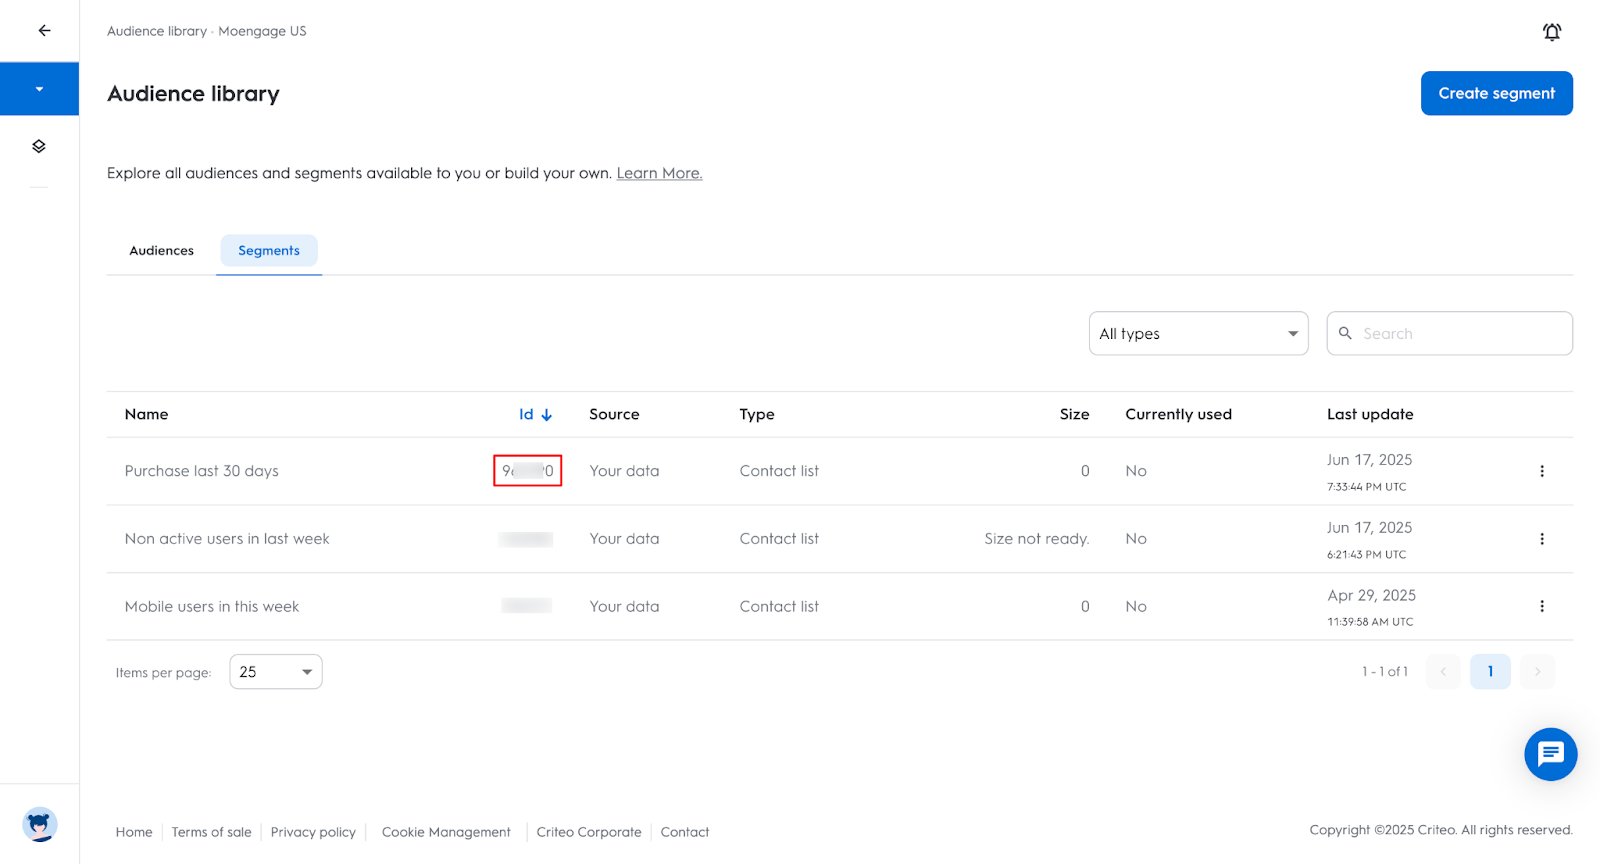
- Under Audiences >> select Audience Library and select the Segments tab.
- View your Segment ID by locating your desired Segment.
- Note down the Segment ID from the ‘Id ’ column:
Create a new Audience on Criteo
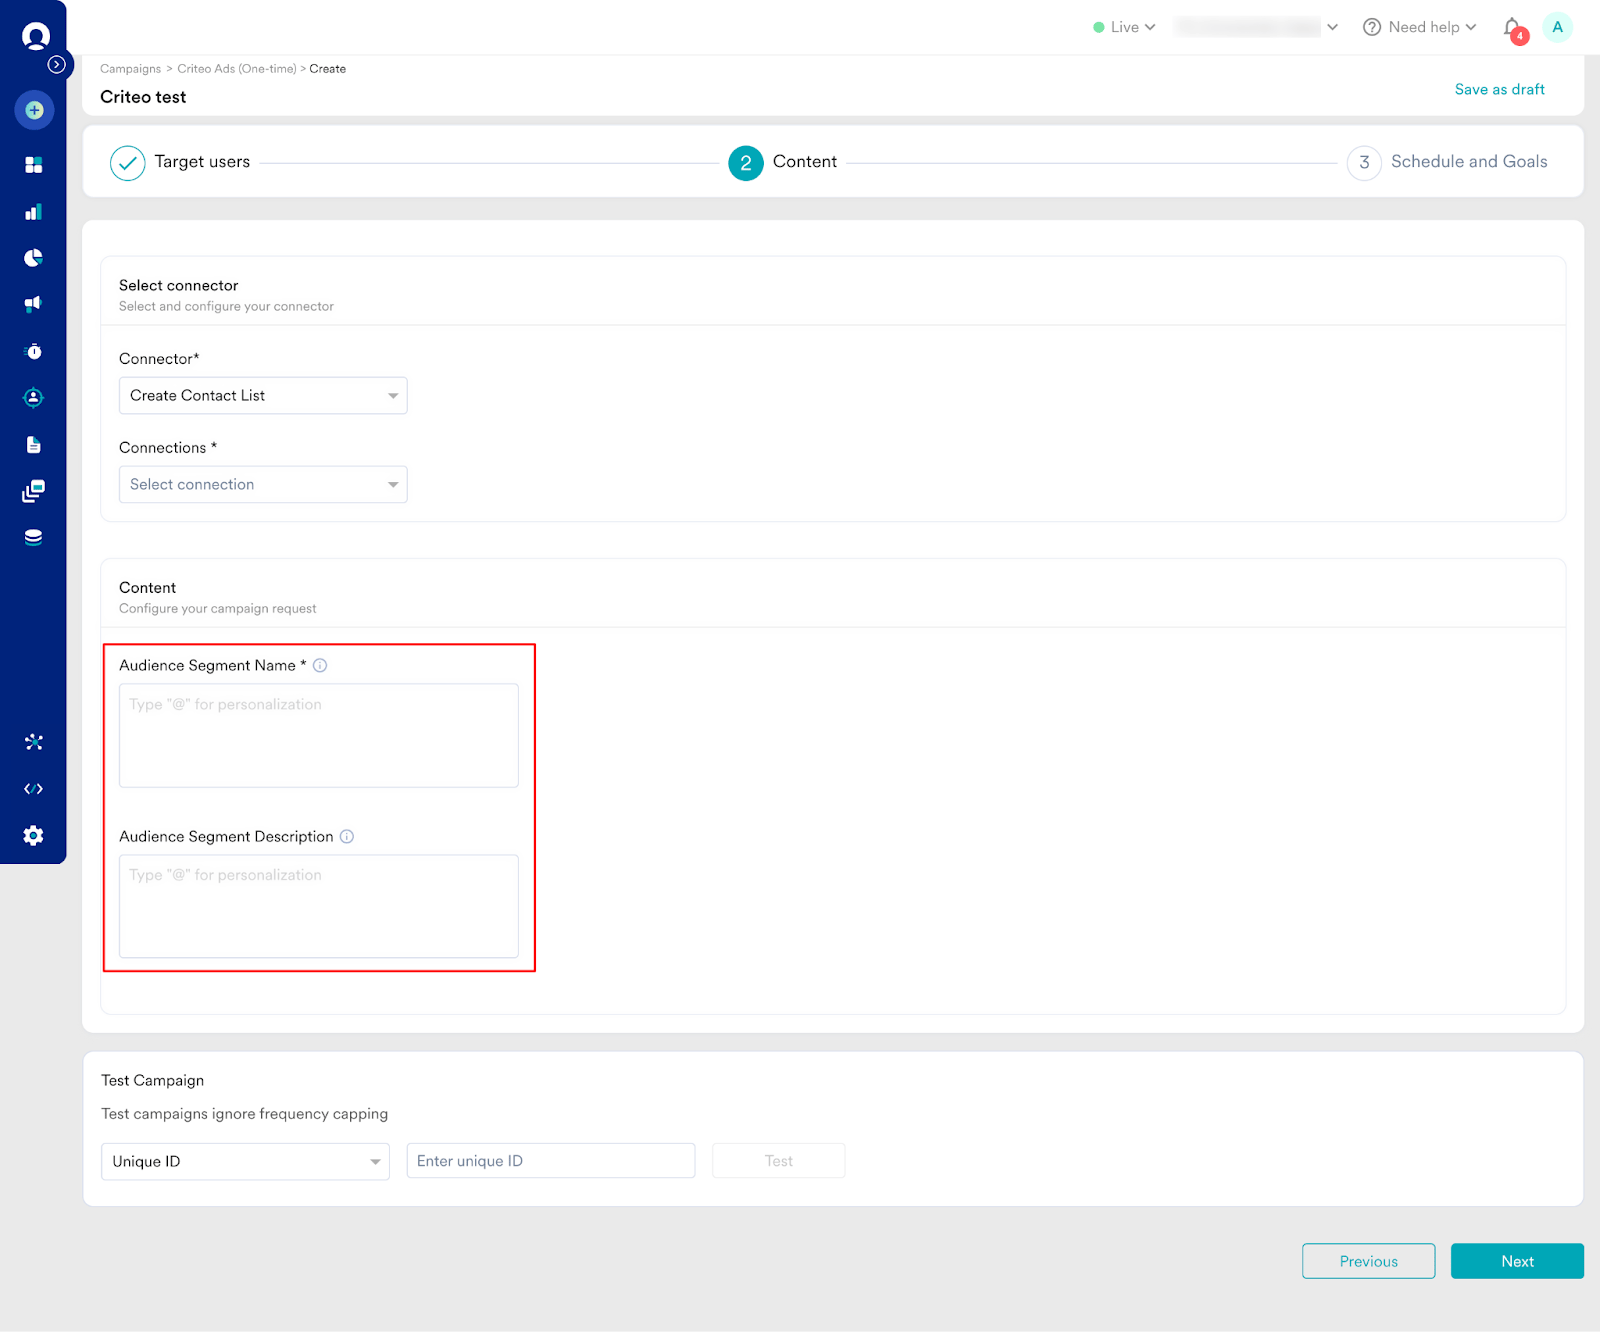
To create a new Audience on Criteo, you can use the “Create Contact List” connector below. Follow these steps:- Select the “Create Contact List” connector and the connection you created.
- Enter the Audience Segment Name and other required details as stated below.
- Run a test campaign and observe the response:
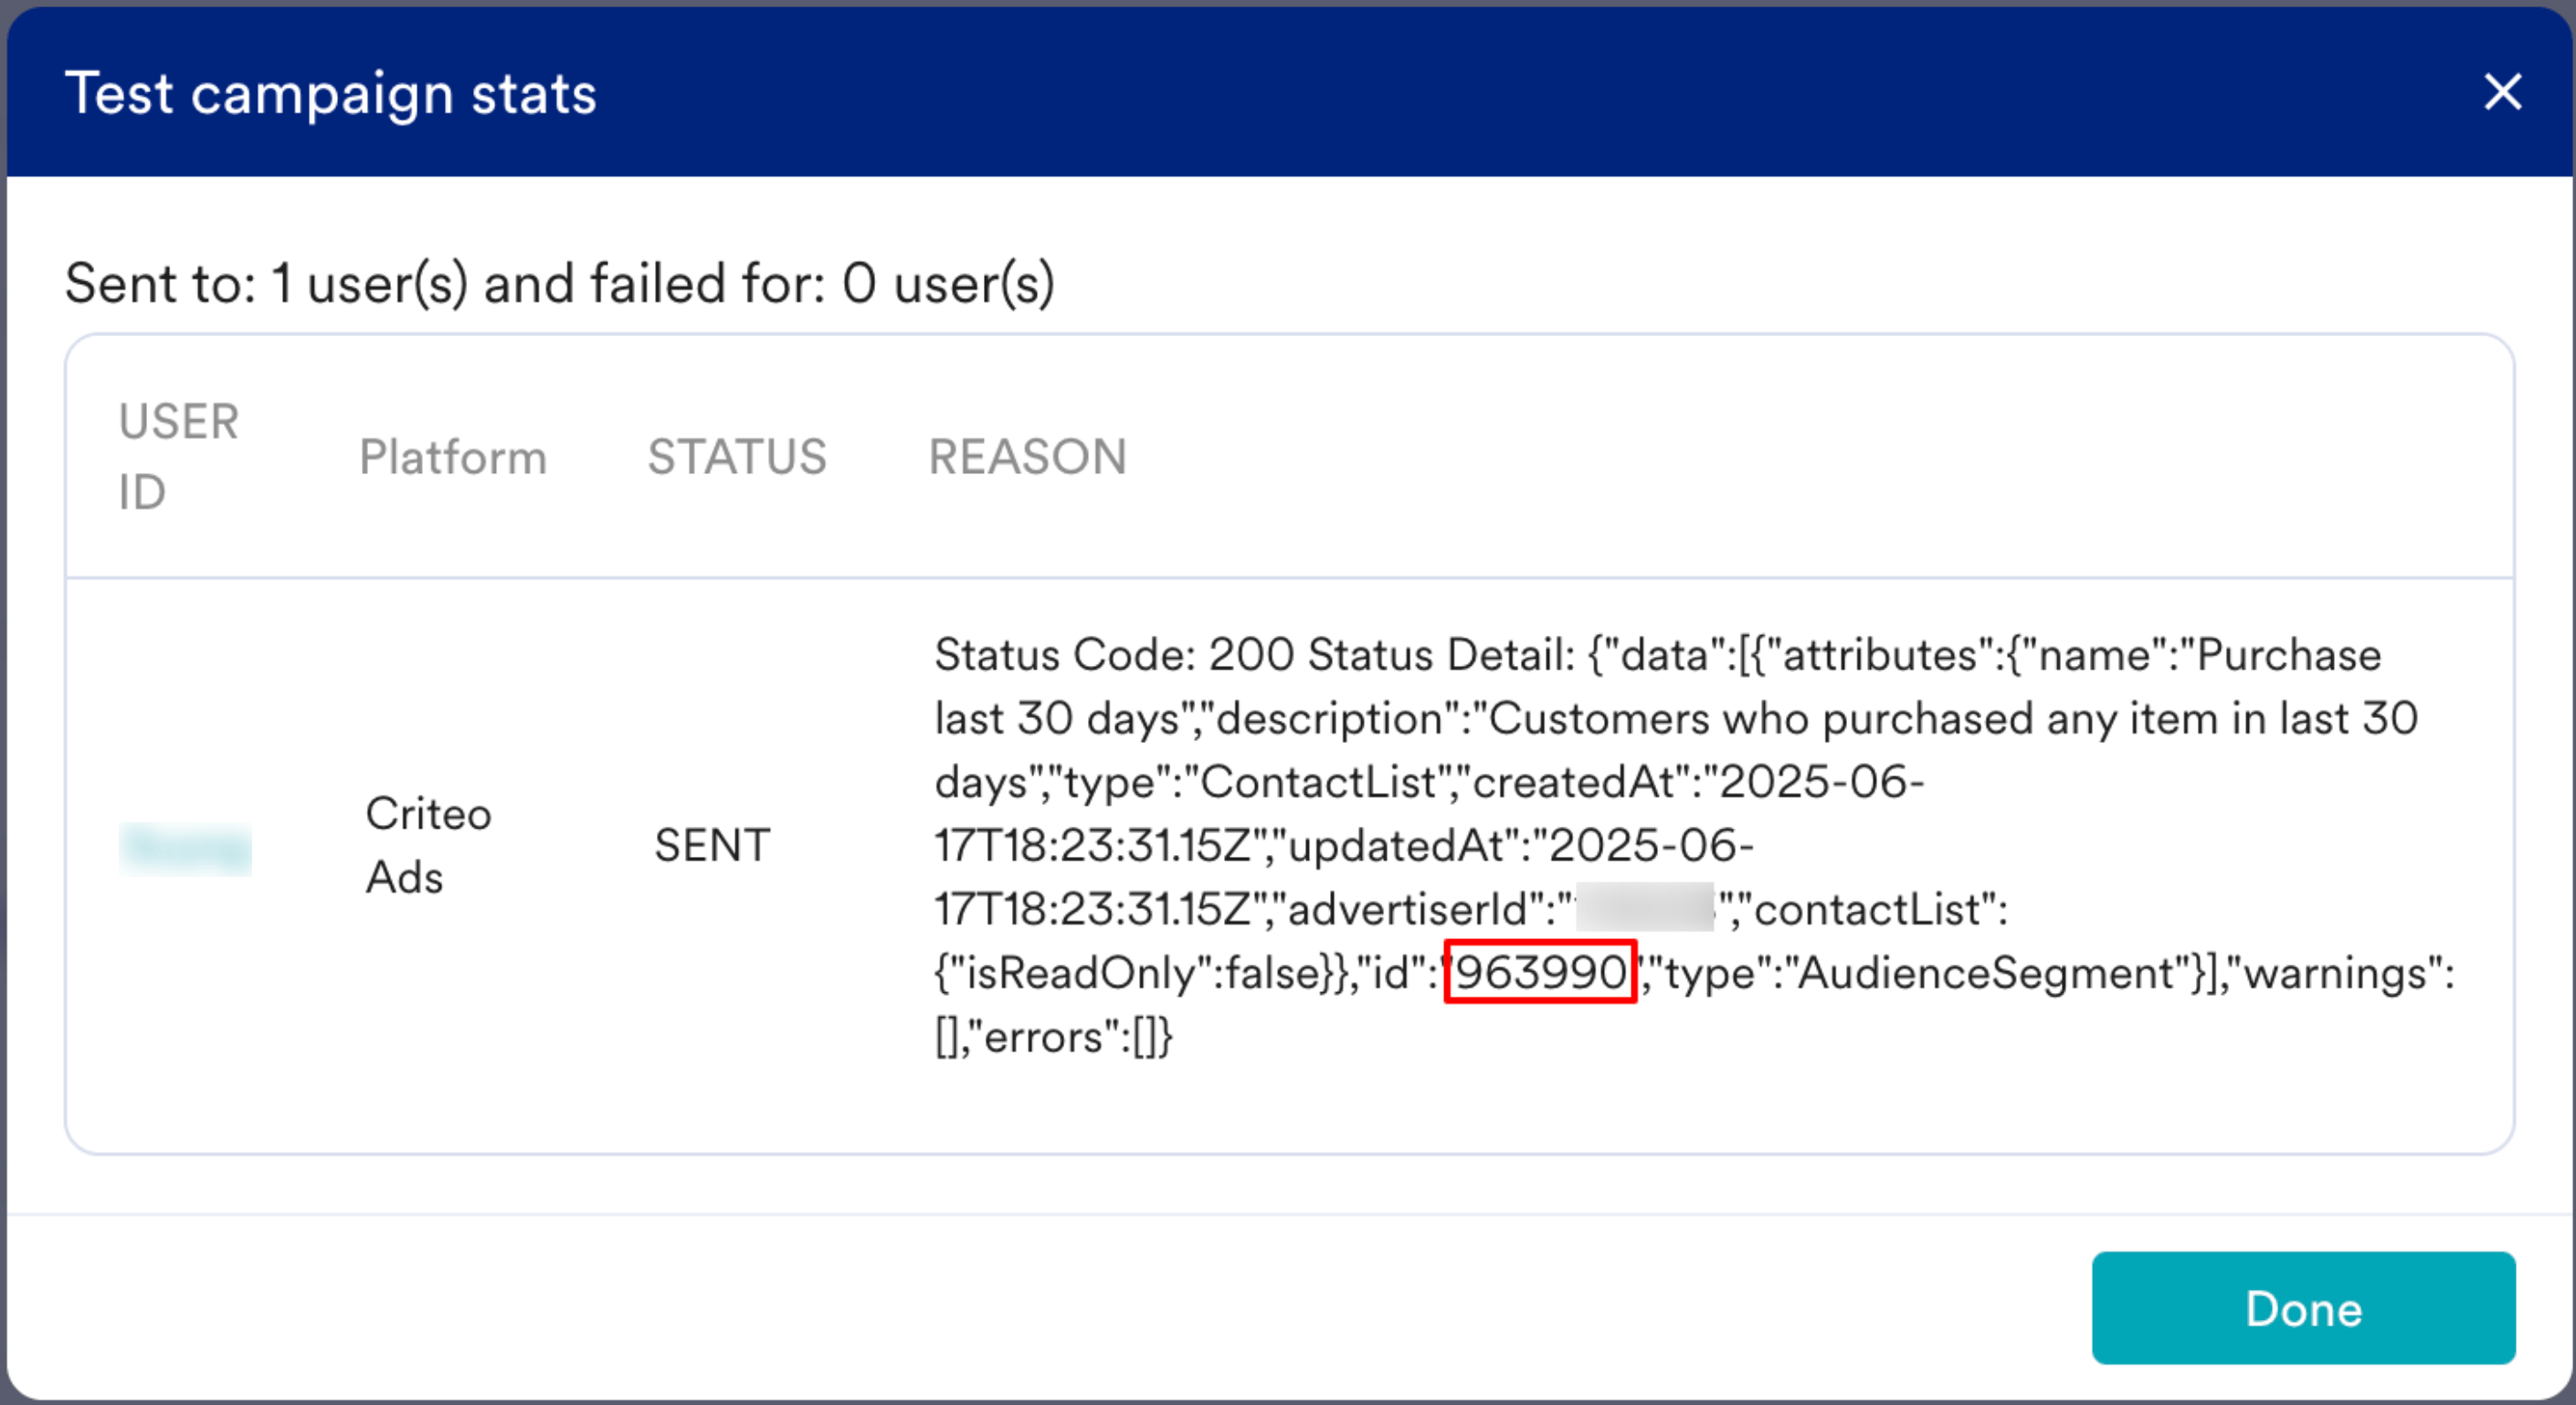
- The highlighted ID is your Audience ID. You will need this to add or remove users to this Audience in the future. You can always find this within Cirteo by following the above steps.
Running a Campaign
Based on your selected Connector, you must provide the following information:- Create Contact List
- Update Contact List

- Your campaign is now ready to test and send your campaign. Using the Test functionality, you can also test your connector configuration.
 If your test user successfully receives the message, your setup is ready.
 - Publish the campaign.